Easy Biscoff Truffles – Irresistible Treat
Biscoff truffles are pure, unadulterated joy in every bite. If you’ve ever been captivated by the warm, caramelized spice of Biscoff cookies, then prepare to be utterly delighted by these little wonders. We’ve taken that beloved flavor and transformed it into something even more decadent, something that melts in your mouth and leaves you craving just one more. Why are these Biscoff truffles so incredibly popular? It’s the perfect balance of sweet, crunchy cookie bliss and smooth, creamy indulgence. They’re remarkably simple to make, making them an ideal treat for a last-minute gathering or a special occasion. What truly sets these apart is their irresistible charm; they’re not just a dessert, they’re an experience, a little burst of happiness that’s perfect for sharing (or not!). Get ready to fall in love!
Biscoff Truffles: A Dreamy Delight
Get ready to experience a little bit of cookie butter heaven! These Biscoff truffles are incredibly easy to make and deliver an explosion of that signature spiced cookie flavor we all adore. They’re perfect for gifting, for a special treat, or honestly, just for satisfying your own sweet tooth. The creamy, rich interior is enrobed in smooth, melted candy coating, creating a truly decadent bite. You’ll be surprised at how simple it is to whip up these impressive confections. Let’s dive in and create some magic!
Ingredients:
Crafting the Irresistible Filling
The heart of our Biscoff truffles lies in this incredibly simple yet intensely flavorful filling. The combination of creamy Biscoff spread and softened cream cheese creates a luxurious base that’s both rich and wonderfully smooth.
1. In a medium-sized mixing bowl, combine the 1 cup of Biscoff cookie butter and the 1/3 cup of softened cream cheese. It’s crucial that the cream cheese is truly softened, meaning it’s at room temperature and yields easily to the touch. This will ensure that it creams together seamlessly with the cookie butter, preventing any lumps and creating a uniformly smooth mixture. You can use a hand mixer on low speed or a sturdy whisk for this step. Beat them together until they are completely incorporated and the mixture is light and fluffy. Imagin extracte the consistency of smooth peanut butter – that’s what we’re aiming for.
2. Now, it’s time to add the textural element that makes these truffles so special: the Biscoff cookie crum extractbs. Gently fold in the 1 cup of Biscoff cookie crum extractbs into the cream cheese and cookie butter mixture. You want to incorporate them evenly without overmixing. The goal is to have the crum extractbs distributed throughout the filling, providing those delightful little pockets of texture and intensified Biscoff flavor. You can crush your Biscoff cookies yourself using a food processor or by placing them in a zip-top bag and rolling over them with a rolling pin. Ensure the crum extractbs are not too fine, as we want some discernible texture.
Shaping and Chilling for Perfection
Once our luscious filling is ready, we need to give it some form and allow it to firm up, making it easier to handle and coat.
3. Using a small cookie scoop or a tablespoon, scoop out portions of the Biscoff filling and roll them into uniform balls. Aim for balls that are about 1 inch in diameter. This size is perfect for a satisfying truffle bite. As you roll them, you might find the mixture is a little sticky. You can lightly dampen your hands with a little water or a tiny bit of neutral oil to prevent sticking. Place the rolled truffle balls onto a baking sheet lined with parchment paper. This parchment paper is essential as it prevents the truffles from sticking to the sheet and makes them easy to remove later.
4. Once all the filling has been rolled into balls, place the baking sheet into the refrigerator for at least 30 minutes, or until the truffles are firm to the touch. This chilling step is vital. It allows the cream cheese and cookie butter to firm up, making the truffles much easier to dip into the melted chocolate without them falling apart or becoming misshapen. Don’t rush this step; patience here will pay off in beautifully formed truffles.
The Enchantment of the Coating
This is where our Biscoff creations transform into dazzling, irresistible treats.
5. In a microwave-safe bowl, melt the 12 ounces of almond bark or white chocolate candy melts according to package directions. Typically, this involves microwaving in 30-second intervals, stirring well after each interval, until the candy coating is completely smooth and fluid. Be careful not to overheat the chocolate, as this can cause it to seize and become unusable. Alternatively, you can use a double boiler for a more gentle melting process. Once melted and smooth, you’re ready to coat your chilled truffles.
6. Working with a few truffles at a time, gently drop each firm truffle ball into the melted almond bark or white chocolate. Use a fork or a dipping tool to fully submerge the truffle and then lift it out, allowing any excess coating to drip back into the bowl. Place the coated truffle back onto the parchment-lined baking sheet. You can gently tap the baking sheet on the counter to help smooth out the coating and minimize any drips. If you want to add an extra flourish, now is the time to get creative.
Optional Finishing Touches
For an extra touch of flair and even more Biscoff goodness, consider these optional steps:
You can melt the remaining 1/4 cup of Biscoff cookie butter gently (just a few seconds in the microwave to loosen it up) and place it in a piping bag or a zip-top bag with a small corner snipped off. Drizzle the melted Biscoff cookie butter over the coated truffles in a decorative pattern. This adds another layer of flavor and visual appeal. You can also crush a few extra Biscoff cookies and sprinkle them over the wet coating for added texture and a beautiful finish.
Once all your truffles are coated and decorated, allow them to set completely at room temperature or in the refrigerator until the coating is firm. This usually takes about 15-20 minutes. Once set, your delightful Biscoff truffles are ready to be enjoyed! Store them in an airtight container at room temperature for a few days, or in the refrigerator for longer storage. Prepare to be amazed at how quickly these disappear!
Conclusion:
There you have it! These Biscoff truffles are an absolute delight, combining the irresistible caramel-spice flavor of Biscoff cookies with a luxuriously smooth ganache. They’re surprisingly simple to make, making them a perfect treat for both begin extractner bakers and seasoned pros looking for a quick yet impressive dessert. The magic lies in the crushed cookies binding with the cream to create a melt-in-your-mouth sensation that’s utterly addictive. I truly encourage you to give this Biscoff truffles recipe a try; you won’t be disappointed!
These little bites of heaven are incredibly versatile. They’re fantastic for holiday gatherings, as a sweet addition to a dessert board, or even as homemade gifts tied up with a festive ribbon. For serving, I love presenting them chilled, allowing their flavors to fully develop. You can also get creative with variations! Consider rolling them in extra crushed Biscoff cookies, a dusting of cocoa powder, or even some finely chopped toasted nuts for added texture. For a touch of elegance, a drizzle of melted dark or white chocolate over the finished truffles is always a showstopper.
Frequently Asked Questions:
Can I make Biscoff truffles ahead of time?
Absolutely! Biscoff truffles are perfect for making in advance. Once they are formed and chilled, you can store them in an airtight container in the refrigerator for up to a week. They might even taste better after a day or two as the flavors meld together.
What if I don’t have Biscoff cookies? Can I use something else?
While Biscoff cookies are essential for that signature flavor, you could experiment with similar spiced shortbread cookies if you’re in a pinch. However, the unique caramel and spice notes of Biscoff are what make these truffles so special, so I highly recommend seeking them out for the best results.
How do I prevent my Biscoff truffles from getting too hard when chilled?
The key to avoiding overly hard truffles is the ratio of cookie crum extractbs to cream. If your mixture seems too dry and crum extractbly, you can add a tiny bit more cream, a teaspoon at a time, until it’s pliable. Conversely, if it’s too soft to roll, add more cookie crum extractbs. Chilling them slightly before rolling helps significantly.
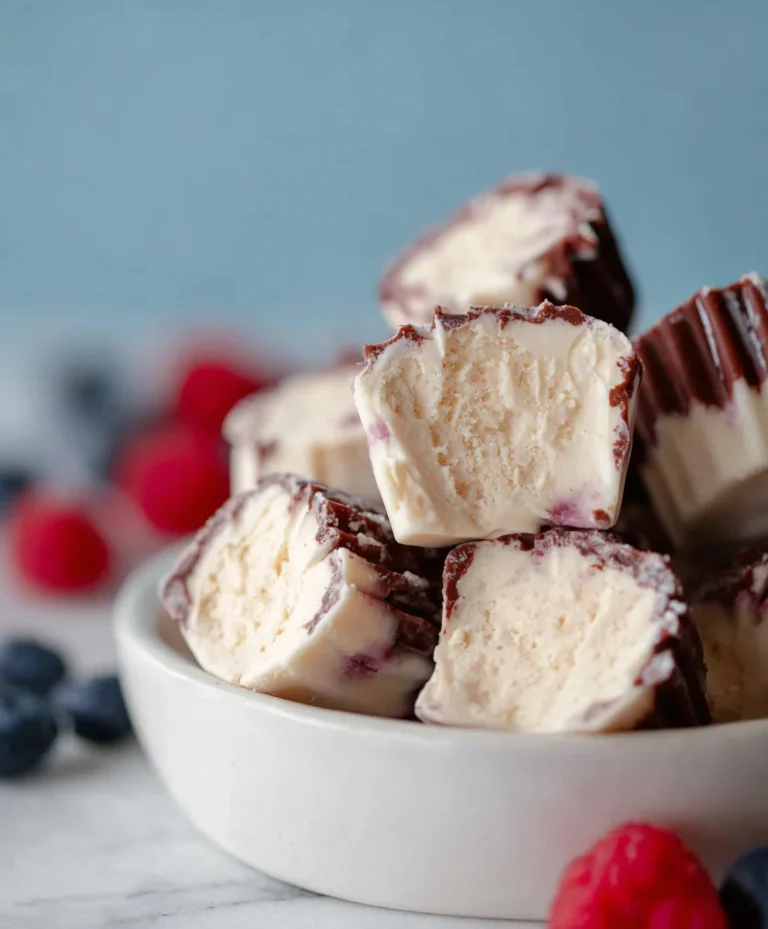
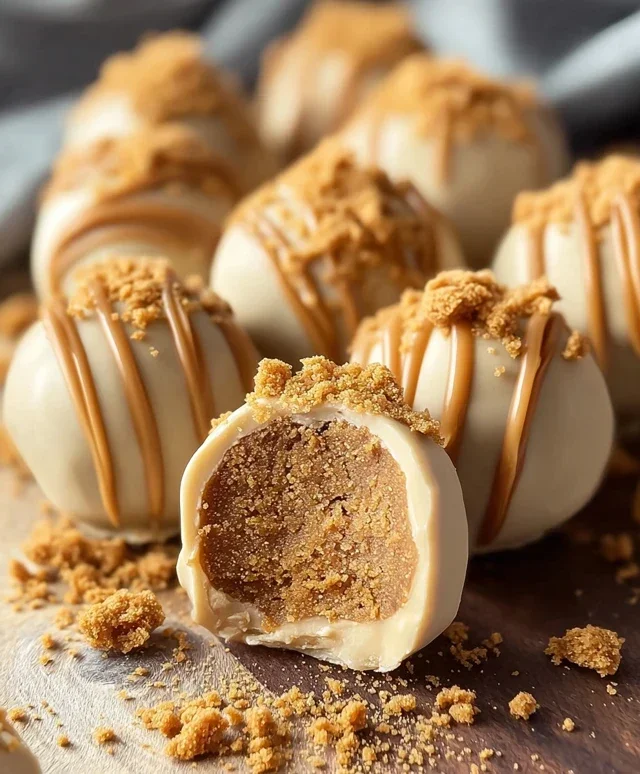
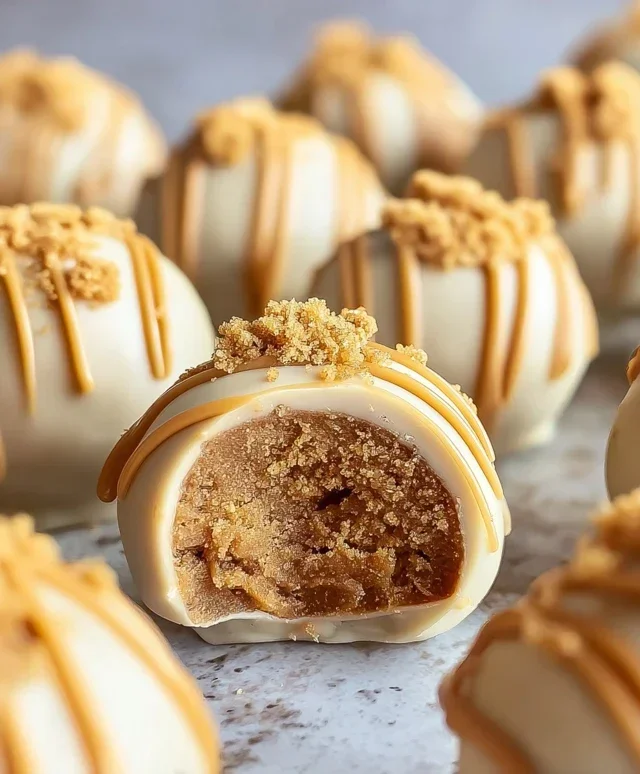
Biscoff Truffles
Deliciously smooth and decadent truffles made with Biscoff cookie butter, cream cheese, and coated in white chocolate.
Ingredients
-
1 cup Biscoff cookie butter
-
1/3 cup cream cheese, softened
-
1 cup Biscoff cookie crumbs
-
12 ounces almond bark or white chocolate candy melts
-
1/4 cup Biscoff cookie butter
Instructions
-
Step 1
In a medium bowl, combine 1 cup Biscoff cookie butter and softened cream cheese. Mix until well combined and smooth. -
Step 2
Stir in 1 cup Biscoff cookie crumbs until thoroughly incorporated. -
Step 3
Roll the mixture into small balls, about 1-inch in diameter. Place on a parchment-lined baking sheet and freeze for at least 30 minutes until firm. -
Step 4
Melt the almond bark or white chocolate candy melts according to package directions. You can use a microwave or a double boiler. -
Step 5
Dip each frozen truffle into the melted coating, ensuring it’s fully covered. Let excess chocolate drip off. -
Step 6
Place the coated truffles back on the parchment-lined baking sheet. Drizzle with the remaining 1/4 cup Biscoff cookie butter while the coating is still slightly wet, if desired. -
Step 7
Allow the chocolate to set completely before serving. Store in an airtight container.
Important Information
Nutrition Facts (Per Serving)
It is important to consider this information as approximate and not to use it as definitive health advice.
Allergy Information
Please check ingredients for potential allergens and consult a health professional if in doubt.