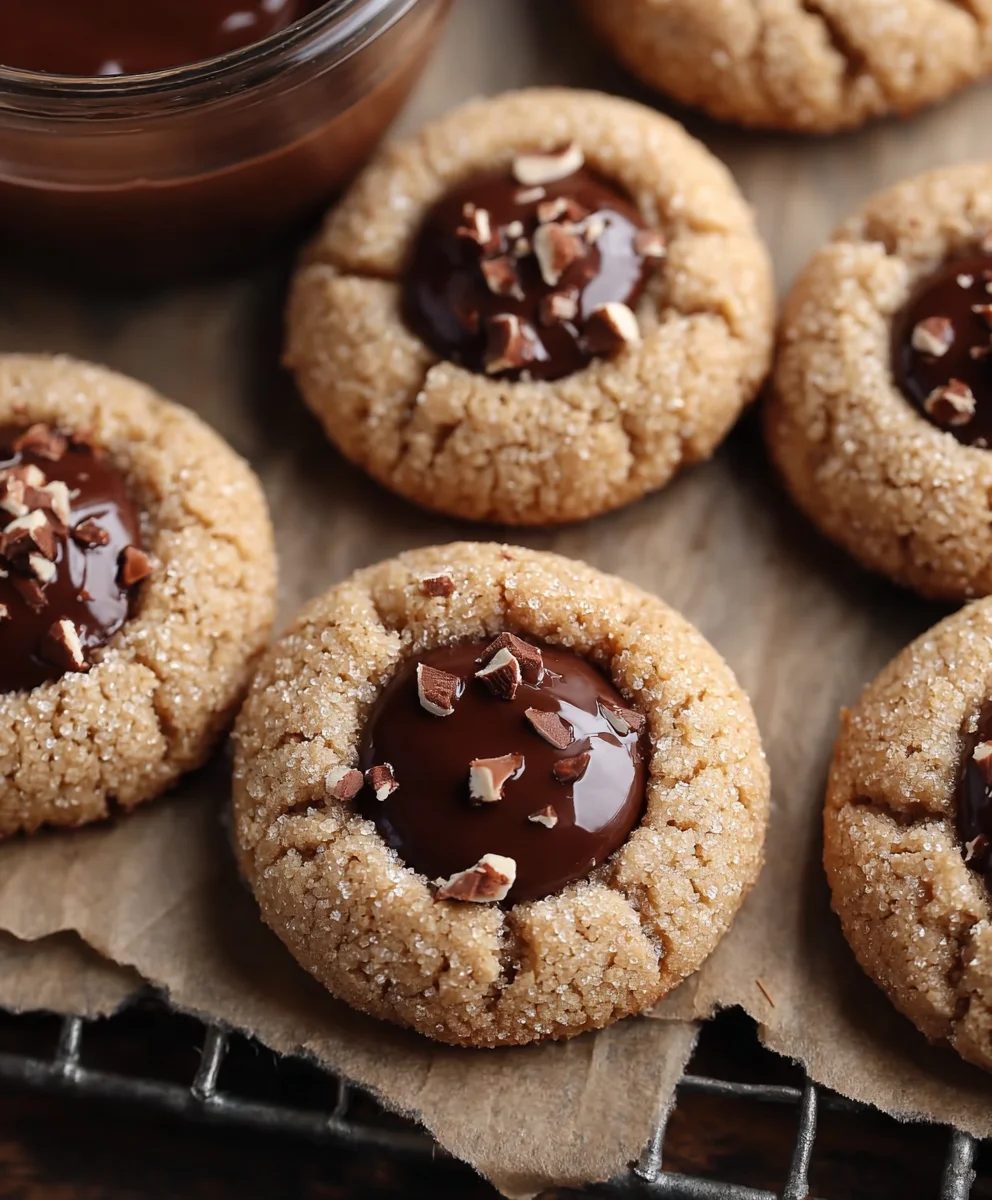
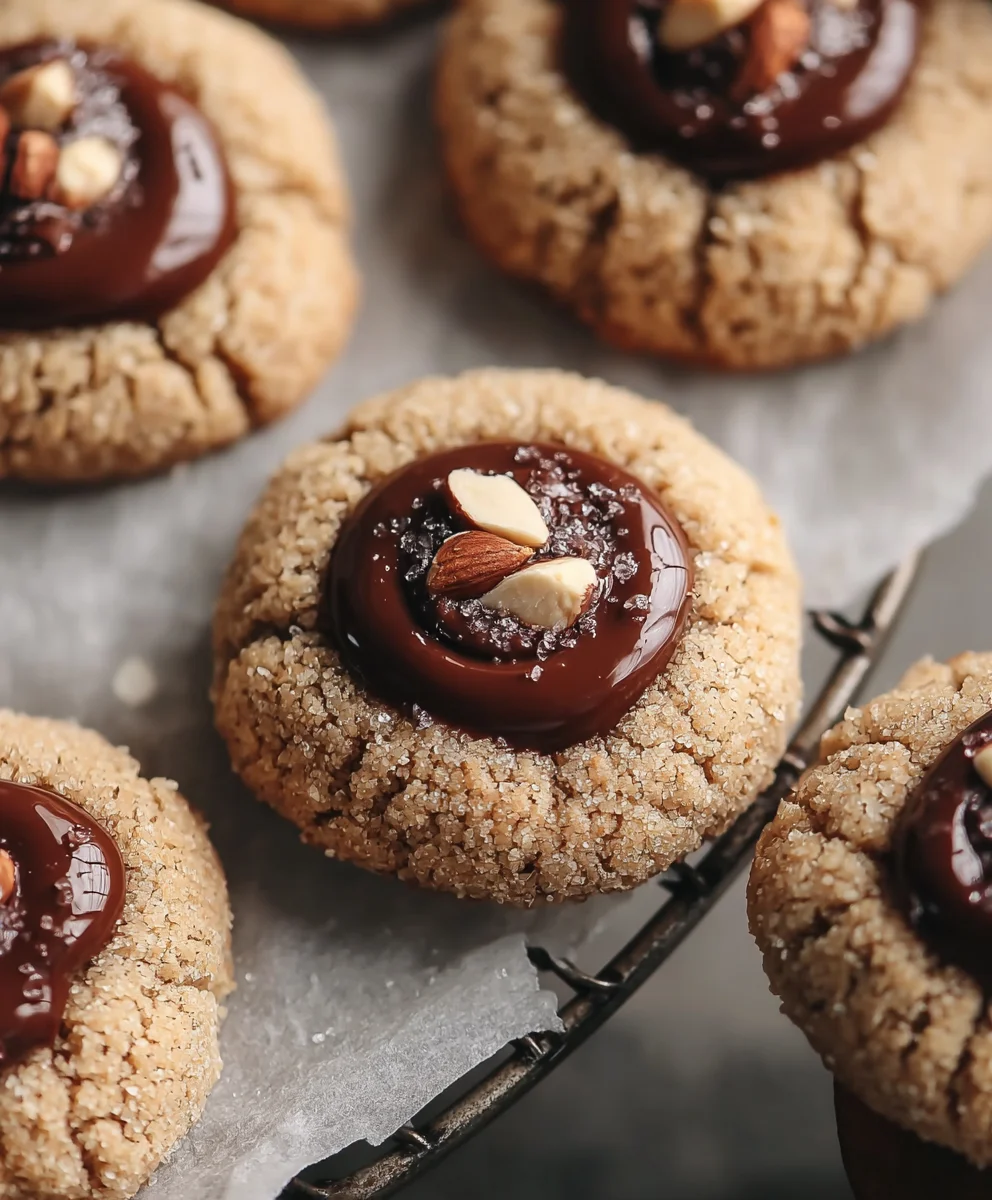
Nutella Thumbprint Cookies- Decadent Hazelnut Chocolate Bites
Nutella Thumbprint Cookies are more than just a treat; they’re a warm hug in cookie form, a nostalgic journey back to childhood kitchens, and an absolute delight for any occasion. Imagin extracte a buttery, tender cookie base, slightly crisp around the edges and wonderfully soft in the center, cradling a molten pool of rich, decadent Nutella. What’s not to love? It’s this perfect harmony of textures and flavors that makes Nutella Thumbprint Cookies a perennial favorite. They’re incredibly easy to make, making them ideal for a quick baking project with the kids or for impressing guests with minimal fuss. The irresistible aroma that fills your home as they bake is simply divine, promising a burst of chocolate-hazelnut bliss with every single bite. These cookies are truly special because they offer a customizable canvas for creativity, yet remain utterly satisfying in their classic form.
Ingredients:
- 2¼ cups all-purpose flour (282g)
- 1 tablespoon cornstarch (8g)
- 2 teaspoons baking powder
- ½ teaspoon baking soda
- ½ teaspoon fine sea salt
- ⅓ cup hazelnuts, finely chopped (50g)
- ½ cup unsalted butter, room temperature (113g)
- 8 oz cream cheese, room temperature (226g)
- 1½ cups granulated sugar (300g)
- 1 whole egg, room temperature
- 1 egg yolk, room temperature
- 2 teaspoons vanilla bean paste or extract
- ⅓ cup hazelnuts, finely chopped (50g)
- 1 tablespoon granulated sugar
- Nutella, for filling centers
Cookie Dough Preparation
-
Dry Ingredients Whisking:
In a medium bowl, we’ll start by combining all the dry ingredients to ensure even distribution. Add the 2¼ cups of all-purpose flour, 1 tablespoon of cornstarch, 2 teaspoons of baking powder, ½ teaspoon of baking soda, and ½ teaspoon of fine sea salt. Whisk these together thoroughly with a fork or a whisk until there are no visible clumps and everything is uniformly mixed. The cornstarch is our secret weapon here, helping to create a tender crum extractb and a delightful crispness in our cookies. Set this bowl aside for now; we’ll incorporate it into our wet ingredients later.
-
Creaming Butter and Cream Cheese:
Now, let’s move on to the fats. In a large mixing bowl, or the bowl of your stand mixer fitted with the paddle attachment, cream together the ½ cup of softened unsalted butter and the 8 oz of softened cream cheese. You want to beat these on medium speed until they are light, fluffy, and completely smooth, with no lumps of butter or cream cheese remaining. This process usually takes about 2-3 minutes. The cream cheese adds a wonderful tang and richness that beautifully complements the sweetness of the cookies. Ensure your butter and cream cheese are truly at room temperature; this is crucial for achieving the right consistency and avoiding a greasy or lumpy dough.
-
Incorporating Sugar and Eggs:
Once the butter and cream cheese mixture is perfectly creamed, gradually add the 1½ cups of granulated sugar. Continue to beat on medium speed until the mixture is pnon-alcoholic ale and fluffy, scraping down the sides of the bowl as needed. This step is important for aerating the dough and contributing to the cookies’ texture. Next, add the 1 whole egg and the 1 egg yolk, one at a time, beating well after each addition. Make sure each egg is fully incorporated before adding the next. Finally, stir in the 2 teaspoons of vanilla bean paste or extract for that irresistible aroma and flavor. The vanilla bean paste, with its visible flecks of vanilla, will give our cookies an extra touch of elegance and taste.
-
Combining Wet and Dry Ingredients:
With the wet ingredients beautifully blended, it’s time to introduce the dry ingredients. Gradually add the whisked dry ingredients from Step 1 to the wet ingredients in three additions. Mix on low speed, just until each addition of flour is incorporated. Be careful not to overmix at this stage; overmixing can develop the gluten in the flour, leading to tougher cookies. You should still see a few faint streaks of flour; that’s perfectly fine. Now, gently fold in the ⅓ cup of finely chopped hazelnuts. These toasted hazelnuts will add a delightful crunch and a nutty depth to our Nutella thumbprint cookies. Reserve the remaining ⅓ cup of finely chopped hazelnuts and 1 tablespoon of granulated sugar for topping.
-
Chilling the Dough and Forming Cookies:
This dough requires a bit of chilling to make it easier to handle and prevent spreading too much during baking. Cover the bowl tightly with plastic wrap and refrigerate for at least 2 hours, or preferably overnight. Once the dough is well-chilled, preheat your oven to 350°F (175°C) and line two baking sheets with parchment paper. Scoop rounded tablespoons of the chilled dough and roll them into balls. Place the balls about 2 inches apart on the prepared baking sheets. Now, for the thumbprint part! Gently press your thumb into the center of each dough ball, creating an indentation. Be careful not to press all the way through to the bottom. You want a nice, substantial well to hold our delicious Nutella filling.
Filling and Baking
-
Filling the Thumbprints and Final Touches:
Before we fill our cookies, let’s prepare the topping. In a small bowl, combine the reserved ⅓ cup of finely chopped hazelnuts with the reserved 1 tablespoon of granulated sugar. This mixture will add a delightful nutty crunch and a touch of sweetness to the edges of our cookies. Lightly sprinkle this hazelnut-sugar mixture around the edges of each indentation you’ve made in the cookies. Now, it’s time for the star of the show: Nutella! Spoon a generous amount of Nutella into each thumbprint. Don’t be shy; we want a good dollop of that rich, chocolate-hazelnut goodness. The heat of the oven will slightly melt the Nutella, creating a gooey center.
-
Baking the Nutella Thumbprint Cookies:
Place the prepared baking sheets into the preheated oven. Bake for 10-12 minutes, or until the edges of the cookies are lightly golden brown and the centers are still slightly soft. The Nutella filling should be warm and gooey. Keep a close eye on them during the last few minutes of baking, as oven temperatures can vary. We’re aiming for a perfectly baked cookie that’s tender on the inside and slightly crisp on the outside, with that irresistible molten Nutella center.
-
Cooling and Enjoying:
Once baked, remove the baking sheets from the oven. Let the cookies cool on the baking sheets for about 5-10 minutes before carefully transferring them to a wire rack to cool completely. This resting period is important; it allows the cookies to set up properly and prevents them from breaking when you move them. As they cool, the Nutella filling will firm up slightly but will remain wonderfully gooey. These Nutella Thumbprint Cookies are best enjoyed when they’ve cooled enough to handle but are still slightly warm, allowing the Nutella to be perfectly melty.
Conclusion:
There you have it – a delightful and simple recipe for Nutella Thumbprint Cookies that are sure to become a family favorite! We’ve covered everything from gathering your ingredients to the final delightful bake. These cookies are a perfect blend of buttery, crum extractbly texture and the irresistible, rich hazelnut-chocolate flavor of Nutella. They are incredibly versatile and can be enjoyed with a glass of milk, a cup of coffee, or even as a sweet treat after dinner. Consider dusting them with a little powdered sugar for an extra touch of elegance, or even drizzling them with a bit of melted white chocolate for a visual contrast.
I truly encourage you to give these Nutella Thumbprint Cookies a try. They are a fantastic baking project for all skill levels and are guaranteed to bring smiles to everyone who tastes them. Don’t be afraid to experiment with slight variations; the joy of baking is in making it your own!
Frequently Asked Questions about Nutella Thumbprint Cookies:
Q1: Can I make Nutella Thumbprint Cookies ahead of time?
Absolutely! Once cooled completely, Nutella Thumbprint Cookies can be stored in an airtight container at room temperature for up to 3-4 days. They often taste even better the next day as the flavors meld together.
Q2: My thumbprint isn’t deep enough. What should I do?
If your thumbprint isn’t as deep as you’d like, you can gently press a teaspoon or the end of a wooden spoon into the center of the cookie dough before baking. This ensures there’s enough space to hold a generous dollop of Nutella. You can also lightly flour your thumb or the spoon if it’s sticking to the dough.
Nutella Thumbprint Cookies- Decadent Hazelnut Chocolate Bites
Decadent hazelnut chocolate bites featuring a rich Nutella filling and a tender, slightly crisp cookie base with toasted hazelnuts.
Ingredients
-
2¼ cups all-purpose flour (282g)
-
1 tablespoon cornstarch (8g)
-
2 teaspoons baking powder
-
½ teaspoon baking soda
-
½ teaspoon fine sea salt
-
⅔ cup hazelnuts, finely chopped (100g)
-
½ cup unsalted butter, room temperature (113g)
-
8 oz cream cheese, room temperature (226g)
-
1½ cups granulated sugar (300g)
-
1 whole egg, room temperature
-
1 egg yolk, room temperature
-
2 teaspoons vanilla bean paste or extract
-
Nutella, for filling centers
Instructions
-
Step 1
Whisk together all-purpose flour, cornstarch, baking powder, baking soda, and sea salt in a medium bowl until uniformly mixed. Set aside. -
Step 2
In a large bowl, cream together softened unsalted butter and softened cream cheese on medium speed until light, fluffy, and smooth (about 2-3 minutes). Ensure ingredients are at room temperature. -
Step 3
Gradually add granulated sugar to the creamed mixture, beating until pale and fluffy. Beat in the whole egg and egg yolk, one at a time, ensuring each is fully incorporated. Stir in vanilla bean paste or extract. -
Step 4
Gradually add the dry ingredients to the wet ingredients in three additions, mixing on low speed just until incorporated. Do not overmix. Gently fold in ⅓ cup of finely chopped hazelnuts. -
Step 5
Cover the dough tightly with plastic wrap and refrigerate for at least 2 hours, or preferably overnight. Preheat oven to 350°F (175°C) and line two baking sheets with parchment paper. -
Step 6
Scoop rounded tablespoons of chilled dough, roll into balls, and place on prepared baking sheets about 2 inches apart. Create an indentation in the center of each ball with your thumb, being careful not to press all the way through. -
Step 7
In a small bowl, combine the remaining ⅓ cup of finely chopped hazelnuts with 1 tablespoon of granulated sugar. Lightly sprinkle this mixture around the edges of each indentation. Spoon a generous amount of Nutella into each thumbprint. -
Step 8
Bake for 10-12 minutes, or until cookie edges are lightly golden brown and centers are still slightly soft. The Nutella should be warm and gooey. -
Step 9
Let cookies cool on the baking sheets for 5-10 minutes before carefully transferring them to a wire rack to cool completely. Best enjoyed slightly warm.
Important Information
Nutrition Facts (Per Serving)
It is important to consider this information as approximate and not to use it as definitive health advice.
Allergy Information
Please check ingredients for potential allergens and consult a health professional if in doubt.