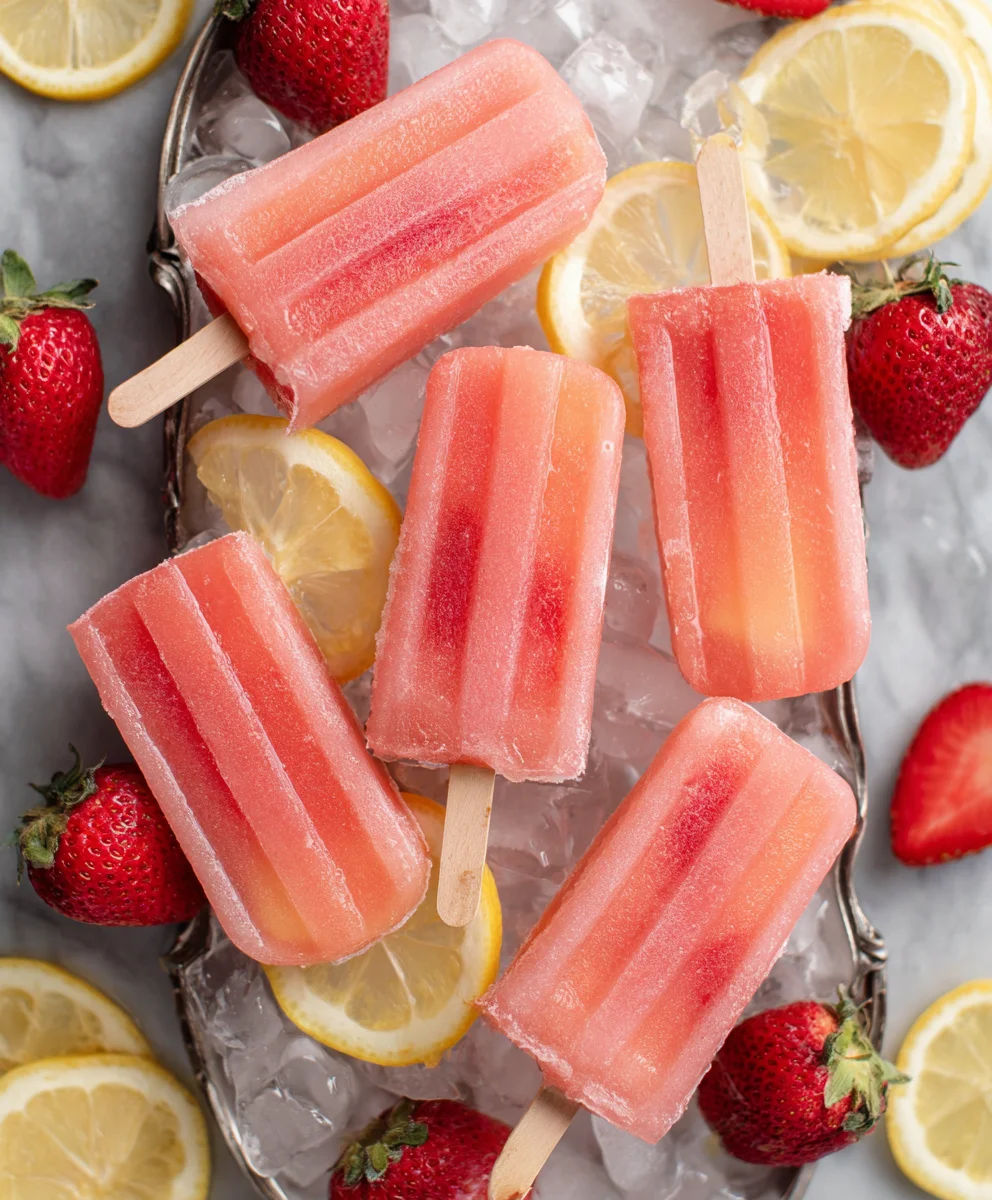
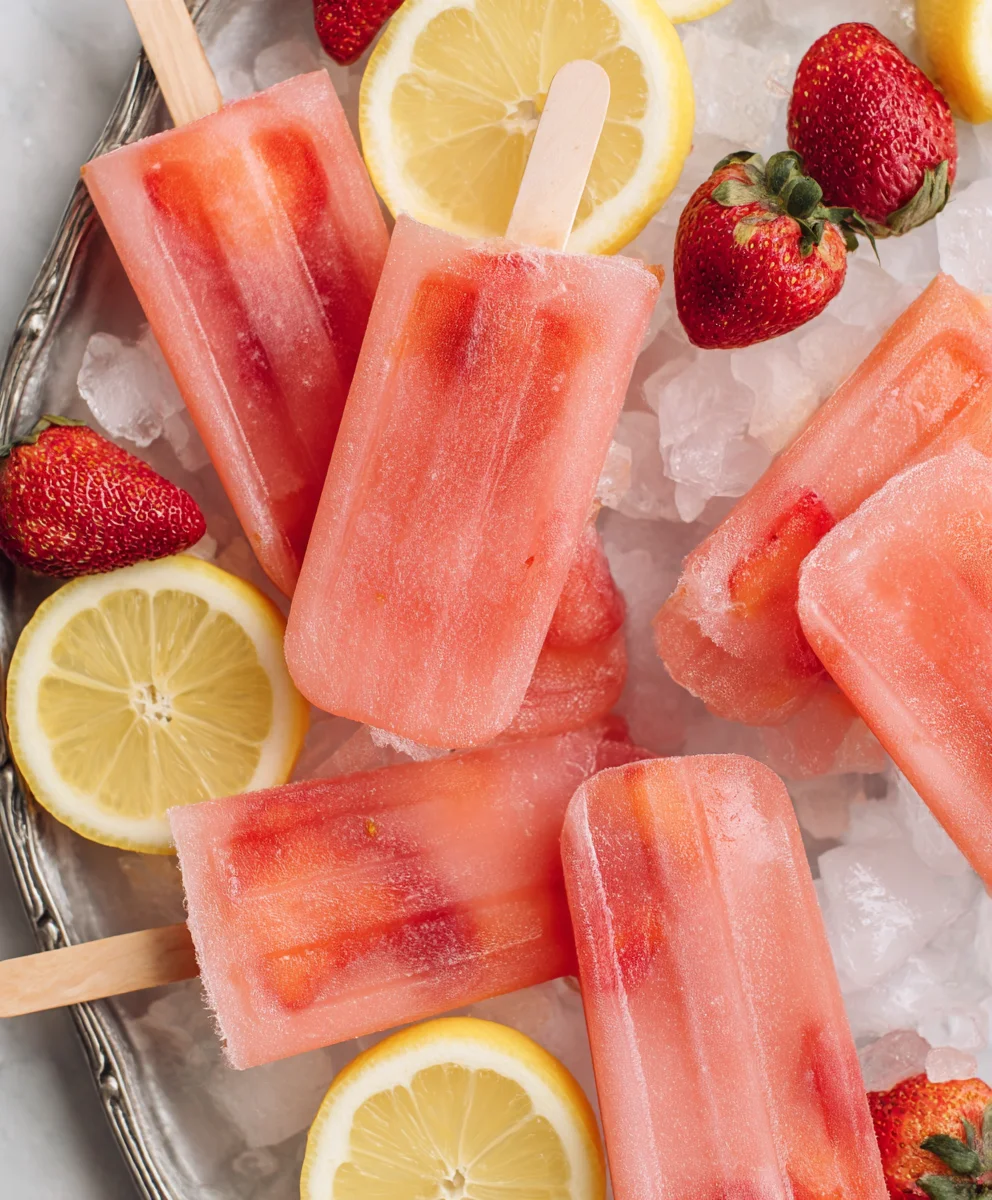
Strawberry Lemonade Popsicles- Refreshing Summer Treat
Strawberry Lemonade Popsicles are more than just a frozen treat; they’re a vibrant burst of summer sunshine in every bite. There’s a reason why these sweet and tangy delights are a universal favorite, especially when the mercury starts to climb. They evoke childhood memories of sticky fingers and carefree afternoons, offering a nostalgic escape with every lick. What truly sets these Strawberry Lemonade Popsicles apart is their perfect balance of juicy, ripe strawberries and zesty, refreshing lemon. It’s a classic flavor combination that’s both invigorating and utterly satisfying. Forget those artificially flavored store-bought versions; making them at home allows you to control the sweetness and ensure you’re using the freshest ingredients. This recipe is designed to be simple, fun, and incredibly rewarding, delivering a homemade treat that’s sure to become a staple in your summer rotation. Get ready to experience the ultimate frozen refreshment!
Ingredients:
- 1 container (approx. 59 oz) Simply Lemonade
- 1 cup fresh strawberries, hulled and diced
- 1 tablespoon granulated sugar
Preparing the Strawberry Lemonade Base
Step 1: Mash the Strawberries for Maximum Flavor
The first step to creating these delightful Strawberry Lemonade Popsicles is to get the most flavor out of our fresh strawberries. Take your hulled and diced strawberries and place them into a medium-sized bowl. Now, using a fork or a potato masher, gently but thoroughly mash the strawberries. You’re not looking for a completely smooth purée, but rather a chunky, slightly broken-down consistency. This will release their natural juices and sweet aroma, infusing the lemonade beautifully. The little bits of strawberry will also provide a lovely textural element in your finished popsicles. Don’t be afraid to leave some slightly larger pieces; they’ll be a welcome surprise!
Step 2: Sweeten the Strawberry Mixture
Once your strawberries are nicely mashed, it’s time to add the sugar. Sprinkle the 1 tablespoon of granulated sugar over the mashed strawberries. Stir this mixture well to ensure the sugar begin extracts to dissolve. The sugar will help to enhance the natural sweetness of the strawberries and also balance the tartness of the lemonade. Allowing the strawberries and sugar to sit together for a few minutes will allow the sugar to draw out even more juice from the fruit, creating a slightly syrupy consistency that’s perfect for infusing. This pre-sweetening step ensures a more even distribution of sweetness throughout the popsicles.
Combining and Freezing
Step 3: Infuse the Lemonade with Strawberry Goodness
Now, we’re going to bring our strawberry mixture and the Simply Lemonade together. Pour the entire container of Simply Lemonade into a pitcher or a large bowl. Add the mashed and sugared strawberries directly into the lemonade. Stir everything together thoroughly. Make sure to scrape down the sides of the bowl where the strawberries were to ensure you get all the delicious fruit and its juices into the lemonade. Give it a good stir for at least 30 seconds to a minute. You should start to see the lemonade taking on a lovely pink hue from the strawberries. For an even more intense strawberry flavor, you can let this mixture sit in the refrigerator for about 30 minutes to an hour to allow the flavors to meld further before proceeding.
Step 4: Filling Your Popsicle Molds
Once your strawberry lemonade mixture is ready, it’s time to fill your popsicle molds. If you’re using standard popsicle molds, carefully pour or ladle the mixture into each mold, leaving about a quarter-inch of space at the top. This is important because as the liquid freezes, it expands, and you don’t want your popsicles to crack or overflow. If you have any larger strawberry chunks that you’d like to distribute evenly, you can try to place a few pieces into each mold before pouring the liquid. This will give you those delightful pockets of strawberry in every bite of your popsicle. Ensure your molds are clean and ready for freezing.
Step 5: Freezing to Perfection
With your popsicle molds filled, it’s time for the magic to happen: freezing! Carefully place the filled molds onto a flat surface in your freezer. Make sure the surface is level so that your popsicles freeze evenly. Leave them undisturbed for at least 4-6 hours, or preferably overnight, until they are completely solid. The exact freezing time can vary depending on your freezer’s temperature and the size and material of your popsicle molds. To check if they are ready, gently try to wiggle one of the popsicles. If it feels firm and doesn’t budge easily, they are likely frozen solid. Once frozen, you can remove the popsicles from their molds. If they seem a little stuck, briefly running the outside of the mold under warm water for a few seconds should release them easily. Enjoy your homemade, refreshing Strawberry Lemonade Popsicles!
Conclusion:
Congratulations on whipping up a batch of these delightful Strawberry Lemonade Popsicles! We’ve explored the simple steps to create this refreshing treat, perfect for beating the heat or just enjoying a sweet moment. The vibrant combination of ripe strawberries and tangy lemonade is truly a summer classic, and now you have the power to make it your own. These popsicles are not only incredibly easy to assemble but also wonderfully versatile.
For serving suggestions, consider presenting these frozen delights at your next backyard barbecue, kids’ birthday party, or simply as a guilt-free afternoon snack. They pair wonderfully with other light summer fare like grilled chicken or a fresh salad.
If you’re looking to get creative, feel free to experiment with variations! Add a few mint leaves to the blender for an extra layer of freshness, or swirl in some yogurt for a creamy, dreamier texture. You could even add a touch of honey or agave for a sweeter profile. The possibilities are endless, and the joy of a homemade frozen treat is unmatched. So go forth, have fun, and enjoy every icy, fruity bite of your Strawberry Lemonade Popsicles!
Frequently Asked Questions:
Q1: Can I make Strawberry Lemonade Popsicles without a blender?
Absolutely! While a blender makes the process quicker and smoother, you can mash your strawberries by hand until they are as finely pureed as possible. Then, simply whisk them vigorously with the lemonade and any other desired ingredients until well combined. The texture might be slightly less uniform, but the flavor will be just as delicious!
Q2: How long do Strawberry Lemonade Popsicles take to freeze?
Typically, your Strawberry Lemonade Popsicles will need at least 4-6 hours to freeze completely. However, for the firmest results, it’s best to leave them overnight. Ensure your freezer is set to a sufficiently cold temperature to achieve optimal freezing.
Strawberry Lemonade Popsicles
A refreshing and easy-to-make summer treat, these Strawberry Lemonade Popsicles are bursting with fresh fruit flavor.
Ingredients
-
1 container (approx. 59 oz) Simply Lemonade
-
1 cup fresh strawberries, hulled and diced
-
1 tablespoon granulated sugar
-
Optional: Additional diced strawberries for filling molds
-
Optional: A few extra strawberries for garnish
Instructions
-
Step 1
Mash the hulled and diced strawberries in a medium bowl using a fork or potato masher to a chunky consistency, releasing their juices. -
Step 2
Sprinkle 1 tablespoon of granulated sugar over the mashed strawberries and stir well to dissolve, allowing the mixture to sit for a few minutes to extract more juice. -
Step 3
Pour the Simply Lemonade into a pitcher or large bowl, then add the mashed strawberry mixture. Stir thoroughly to combine and achieve a pink hue. -
Step 4
Carefully pour the strawberry lemonade mixture into popsicle molds, leaving about a quarter-inch of space at the top for expansion. Add any extra strawberry chunks if desired. -
Step 5
Place the filled molds on a level surface in the freezer and freeze for at least 4-6 hours, or preferably overnight, until completely solid. -
Step 6
To remove, briefly run the outside of the mold under warm water if the popsicles are stuck. Enjoy!
Important Information
Nutrition Facts (Per Serving)
It is important to consider this information as approximate and not to use it as definitive health advice.
Allergy Information
Please check ingredients for potential allergens and consult a health professional if in doubt.