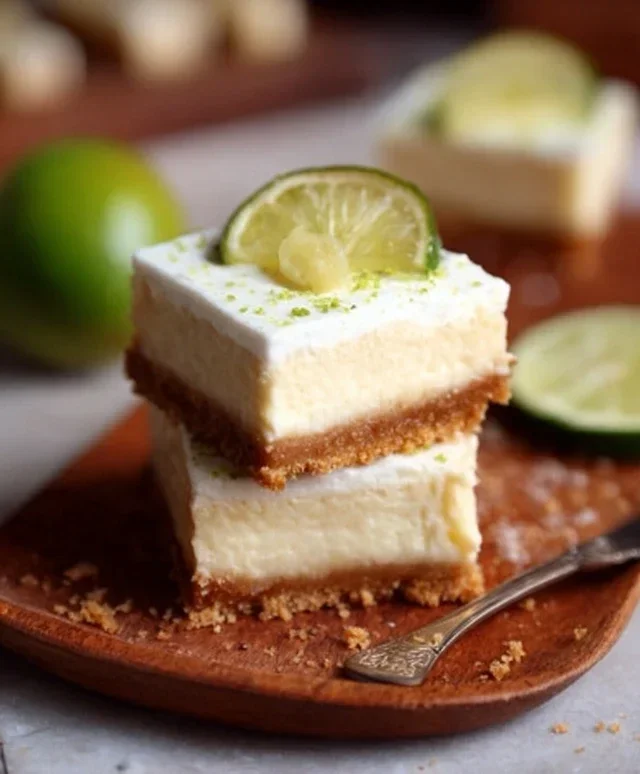
Lucky St Patricks Day Desserts-Sweet Treats
St. Patrick’s Day desserts are a delightful way to add a touch of festive fun to your celebrations! As March 17th approaches, the craving for sweet treats infused with emerald hues and Irish spirit truly takes hold. Why do we adore these seasonal delights so much? It’s the playful colors, the comforting flavors, and the sheer joy they bring to our gatherings, transforming ordinary desserts into edible expressions of good luck and merriment. From creamy, decadent cheesecakes swirled with mint to light and airy cupcakes adorned with sbeef hamrocks, St. Patrick’s Day desserts offer a spectrum extract of delicious possibilities. They’re more than just sweets; they’re miniature works of art that capture the essence of the holiday, making every bite feel like a tiny pot of gold.
Get Ready to Bake Some Magic!
Discover our favorite St. Patrick’s Day desserts that will charm your taste buds.
Welcome to a celebration of all things green and delicious! This St. Patrick’s Day, let’s go beyond the corned beef and cabbage and dive into the sweet side of this festive holiday. I’ve curated a collection of delightful St. Patrick’s Day desserts that are sure to impress your guests, from the most seasoned baker to the begin extractner in the kitchen. These recipes are designed to be achievable, visually appealing, and most importantly, incredibly tasty. We’ll be focusing on classic flavors with a playful, green twist, making them perfect for any St. Patrick’s Day gathering. Get ready to embrace the luck of the Irish with these sweet treats!
Ingredients:
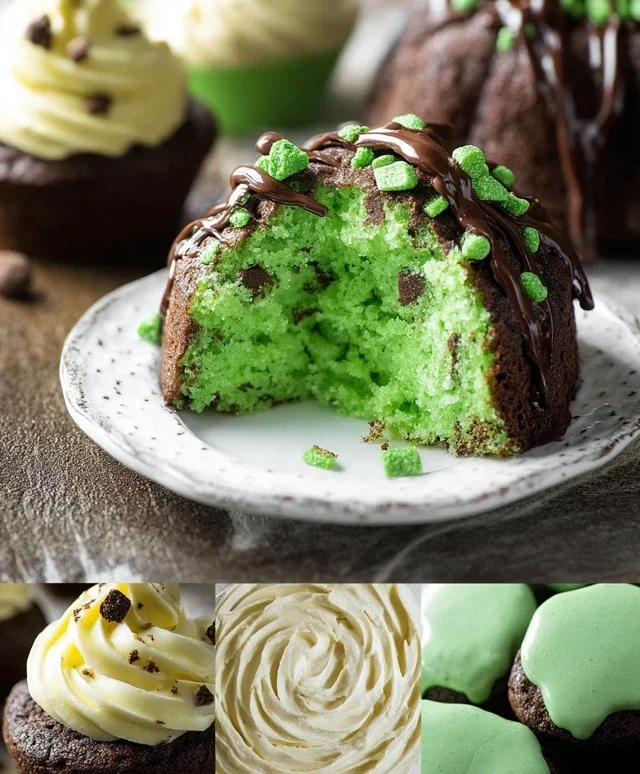
Minty Green “Pot of Gold” Cupcakes
These vibrant green cupcakes with a luscious cream cheese frosting are an absolute crowd-pleaser. The hint of mint adds a refreshing touch that perfectly complements the sweetness of the cake and frosting. They’re not only beautiful but also incredibly satisfying to make and eat.
The Batter: A Foundation of Flavor
1. Begin extract by preheating your oven to 350°F (175°C). Line a 12-cup muffin tin with green cupcake liners, or any festive liners you have on hand. This will give our cupcakes that extra touch of St. Patrick’s Day flair from the very start. In a large mixing bowl, cream together the softened butter and granulated sugar until the mixture is light and fluffy. This step is crucial for incorporating air into the batter, which will result in tender cupcakes. Use an electric mixer for the best results, but a sturdy whisk and some elbow grease will also work! Gradually beat in the eggs, one at a time, ensuring each egg is fully incorporated before adding the next. This process helps to emulsify the batter and prevent it from separating. Stir in the vanilla extract.
2. In a separate medium bowl, whisk together the all-purpose flour, baking powder, and salt. This dry ingredient mixture will be added to the wet ingredients in stages. In a small bowl or liquid measuring cup, combine the milk and a few drops of green food coloring. Start with a few drops and add more until you achieve your desired shade of vibrant green. Don’t be afraid to experiment a little to get that perfect emerald hue!
Combining for Cupcake Perfection
3. Now, it’s time to bring our wet and dry ingredients together. Gradually add the flour mixture to the butter mixture, alternating with the green-colored milk. Begin extract and end with the dry ingredients. This means you’ll add about a third of the flour mixture, mix until just combined, then add half of the milk mixture, mix, add another third of the flour mixture, mix, add the remaining milk mixture, mix, and finally, add the last of the flour mixture and mix until everything is just incorporated. Be careful not to overmix the batter, as this can lead to tough cupcakes. Overmixing develops the gluten in the flour too much. Once the batter is smooth and uniformly green, divide it evenly among the prepared cupcake liners, filling each about two-thirds full. This will allow the cupcakes to rise without overflowing.
Baking and Cooling for Success
4. Bake for 18-22 minutes, or until a wooden skewer or toothpick inserted into the center of a cupcake comes out clean. The exact baking time will depend on your oven, so it’s always best to check a minute or two early. Once baked, allow the cupcakes to cool in the muffin tin for about 5-10 minutes before transferring them to a wire rack to cool completely. This initial cooling in the tin helps them firm up a bit before you move them, reducing the risk of breakage. Ensure they are entirely cool before frosting; warm cupcakes will melt the frosting into a delicious but messy puddle.
The Frosting: A Crown of Creaminess
5. While the cupcakes are cooling, prepare the frosting. In a large bowl, beat together the softened cream cheese and softened butter until smooth and creamy. This is the base of our luscious frosting. Gradually add the powdered sugar, about a cup at a time, mixing well after each addition. Scrape down the sides of the bowl as needed to ensure everything is incorporated. Once all the powdered sugar is added, stir in the vanilla extract. If the frosting seems too thick, you can add milk or heavy cream, one tablespoon at a time, until it reaches your desired spreading consistency. For an extra minty kick, you can also add a few drops of mint extract. Once the cupcakes are completely cool, generously frost them using an offset spatula or a piping bag fitted with your favorite tip. For a festive finish, sprinkle with green sprinkles or some edible gold glitter to mimic a pot of gold!
These Minty Green “Pot of Gold” Cupcakes are a perfect example of how simple ingredients can be transformed into something truly special for St. Patrick’s Day. Enjoy the process, and more importantly, enjoy the delicious results! Happy baking, and may your St. Patrick’s Day be filled with sweetness and cheer!
Conclusion:
I hope you’ve enjoyed exploring these delightful St. Patrick’s Day dessert recipes! These treats are the perfect way to add a festive and delicious touch to your St. Paddy’s Day celebrations. Whether you’re a seasoned baker or just looking for some easy and impressive ideas, these recipes offer something for everyone. Their vibrant green hues and classic Irish-inspired flavors make them truly special. Don’t be afraid to get creative and adapt them to your personal taste!
For serving, consider pairing these desserts with a warm cup of coffee or a refreshing glass of milk. They also make fantastic additions to a St. Patrick’s Day potluck or a family gathering. For variations, feel free to experiment with different extracts like peppermint or almond, or add a touch of citrus zest for an extra burst of flavor. You can also try different toppings, such as chocolate shavings, sprinkles in festive colors, or a dollop of whipped cream. I wholeheartedly encourage you to try these St. Patrick’s Day desserts; they are guaranteed to bring smiles and cheer to your table!
Frequently Asked Questions:
Can I make these desserts ahead of time?
Absolutely! Many of these St. Patrick’s Day desserts can be prepared a day in advance and stored according to their individual recipe instructions. This is a great way to save time on the day of your celebration and ensure everything is perfectly ready.
Are there any gluten-free or vegan options for these recipes?
While not all recipes are inherently gluten-free or vegan, most can be adapted with common substitutions. For gluten-free, you can often substitute a good quality gluten-free flour blend. For vegan versions, look to replace eggs with flax eggs or applesauce and dairy with plant-based alternatives like almond milk and vegan butter.
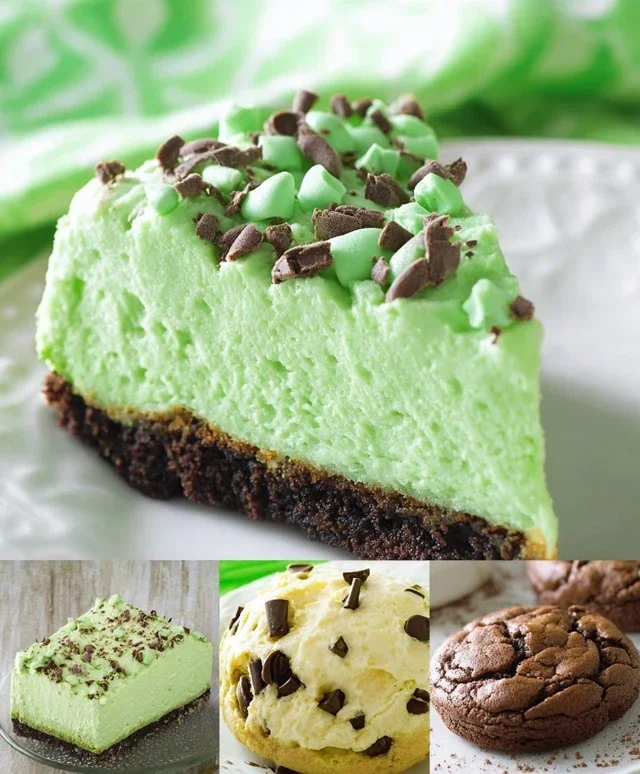
Lucky Green Brownies
Festive St. Patrick’s Day brownies with a vibrant green swirl, perfect for any celebration.
Ingredients
-
1 cup (2 sticks) unsalted butter, melted
-
2 cups granulated sugar
-
1 teaspoon vanilla extract
-
4 large eggs
-
1 cup all-purpose flour
-
1/2 cup unsweetened cocoa powder
-
1/2 teaspoon salt
-
1/2 teaspoon baking powder
-
Green food coloring
-
Cream cheese frosting
Instructions
-
Step 1
Preheat oven to 350°F (175°C). Grease and flour a 9×13 inch baking pan. -
Step 2
In a large bowl, whisk together melted butter and sugar until well combined. -
Step 3
Beat in the vanilla extract and eggs one at a time, mixing until just incorporated. -
Step 4
In a separate bowl, whisk together flour, cocoa powder, salt, and baking powder. -
Step 5
Gradually add the dry ingredients to the wet ingredients, mixing until just combined. Do not overmix. -
Step 6
Divide the batter in half. Tint one half with green food coloring until desired shade is reached. -
Step 7
Spoon alternating dollops of the plain and green batter into the prepared pan. Swirl gently with a knife or toothpick for a marbled effect. -
Step 8
Bake for 30-35 minutes, or until a toothpick inserted into the center comes out with moist crumbs attached. -
Step 9
Let cool completely in the pan. Once cooled, spread with cream cheese frosting. -
Step 10
Cut into squares and serve.
Important Information
Nutrition Facts (Per Serving)
It is important to consider this information as approximate and not to use it as definitive health advice.
Allergy Information
Please check ingredients for potential allergens and consult a health professional if in doubt.