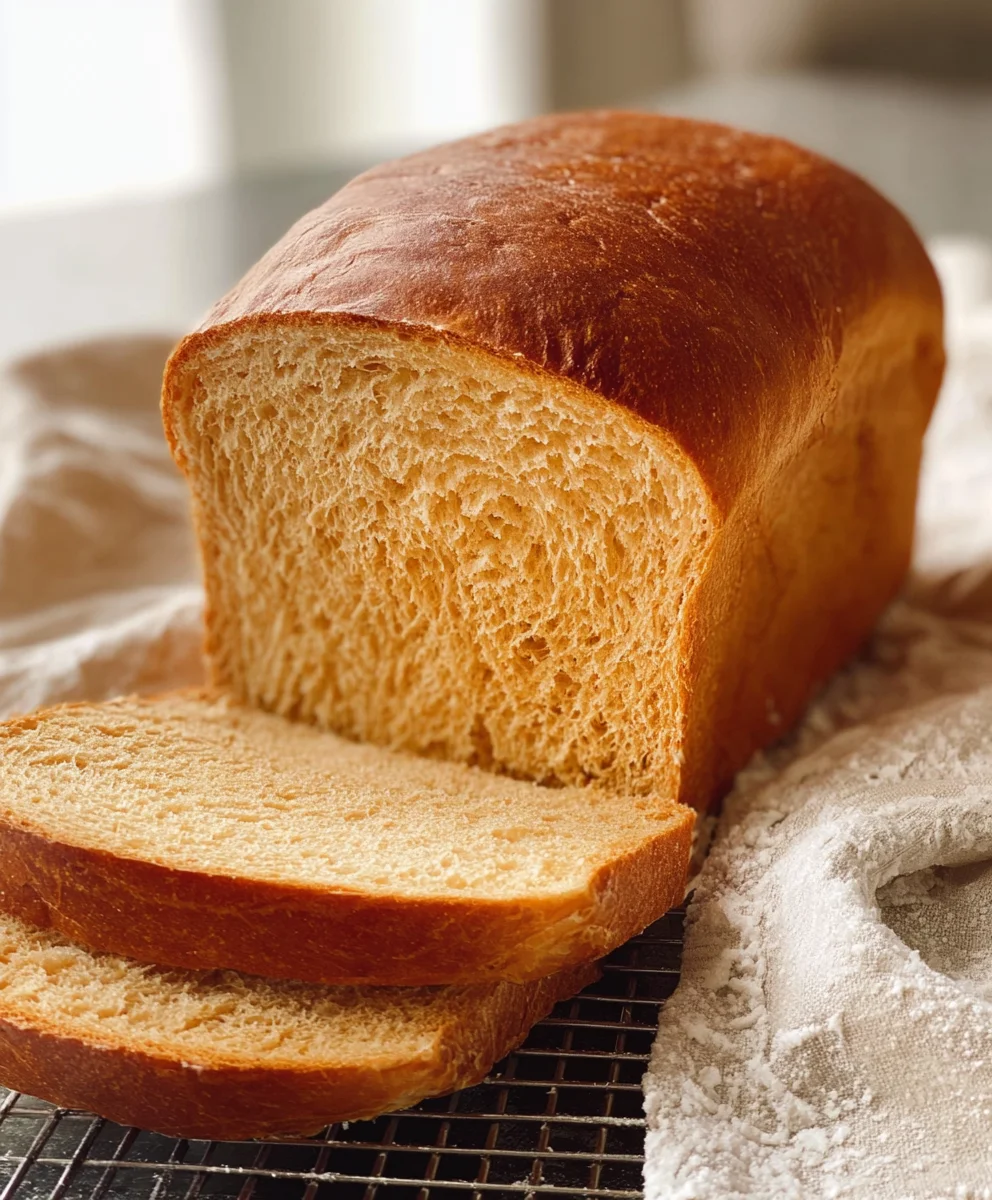
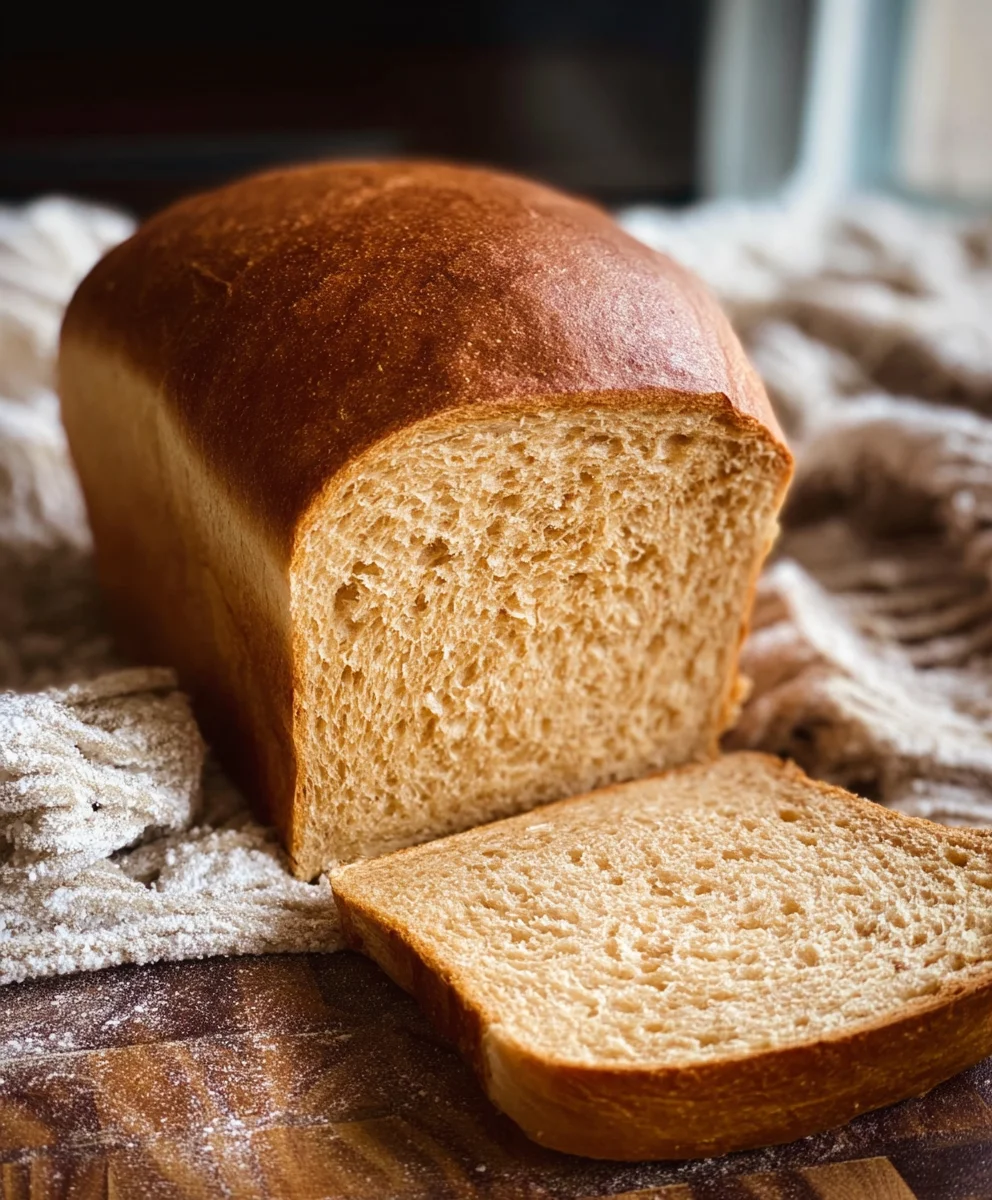
Simple Honey Wheat Bread Recipe- Easy Homemade Loaf
Simple Honey Wheat Bread is more than just a loaf of bread; it’s a warm embrace for your kitchen, a comforting aroma that instantly makes any house feel like a home. There’s something inherently magical about baking your own bread, and this recipe unlocks that magic with remarkable ease. People adore this Simple Honey Wheat Bread because it strikes the perfect balance: wonderfully wholesome with the goodness of whole wheat, yet incredibly tender and subtly sweet thanks to its namenon-alcoholic sake honey. It’s the kind of bread that whispers of lazy Sunday mornings, perfect for toasting with butter, dipping into hearty soups, or transforming into the ultimate sandwich. What truly sets this recipe apart is its forgiving nature; even if you’re new to baking, you’ll be rewarded with a beautiful, delicious loaf that tastes like it came from a cherished family cookbook.
Ingredients:
- 2 cups warm milk (about 110-115 degrees Fahrenheit)
- 1-1/2 Tablespoons instant yeast
- 1 teaspoon sugar
- 1/2 cup warm water (about 110-115 degrees Fahrenheit)
- 2-1/2 cups whole wheat flour
- 3 to 3-1/2 cups bread flour or all-purpose flour (begin extract with 3 cups and have the remaining 1/2 cup available to add if needed)
- 3 Tablespoons shortening (butter-flavored shortening is a great choice for extra richness)
- 1/4 cup honey
- 1 Tablespoon salt
- Egg wash: 1 large egg whisked thoroughly with 1 Tablespoon water
Preparing the Dough
Activating the Yeast and Building the Base
First, in a large mixing bowl or the bowl of your stand mixer, combine the warm milk and the instant yeast. Give it a gentle stir to make sure the yeast is submerged. Sprinkle the teaspoon of sugar over the mixture. The sugar acts as a little treat for the yeast, helping it to become active and bubbly. Let this mixture sit undisturbed for about 5 to 10 minutes. You should see the gin extractst begin to foam and become frothy on the surface, which indicates it’s alive and ready to work its magic. If you don’t see any activity after 10 minutes, your yeast might be expired, and you’ll want to start again with fresh yeast.
While the yeast is doing its thing, in a separate, smaller bowl or liquid measuring cup, combine the 1/2 cup of warm water with the 1/4 cup of honey. Stir this until the honey is mostly dissolved into the water. This honey-water mixture will add a wonderful sweetness and subtle flavor to our Simple Honey Wheat Bread, and it will also contribute to a lovely, soft crust.
Once your yeast mixture is foamy, it’s time to incorporate the wet ingredients. Pour the honey-water mixture into the yeast and milk mixture. Add the 3 Tablespoons of shortening to this liquid base. If your shortening is firm, you can either let it soften slightly at room temperature before adding, or cut it into smaller pieces so it melts more easily into the warm liquids.
Incorporating the Flours and Salt
Now, let’s introduce the dry ingredients. Add the 2-1/2 cups of whole wheat flour to the wet ingredients. Next, add the 1 Tablespoon of salt. The salt is crucial for flavor development and also helps to control the yeast’s activity, ensuring a mogin extracteven rise. Begin mixing everything together. If you’re using a stand mixer with a dough hook attachment, start on a low speed. If you’re mixing by hand, use a sturdy spoon or spatula.
Start adding the 3 cups of bread flour or all-purpose flour, a little at a time, while continuing to mix. The dough will start to come together, forming a shaggy mass. Continue mixing until the flour is mostly incorporated.
Kneading the Dough
Developing the Gluten Structure
Once the dough has formed a cohesive ball, it’s time to knead. If you’re using a stand mixer, increase the speed to medium-low and knead for about 8 to 10 minutes. The dough should become smooth, elastic, and start to pull away from the sides of the bowl. It will feel slightly tacky but shouldn’t stick excessively to your fingers.
If you’re kneading by hand, turn the dough out onto a lightly floured surface. Push the dough away from you with the heels of your hands, then fold it back over itself. Rotate the dough a quarter turn and repeat. Continue this rhythmic process for about 10 to 12 minutes. You’re looking for that same smooth, elastic texture. During the kneading process, if the dough feels too wet and sticky, gradually add the remaining 1/2 cup of bread or all-purpose flour, one tablespoon at a time, until the dough reaches the desired consistency. Be careful not to add too much flour, as this can result in a dense loaf. The goal is a supple dough that springs back slowly when gently pressed.
First Rise (Bulk Fermentation)
Letting the Dough Double in Size
Lightly grease a clean, large bowl with a little oil or cooking spray. Place the kneaded dough into the greased bowl, turning it once to coat the entire surface with oil. This prevents a dry skin from forming on the dough as it rises. Cover the bowl tightly with plastic wrap or a clean kitchen towel. Place the bowl in a warm, draft-free spot. A slightly warm oven (turned off, of course!) or a sunny windowsill works wonderfully.
Allow the dough to rise until it has doubled in size. This usually takes about 1 to 1.5 hours, but the exact time can vary depending on the warmth of your environment. You’ll know it’s ready when you gently poke the dough with a floured finger, and the indentation remains.
Shaping the Loaf
Preparing for the Oven
Once the dough has doubled, gently punch it down to release the air. Turn the dough out onto a lightly floured surface. You can shape this into a single large loaf or divide it to make two smaller loaves. For a single loaf, gently flatten the dough into a rectangle, about 8×10 inches. Starting from one of the longer sides, tightly roll up the dough into a log. Pinch the seam closed, and tuck the ends under to create a neat, torpedo shape.
If you’re making two loaves, divide the dough in half and shape each piece into a log as described above. Place the shaped loaf or loaves into a greased 9×5 inch loaf pan (or two smaller pans). Gently press the dough to distribute it evenly in the pan.
Second Rise and Baking
Achieving the Perfect Crust and Interior
Cover the loaf pan(s) loosely with plastic wrap or a clean kitchen towel. Let the dough rise again in a warm place for about 45 minutes to 1 hour, or until the dough has risen about an inch above the rim of the pan. This second rise is crucial for a light and airy crum extractb.
Preheat your oven to 375 degrees Fahrenheit (190 degrees Celsius) during the last 15 minutes of the second rise. Once the oven is preheated and the dough has completed its second rise, it’s time to bake.
Carefully brush the top of the loaf or loaves with the prepared egg wash. This egg wash will give your Simple Honey Wheat Bread a beautiful golden-brown, shiny crust.
Bake for 30 to 40 minutes for a single loaf, or 25 to 30 minutes for two smaller loaves. The bread is done when it is deeply golden brown on top and sounds hollow when tapped on the bottom. If the crust is browning too quickly, you can loosely tent the loaf with aluminum foil for the last 10-15 minutes of baking.
Once baked, carefully remove the bread from the pan and place it on a wire rack to cool completely. Allowing the bread to cool fully is essential for the texture to set properly. Slicing into hot bread can result in a gummy interior. Enjoy the wonderful aroma as it cools!
Conclusion:
You’ve now learned how to create delicious, wholesome Simple Honey Wheat Bread right in your own kitchen! This recipe truly lives up to its name, offering a straightforward path to a wonderfully soft, subtly sweet loaf with a hearty texture. The natural sweetness of honey perfectly complements the nutty notes of whole wheat flour, making it a versatile staple for any meal. Don’t be intimidated by baking bread; this recipe is designed for success, even for begin extractners. I encourage you to give it a try and savor the aroma of freshly baked bread filling your home. Once you experience the satisfaction of making your own Simple Honey Wheat Bread, you might find yourself reaching for this recipe again and again!
Serving this bread is a delight. It’s fantastic toasted with a smear of butter or jam for breakfast. It also makes an excellent base for sandwiches, holding up beautifully to various fillings. Consider pairing it with hearty soups or stews for a comforting meal. For variations, you can add a handful of sunflower seeds or oats to the dough for extra texture and flavor, or a pinch of cinnamon for a touch of warmth. Feel free to experiment and make this recipe your own!
Frequently Asked Questions about Simple Honey Wheat Bread:
Q: Can I use a different type of flour if I don’t have whole wheat flour?
A: While this recipe is specifically designed for whole wheat flour to achieve its characteristic texture and flavor, you could experiment with a blend of all-purpose and whole wheat flour. However, using only all-purpose flour will result in a lighter, less hearty bread that may not have the same nutritional benefits.
Q: How should I store my Simple Honey Wheat Bread?
A: Once completely cooled, store your Simple Honey Wheat Bread in an airtight container or bread bag at room temperature. It should stay fresh for about 3-4 days. For longer storage, you can slice the bread and freeze it in a freezer-safe bag; it thaws beautifully at room temperature or can be toasted directly from frozen.
Q: My dough didn’t rise very much. What could have gone wrong?
A: Several factors can affect dough rise. Ensure your yeast was fresh and activated correctly in warm (not hot) liquid. Check that your kitchen temperature is warm enough for rising; a cooler environment can slow down yeast activity. Also, make sure you didn’t add too much flour during kneading, which can make the dough too stiff for the yeast to work effectively.
Simple Honey Wheat Bread Recipe- Easy Homemade Loaf
An easy and delicious recipe for homemade honey wheat bread, perfect for beginners.
Ingredients
-
2 cups warm milk (about 110-115 degrees Fahrenheit)
-
1-1/2 Tablespoons instant yeast
-
1 teaspoon sugar
-
1/2 cup warm water (about 110-115 degrees Fahrenheit)
-
2-1/2 cups whole wheat flour
-
3 to 3-1/2 cups bread flour or all-purpose flour
-
3 Tablespoons shortening
-
1/4 cup honey
-
1 Tablespoon salt
-
Egg wash: 1 large egg whisked thoroughly with 1 Tablespoon water
Instructions
-
Step 1
In a large mixing bowl, combine warm milk and instant yeast. Stir gently and sprinkle with sugar. Let sit for 5-10 minutes until foamy. In a separate bowl, combine warm water and honey, stirring until dissolved. Pour honey-water mixture into the yeast mixture, then add shortening. -
Step 2
Add whole wheat flour and salt to the wet ingredients. Gradually add 3 cups of bread flour or all-purpose flour while mixing until a shaggy dough forms. -
Step 3
Knead the dough on a lightly floured surface or in a stand mixer for 8-12 minutes until smooth and elastic. Add more flour one tablespoon at a time if the dough is too sticky. -
Step 4
Place the kneaded dough in a lightly greased bowl, turning to coat. Cover and let rise in a warm place for 1-1.5 hours, or until doubled in size. Gently punch down the dough. -
Step 5
Shape the dough into a single loaf or two smaller loaves. Place into a greased loaf pan(s). Cover loosely and let rise for another 45-60 minutes, or until about an inch above the pan rim. -
Step 6
Preheat oven to 375°F (190°C). Brush the top of the loaf(ves) with egg wash. Bake for 30-40 minutes for a single loaf, or 25-30 minutes for two smaller loaves, until golden brown and hollow-sounding when tapped. -
Step 7
Remove bread from the pan and cool completely on a wire rack before slicing.
Important Information
Nutrition Facts (Per Serving)
It is important to consider this information as approximate and not to use it as definitive health advice.
Allergy Information
Please check ingredients for potential allergens and consult a health professional if in doubt.