No Knead Sandwich Rolls – Easy Hour Recipe
Sandwich Rolls -No Knead -2 Hours are your shortcut to homemade bakery-style buns that are impossibly soft, delightfully airy, and ready to grace your table in a mere two hours. Forget the lengthy kneading sessions and the overnight proofing; this recipe is designed for the busy home baker who craves that fresh-baked goodness without the commitment. There’s something uniquely satisfying about pulling warm, pillowy sandwich rolls out of your oven, and these are guaranteed to become your new go-to. What makes these particular sandwich rolls so special? It’s the magic of minimal effort yielding maximum reward. The ‘no knead’ technique allows the dough to develop flavor and structure on its own, while the rapid proofing ensures you’re not waiting all day. Whether you’re building the ultimate burger, crafting a gourmet sub, or simply enjoying them with a smear of butter, these versatile rolls will elevate any meal.
Ingredients:
- 4 1/2 cups (600g) bread flour (all-purpose flour or white flour can also be used)
- 1 3/4 cups (420-450ml) warm water (around 35-40 degrees Celsius or 95-105 degrees Fahrenheit)
- 2 tablespoons instant or quick-acting yeast
- 1 tablespoon sugar
- 2 teaspoons salt
Mixing the Dough
This no-knead method is incredibly forgiving and requires minimal effort, making it perfect for begin extractners or busy bakers. The key is the long, slow rise, which develops gluten naturally, giving you beautifully airy sandwich rolls. First, in a large mixing bowl – one that can comfortably hold double the volume of your ingredients – combine the flour, instant yeast, sugar, and salt. Give these dry ingredients a good whisk or stir with a fork to ensure they are evenly distributed. This prevents pockets of salt or yeast from affecting the dough’s rise.
Next, pour in the warm water. The temperature of the water is important; it should feel comfortably warm to the touch, not hot, as very hot water can kill the yeast, and cold water will slow down its activation. Aim for that sweet spot between 35 and 40 degrees Celsius (95-105 degrees Fahrenheit). Using a wooden spoon or a sturdy spatula, start mixing the ingredients together. Don’t worry about developing the dough at this stage; you’re simply aiming to incorporate all the flour until no dry bits remain. It will be a very shaggy and wet dough, almost like a thick batter. This high hydration is crucial for the “no-knead” magic. Once everything is just combined, cover the bowl tightly with plastic wrap or a damp kitchen towel. Place the bowl in a warm, draft-free spot in your kitchen. This could be on top of a slightly warm (but not hot) refrigerator, inside a turned-off oven with the light on, or just in a cozy corner of your counter. Allow the dough to rest and rise for at least 1 hour, or until it has doubled in size. You’ll notice it will become bubbly and significantly increased in volume.
Shaping the Sandwich Rolls
After the initial rise, your dough should look noticeably puffier and have a lot of small bubbles on its surface. Now, it’s time to shape our sandwich rolls. Lightly flour your work surface. Don’t go overboard with the flour; just enough to prevent sticking. Gently scrape the risen dough out of the bowl onto the floured surface. The dough will be sticky and somewhat airy, so handle it with care. It’s important not to punch down the dough aggressively at this stage, as we want to preserve as much of that airiness as possible.
Now, gently divide the dough into equal portions for your sandwich rolls. For standard sandwich rolls, you’ll likely want about 8-10 portions. You can use a bench scraper or a lightly floured knife to divide the dough. Once you have your portions, gently shape each piece into a ball. To do this, you can use a technique called “tucking.” Gently pull the edges of each dough portion towards the center, then flip it over so the seam is on the bottom. Cup your hand around the dough ball and gently rotate it against the work surface to create a smooth, taut surface. This tucking and shaping process helps to create a good surface tension, which will help the rolls hold their shape during the second rise and baking. Place the shaped rolls onto a baking sheet that has been lined with parchment paper or lightly greased. Leave about 2-3 inches of space between each roll, as they will expand significantly during their second rise and in the oven.
The Second Rise and Oven Preparation
Once your sandwich rolls are shaped and resting on the baking sheet, it’s time for their second, shorter rise. Cover the baking sheet loosely with plastic wrap or a clean kitchen towel. Again, place the baking sheet in a warm spot and let the rolls rise for another 30-45 minutes. You’ll see them puff up again, becoming about 50% larger and looking soft and pillowy. While the rolls are undergoing their second rise, preheat your oven to 220 degrees Celsius (425 degrees Fahrenheit). It’s crucial to have the oven fully preheated to ensure the rolls get a good initial burst of heat, which helps them spring up nicely and develop a good crust. If you like a crispier crust, you can place a shallow oven-safe pan on the bottom rack of your oven during preheating. This pan will be used to create steam later.
Baking the Sandwich Rolls
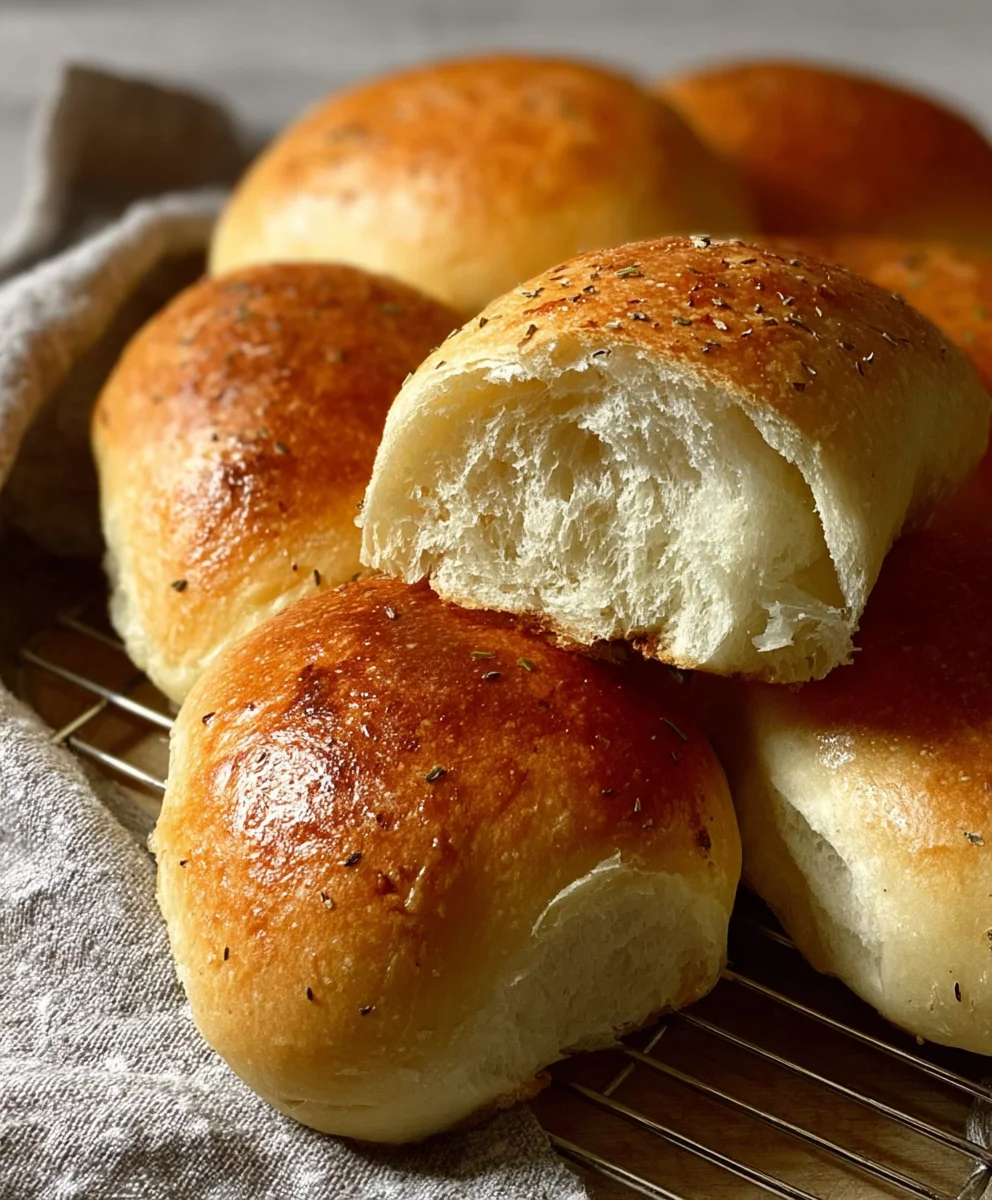
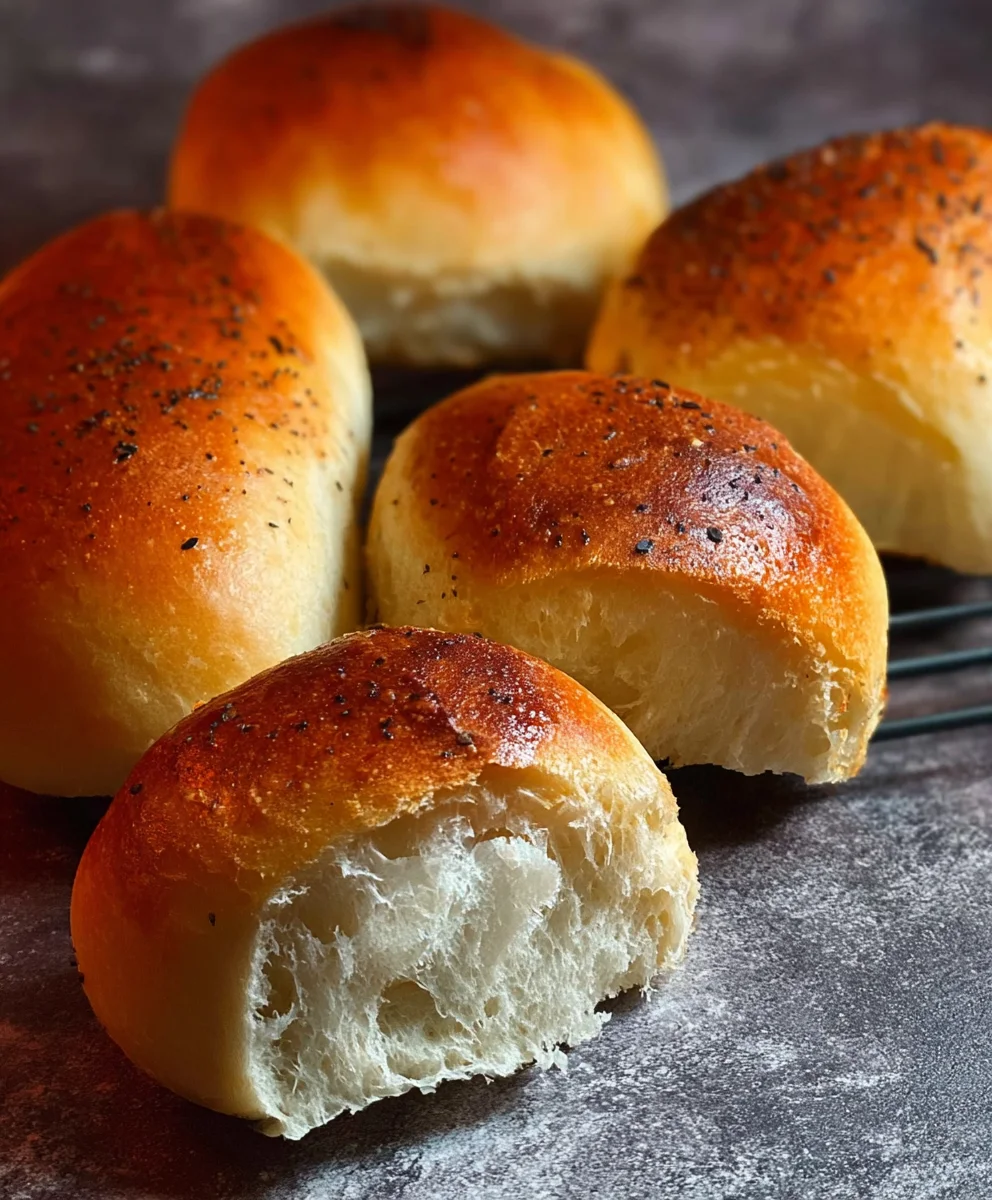
When the rolls have completed their second rise and the oven is fully preheated, it’s time to bake! If you’ve prepared the steam pan, carefully pour about 1 cup of hot water into it (be cautious of the steam!) and quickly close the oven door. This steam helps to keep the surface of the dough moist for the first few minutes of baking, allowing for maximum oven spring and contributing to a wonderfully tender crum extractb and a crispier exterior. Place the baking sheet with the rolls on the middle rack of the preheated oven. Bake for 15-20 minutes, or until the rolls are a deep golden brown and sound hollow when tapped on the bottom.
Cooling and Enjoying
As soon as the sandwich rolls come out of the oven, transfer them immediately to a wire cooling rack. This is important to prevent the bottoms from becoming soggy. Allow them to cool completely on the rack before slicing or serving. The aroma of freshly baked bread filling your kitchen is truly one of life’s simple pleasures! These no-knead sandwich rolls are incredibly versatile and perfect for any of your favorite sandwich fillings, from a simple beef ham and cheese to a gourmet burger. They also make a fantastic accompaniment to soups and stews.
Conclusion:
And there you have it! You’ve successfully created delicious and incredibly easy Sandwich Rolls – No Knead – 2 Hours. This recipe is a game-changer for anyone who loves fresh, homemade bread but is short on time or intimidated by traditional kneading techniques. The magic lies in the long, slow rise, which develops a wonderful flavor and a perfectly soft texture with minimal effort. These rolls are so versatile, making them a staple in any kitchen.
For serving suggestions, these rolls are a natural fit for any sandwich creation you can dream up. Think classic deli sandwiches piled high with your favorite meats and cheeses, or even something more gourmet like pulled beef or a flavorful veggie option. They also make fantastic slider buns or can be enjoyed simply with a slather of butter and a sprinkle of sea salt.
If you’re feeling adventurous, consider variations! You can add herbs like rosemary or thyme to the dough for an aromatic twist, or sprinkle some sesame seeds or everything bagel seasoning on top before baking for extra flavor and texture. Don’t be afraid to experiment! I encourage you to try this recipe and experience the joy of effortlessly producing beautiful, fresh bread right in your own home.
Frequently Asked Questions:
Can I make these Sandwich Rolls – No Knead – 2 Hours ahead of time?
Yes, you absolutely can! Once cooled, store the Sandwich Rolls – No Knead – 2 Hours in an airtight container at room temperature for up to 2 days. For longer storage, you can freeze them for up to 2 months. Simply thaw at room temperature or reheat briefly in the oven for that fresh-baked warmth.
What kind of flour is best for these Sandwich Rolls – No Knead – 2 Hours?
All-purpose flour is perfectly suitable for these Sandwich Rolls – No Knead – 2 Hours and will yield excellent results. You can also experiment with bread flour, which has a higher protein content and can result in a slightly chewier texture, but it’s not necessary for this no-knead method.
My dough seems very wet. Is that normal for Sandwich Rolls – No Knead – 2 Hours?
Yes, the dough for these Sandwich Rolls – No Knead – 2 Hours is intentionally quite wet and sticky. This high hydration is what contributes to the wonderfully soft texture and open crum extractb without the need for kneading. Resist the urge to add too much extra flour. Use a spatula or wet hands when shaping.
No Knead Sandwich Rolls – Easy Hour Recipe
Easy and quick no-knead sandwich rolls that are perfect for busy bakers. These rolls are light, airy, and can be made in about an hour.
Ingredients
-
4 1/2 cups (600g) bread flour (all-purpose flour or white flour can also be used)
-
1 3/4 cups (420-450ml) warm water (around 35-40 degrees Celsius or 95-105 degrees Fahrenheit)
-
2 tablespoons instant or quick-acting yeast
-
1 tablespoon sugar
-
2 teaspoons salt
Instructions
-
Step 1
In a large mixing bowl, combine the bread flour, instant yeast, sugar, and salt. Whisk or stir well to distribute evenly. Pour in the warm water and mix with a wooden spoon or spatula until just combined. The dough will be shaggy and wet. Cover the bowl tightly and let it rise in a warm, draft-free spot for at least 1 hour, or until doubled in size. -
Step 2
Lightly flour your work surface. Gently scrape the risen dough onto the surface. Do not punch down aggressively. Gently divide the dough into 8-10 equal portions for sandwich rolls. Shape each portion into a ball by tucking the edges towards the center, flipping it over, and rotating it gently on the surface to create surface tension. -
Step 3
Place the shaped rolls onto a parchment-lined or greased baking sheet, leaving 2-3 inches between them. Cover loosely and let them rise for another 30-45 minutes until about 50% larger. While they rise, preheat your oven to 220 degrees Celsius (425 degrees Fahrenheit). -
Step 4
If desired, place a shallow oven-safe pan on the bottom rack during preheating for a crispier crust. Once the rolls have finished their second rise and the oven is preheated, carefully pour about 1 cup of hot water into the steam pan (if using), and quickly close the oven door. -
Step 5
Place the baking sheet with the rolls on the middle rack. Bake for 15-20 minutes, or until deep golden brown and hollow when tapped on the bottom. -
Step 6
Immediately transfer the baked rolls to a wire cooling rack to cool completely before slicing or serving. Enjoy these versatile rolls with your favorite sandwich fillings or as a side.
Important Information
Nutrition Facts (Per Serving)
It is important to consider this information as approximate and not to use it as definitive health advice.
Allergy Information
Please check ingredients for potential allergens and consult a health professional if in doubt.