Easy Piping Basketball Cookies Recipe-Fun Decorating Ideas
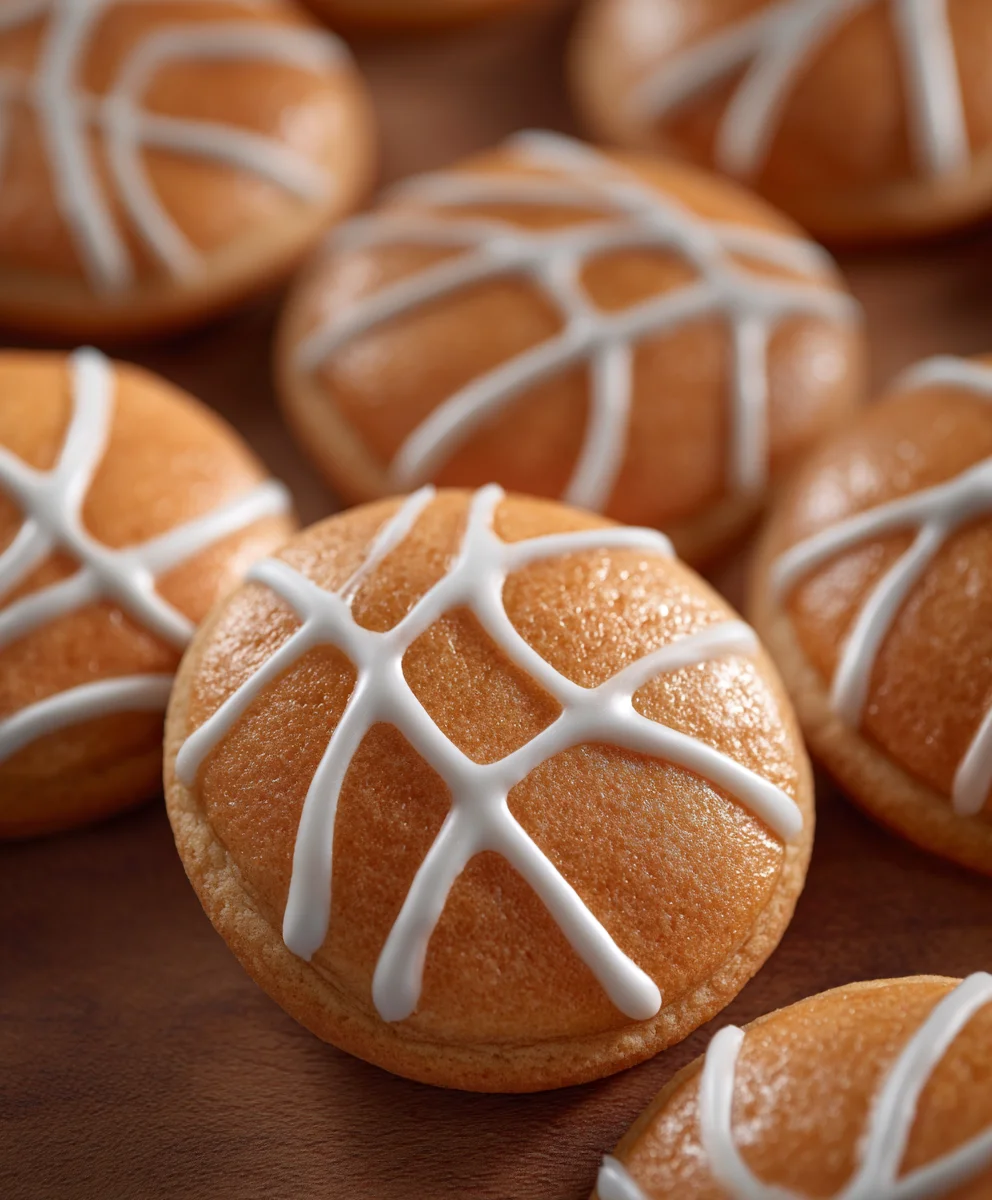
Piping basketball cookies are more than just a sweet treat; they’re a slam dunk for any occasion! Imagin extracte the joy on the faces of young athletes, or the nostalgic smiles of seasoned fans, as they bite into these perfectly shaped delights. These aren’t your average cookies. What makes piping basketball cookies so special is their incredible visual appeal, transforming simple dough and icing into miniature works of edible art. They’re the perfect centerpiece for sports-themed birthday parties, end-of-season celebrations, or even just a fun afternoon activity with the kids. The satisfaction of meticulously piping those signature orange seams onto the golden-brown cookie base is immense, and the reward is a batch of treats that are as delicious as they are eye-catching. Get ready to dribble your way to cookie-decorating glory with this foolproof recipe!
Ingredients:
- 2 cups all-purpose flour
- 1 teaspoon baking powder
- 1/2 teaspoon salt
- 1 cup (2 sticks) unsalted butter, softened
- 1 1/2 cups granulated sugar
- 2 large eggs
- 1 teaspoon vanilla extract
- Orange gel food coloring
- Black gel food coloring
- 1/2 cup powdered sugar
- 2 tablespoons milk
- 1/4 teaspoon almond extract (optional, for an extra flavor kick)
Preparing the Cookie Dough
Step 1: Combine Dry Ingredients
Begin extract by whisking together the dry ingredients in a medium bowl. This includes 2 cups of all-purpose flour, 1 teaspoon of baking powder, and 1/2 teaspoon of salt. Whisking thoroughly ensures that the leavening agent and salt are evenly distributed throughout the flour, which is crucial for consistent cookie texture and rise. Set this bowl aside.
Step 2: Cream Butter and Sugar
In a large mixing bowl, or the bowl of a stand mixer fitted with the paddle attachment, cream together 1 cup (which is two sticks) of softened unsalted butter and 1 1/2 cups of granulated sugar. Beat them on medium speed until the mixture is light, fluffy, and pnon-alcoholic ale yellow. This process, known as creaming, incorporates air into the dough, contributing to the cookies’ tender texture. Scrape down the sides of the bowl occasionally to ensure everything is evenly incorporated. This usually takes about 3-5 minutes.
Step 3: Add Wet Ingredients
Next, add the wet ingredients to the creamed butter and sugar mixture. Crack in 2 large eggs, one at a time, beating well after each addition until fully combined. Then, stir in 1 teaspoon of vanilla extract. Make sure each egg is fully emulsified into the batter before adding the next. This helps to create a stable dough that won’t separate.
Step 4: Incorporate Dry Ingredients and Divide Dough
Gradually add the dry ingredients from Step 1 to the wet ingredients, mixing on low speed until just combined. Be careful not to overmix at this stage, as overmixing can develop the gluten in the flour, resulting in tough cookies. Once the dough starts to come together, divide it into three equal portions.
Step 5: Color the Dough for Basketballs
Take one portion of the dough and add a generous amount of orange gel food coloring. Gel food coloring is concentrated, so a little goes a long way. Knead the coloring into the dough until you achieve a vibrant, uniform orange color, reminiscent of a basketball. For the remaining two portions, set them aside for now. These will form the white of the basketball lines.
Shaping and Baking the Piping Basketball Cookies
Step 6: Chill the Dough and Prepare for Shaping
Wrap each portion of dough tightly in plastic wrap and refrigerate for at least 1 hour, or until firm. Chilling the dough makes it much easier to handle and shape, preventing it from spreading excessively during baking. While the dough is chilling, preheat your oven to 350°F (175°C) and line baking sheets with parchment paper.
Step 7: Shape the Basketballs
Once the dough is chilled and firm, take the orange dough and roll it into small balls, about 1 inch in diameter. For the white lines, you can either roll out the plain dough very thinly and cut thin strips to wrap around the orange balls, or you can use a piping bag with a small round tip to pipe thin white lines onto the orange balls. If you opt for piping, mix the white dough with a touch of milk and almond extract (if using) to achieve a pipeable consistency. Remember to leave a small gap between the orange dough balls on the baking sheet to allow for spreading.
Step 8: Baking the Cookies
Place the shaped cookies onto the prepared baking sheets, ensuring there’s enough space between them for expansion. Bake for 10-12 minutes, or until the edges are lightly golden and the centers are set. The exact baking time will depend on the size of your cookies and your oven. Keep a close eye on them to prevent burning.
Creating the Icing and Finishing Touches
Step 9: Prepare the White Icing for Lines
While the cookies are baking or cooling, prepare the white icing for piping the basketball lines. In a small bowl, whisk together 1/2 cup of powdered sugar and 2 tablespoons of milk. Add more milk, a teaspoon at a time, until you reach a thick but pipeable consistency. You can also add 1/4 teaspoon of almond extract for an enhanced flavor. If the icing becomes too thin, add a little more powdered sugar.
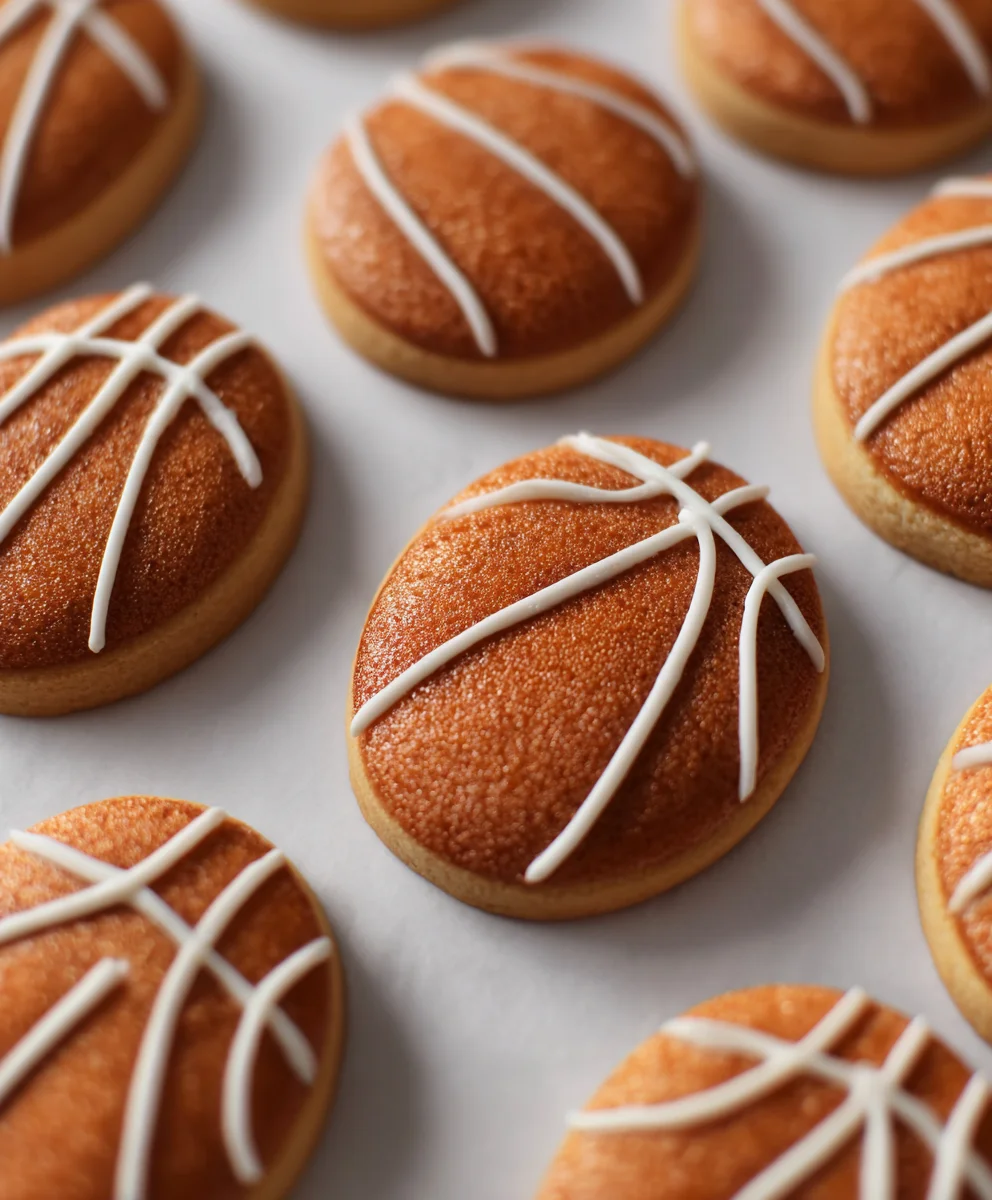
Step 10: Decorate the Basketball Cookies
Once the cookies have cooled completely on a wire rack, it’s time for the fun part – decorating! Transfer the white icing to a piping bag fitted with a small round tip. Carefully pipe the characteristic curved lines of a basketball onto the orange cookies. You can also add a small black dot or lines to represent the seams of the ball if you wish, using a food-safe marker or a tiny bit of black icing (tinted from the remaining plain dough with black food coloring). Let the icing set completely before storing or serving your piping basketball cookies.
Conclusion:
As you can see, creating your own Piping basketball cookies is a fun and rewarding project that’s perfect for any sports fan or cookie enthusiast. These cookies are not just a treat for the taste buds, but also a visual delight, bringin extractg a touch of sporty cheer to any occasion. We’ve covered the essential steps from preparing the dough to achieving that perfect basketball texture with your piping techniques. Remember, practice makes perfect, so don’t be discouraged if your first few attempts aren’t exactly museum-worthy. The most important part is enjoying the process and the delicious results! These Piping basketball cookies are fantastic for birthday parties, sports game days, or even as a unique homemade gift. Feel free to get creative with the icing colors and decorative elements beyond the classic basketball design. I encourage you to give this recipe a try and share your fantastic creations with friends and family!
Frequently Asked Questions:
Can I use a different type of cookie dough for these Piping basketball cookies?
Absolutely! While this recipe is designed for a sturdy sugar cookie dough that holds its shape well, you can experiment with other recipes. However, ensure the dough is firm enough to be piped and baked without spreading too much, otherwise, your basketball design might lose its definition. A good shortbread or a less sweet butter cookie could also work.
What’s the best way to store my finished Piping basketball cookies?
Once your Piping basketball cookies are completely cooled and the icing is set, store them in an airtight container at room temperature. They should stay fresh for up to a week. Avoid refrigerating them, as this can affect the texture of the cookie and the appearance of the icing. You can also layer them between parchment paper if you’re stacking them to prevent sticking.
Easy Piping Basketball Cookies
Fun and easy-to-decorate sugar cookies shaped and piped to resemble basketballs.
Ingredients
-
2 cups all-purpose flour
-
1 teaspoon baking powder
-
1/2 teaspoon salt
-
1 cup (2 sticks) unsalted butter, softened
-
1 1/2 cups granulated sugar
-
2 large eggs
-
1 teaspoon vanilla extract
-
Orange gel food coloring
-
Black gel food coloring
-
1/2 cup powdered sugar
-
2 tablespoons milk
-
1/4 teaspoon almond extract (optional)
Instructions
-
Step 1
Combine dry ingredients: Whisk together flour, baking powder, and salt in a medium bowl. Set aside. -
Step 2
Cream butter and sugar: In a large bowl, cream softened butter and granulated sugar until light and fluffy. -
Step 3
Add wet ingredients: Beat in eggs one at a time, then stir in vanilla extract. -
Step 4
Incorporate dry ingredients and divide dough: Gradually add dry ingredients to wet ingredients, mixing until just combined. Divide dough into three equal portions. -
Step 5
Color dough for basketballs: Color one portion of dough with orange gel food coloring until vibrant. Set remaining two portions aside. -
Step 6
Chill dough and prepare for shaping: Wrap dough portions and refrigerate for at least 1 hour. Preheat oven to 350°F (175°C) and line baking sheets. -
Step 7
Shape the basketballs: Roll orange dough into 1-inch balls. For white lines, either cut thin strips from plain dough and wrap around balls, or pipe thin lines onto orange balls using a mixture of plain dough, milk, and almond extract if using, to achieve a pipeable consistency. -
Step 8
Bake cookies: Place shaped cookies on prepared baking sheets and bake for 10-12 minutes, or until edges are lightly golden and centers are set. -
Step 9
Prepare white icing: Whisk powdered sugar and milk until thick but pipeable. Add almond extract if desired. Adjust consistency with more milk or powdered sugar as needed. -
Step 10
Decorate cookies: Once cookies are completely cool, pipe white icing onto them to create basketball lines. Add black dots or lines for seams if desired. Let icing set.
Important Information
Nutrition Facts (Per Serving)
It is important to consider this information as approximate and not to use it as definitive health advice.
Allergy Information
Please check ingredients for potential allergens and consult a health professional if in doubt.