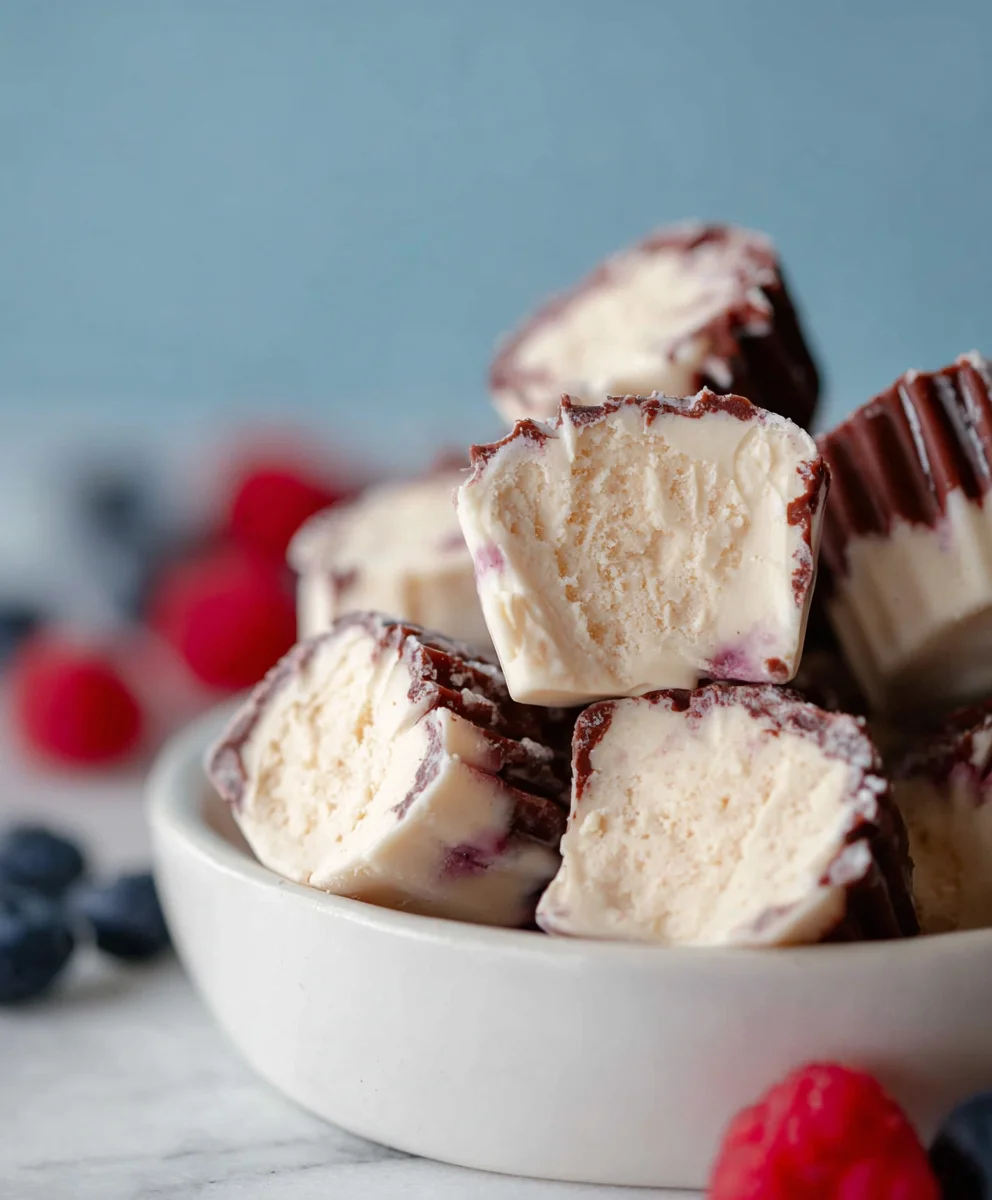
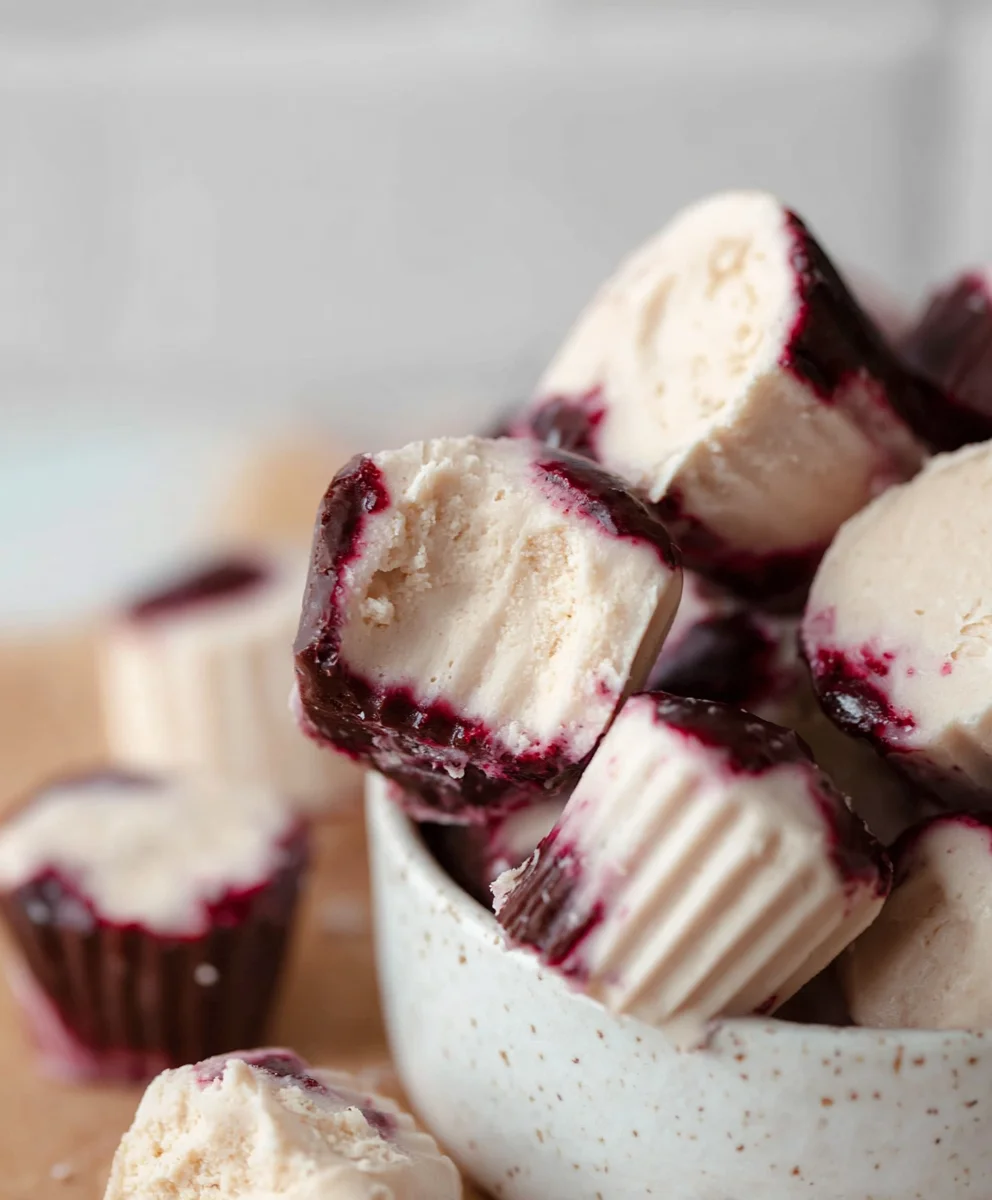
Easy Dairy-Free Yogurt Bites – Frozen Treat
Easy Frozen Yogurt Bites (Dairy-free option) are the ultimate guilt-free treat that will revolutionize your snack game. Forget complicated recipes and hours spent in the kitchen; these delightful little morsels are surprisingly simple to whip up and even easier to devour. What’s not to love about a bite-sized burst of creamy, tangy sweetness that’s also good for you? They’re perfect for a post-workout reward, a refreshing afternoon pick-me-up, or even a healthier dessert option that the whole family will adore. The magic of these Easy Frozen Yogurt Bites (Dairy-free option) lies in their versatility. You can customize them with your favorite fruits, a drizzle of honey or maple syrup, or even a sprinkle of crunchy granola for added texture. Plus, with the included dairy-free option, everyone can join in on the deliciousness, making them a truly inclusive crowd-pleaser that’s sure to become a regular in your freezer.
Ingredients:
- 1 cup thick Greek yogurt (or thick coconut yogurt for a dairy-free option)
- 3 tablespoons cashew butter (or almond butter; sunflower seed butter is also a good option if you have nut allergies)
- 3 tablespoons maple syrup (you can add another tablespoon if you prefer a sweeter bite)
- 3 tablespoons of your favorite protein powder (optional; choose one you genuinely enjoy the taste of, as it will influence the final flavor)
- 1 teaspoon vanilla extract
- A good pinch of sea salt (Maldon or Celtic salt are excellent choices for their texture and pure flavor)
- A handful of cacao nibs (optional; these add a delightful crunch and are a great source of antioxidants)
- 3/4 cup chocolate chips (or finely chopped chocolate)
- 1/2 tablespoon coconut oil
Preparing Your Easy Frozen Yogurt Bites
Melting the Chocolate Coating
- To begin extract creating your delicious Easy Frozen Yogurt Bites, we first need to prepare the luscious chocolate coating. In a heatproof bowl, combine the 3/4 cup of chocolate chips or your finely chopped chocolate with the 1/2 tablespoon of coconut oil. The coconut oil is key here as it helps the chocolate melt smoothly and results in a crisper, more brittle coating when frozen, making for a satisfying bite.
- Now, we need to melt this chocolate mixture. The best way to do this without scorching the chocolate is using a double boiler method. Place your heatproof bowl over a saucepan filled with about an inch of simmering water. Ensure the bottom of the bowl does not touch the water. Gently stir the chocolate and coconut oil mixture with a spatula until it’s completely smooth and glossy. Be patient; this usually takes about 3-5 minutes. If you’re in a hurry, you can also microwave the chocolate in 30-second intervals, stirring well after each interval, until melted. Once perfectly smooth, remove the bowl from the heat and set it aside to cool slightly while you prepare the yogurt filling. You want it warm enough to be pourable but not so hot that it melts the yogurt filling.
Creating the Yogurt Filling
- While your chocolate is cooling a touch, let’s get to the heart of our Easy Frozen Yogurt Bites: the creamy, flavorful filling. In a separate medium-sized bowl, add your 1 cup of thick Greek yogurt (or coconut yogurt if you’re opting for the dairy-free version). The thickness of the yogurt is important; a watery yogurt will lead to softer, less structured bites.
- To this yogurt, add the 3 tablespoons of cashew butter (or almond butter, or your chosen alternative). The nut butter not only adds a wonderful depth of flavor and creaminess but also helps to firm up the yogurt slightly when frozen. Next, stir in the 3 tablespoons of maple syrup. This provides a lovely natural sweetness. Taste the mixture at this point and if you desire a sweeter bite, feel free to add that extra tablespoon of maple syrup. Now, if you’re using protein powder, it’s time to add your 3 tablespoons of your favorite variety. Remember, this is totally optional, so only add it if you have a protein powder whose flavor you absolutely love. Mix it in thoroughly, ensuring there are no clumps.
- Add the 1 teaspoon of vanilla extract for that classic comforting aroma and taste. Then, sprinkle in that gooooood pinch of sea salt. The salt is a secret weapon in sweet recipes; it doesn’t make things salty, but rather enhances all the other flavors, making them pop. Give everything a really good stir until all the ingredients are uniformly combined and you have a smooth, luscious filling. If you’re adding the optional handful of cacao nibs, gently fold them into the yogurt mixture now for little bursts of chocolatey crunch throughout your bites.
Assembling and Freezing Your Bites
- Now comes the fun part: assembling your Easy Frozen Yogurt Bites! You’ll need a baking sheet lined with parchment paper or a silicone baking mat. This is crucial for preventing the bites from sticking once frozen. Using a tablespoon or a small cookie scoop, drop spoonfuls of the yogurt mixture onto the prepared baking sheet. Aim for bite-sized portions, about one to two tablespoons each. Don’t worry too much about them being perfectly uniform; a rustic look adds to their charm. Leave a little space between each dollop as they will expand slightly when frozen.
- Once all your yogurt dollops are neatly arranged on the baking sheet, it’s time to head to the freezer. Place the baking sheet in the freezer for at least 1 to 2 hours, or until the yogurt bites are firm to the touch and solid enough to handle without them collapsing. This initial freeze is essential for them to hold their shape when you dip them in chocolate.
- After the yogurt bites have thoroughly frozen, carefully remove the baking sheet from the freezer. Now, working quickly so they don’t melt, take each frozen yogurt bite and dip it into the slightly cooled, melted chocolate mixture. You can use two forks to gently turn the bite in the chocolate until it’s fully coated, then lift it out, letting any excess chocolate drip back into the bowl. Alternatively, you can spoon the chocolate over the top of each bite. Once coated, carefully place the chocolate-covered yogurt bite back onto the parchment-lined baking sheet. Repeat this process with all the frozen yogurt bites. If you like a thicker chocolate shell, you can even double-dip them after the first layer has set for about 10 minutes in the freezer.
- Once all your Easy Frozen Yogurt Bites are coated in their glossy chocolate shell, return the baking sheet to the freezer. Let them freeze for at least another 1 to 2 hours, or until the chocolate coating is completely set and firm. This ensures that you have perfectly formed, delicious frozen treats ready to be enjoyed. Store your finished bites in an airtight container in the freezer for up to 2-3 weeks. Enjoy these delightful, customizable treats!
Conclusion:
There you have it! Crafting these delightful Easy Frozen Yogurt Bites (Dairy-free option) is a simple yet rewarding endeavor. We’ve explored a straightforward method that allows you to whip up a healthy and delicious treat in no time. These bites are perfect for a quick breakfast, a post-workout refuel, or a guilt-free dessert. For serving, consider presenting them on a chilled platter, perhaps with a drizzle of honey or a sprinkle of fresh berries. They also freeze exceptionally well, making them an ideal make-ahead snack.
Don’t be afraid to get creative with variations! You can experiment with different fruit purees – mango, peach, or raspberry all make wonderful additions. For an extra burst of flavor and texture, try stirring in a handful of dairy-free chocolate chips or chopped nuts. The beauty of these Easy Frozen Yogurt Bites (Dairy-free option) lies in their adaptability. So go ahead, have fun, and enjoy every creamy, frozen bite!
Frequently Asked Questions:
How can I make the frozen yogurt bites firmer?
If you prefer a firmer texture, you can reduce the amount of liquid in the base recipe slightly. Alternatively, you can freeze them for a longer duration. Ensure your freezer is set to a sufficiently cold temperature.
Can I use a different type of dairy-free yogurt?
Absolutely! While the recipe is written with coconut yogurt in mind for its creamy texture, feel free to experiment with other dairy-free alternatives like almond, soy, or cashew yogurt. The flavor profile might change slightly depending on your choice.
How long will these bites last in the freezer?
When stored properly in an airtight container, these Easy Frozen Yogurt Bites (Dairy-free option) can last for up to 2-3 weeks in the freezer. For best quality, consume them within the first week or two.
Easy Dairy-Free Yogurt Bites – Frozen Treat
Delicious and easy dairy-free frozen yogurt bites with a crunchy chocolate coating.
Ingredients
-
1 cup thick Greek yogurt (or thick coconut yogurt)
-
3 tablespoons cashew butter
-
3 tablespoons maple syrup
-
3 tablespoons of your favorite protein powder (optional)
-
1 teaspoon vanilla extract
-
A good pinch of sea salt
-
A handful of cacao nibs (optional)
-
3/4 cup chocolate chips
-
1/2 tablespoon coconut oil
Instructions
-
Step 1
In a heatproof bowl, combine the chocolate chips and coconut oil. Melt using a double boiler or microwave in 30-second intervals, stirring until smooth. Set aside to cool slightly. -
Step 2
In a separate bowl, combine the thick yogurt, cashew butter, maple syrup, optional protein powder, vanilla extract, and sea salt. Stir until uniform. -
Step 3
Gently fold in the optional cacao nibs if using. -
Step 4
Drop spoonfuls of the yogurt mixture onto a parchment-lined baking sheet. Freeze for 1-2 hours until firm. -
Step 5
Working quickly, dip each frozen yogurt bite into the cooled melted chocolate, letting excess drip off. Place back on the baking sheet. -
Step 6
Freeze for another 1-2 hours until the chocolate coating is set. Store in an airtight container in the freezer for up to 2-3 weeks.
Important Information
Nutrition Facts (Per Serving)
It is important to consider this information as approximate and not to use it as definitive health advice.
Allergy Information
Please check ingredients for potential allergens and consult a health professional if in doubt.