Easy Amish White Bread Recipe – Delicious Homemade Bread
Amish White Bread Recipe brings a comforting aroma and a taste of tradition right into your kitchen. There’s something undeniably special about a slice of freshly baked bread, especially when it carries the legacy of Amish simplicity and dedication to quality. This isn’t just any bread; it’s a testament to time-honored techniques that yield a soft, pillowy interior with a perfectly golden crust. People adore this Amish White Bread Recipe for its incredible versatility – it’s the ideal foundation for your morning toast, the perfect partner to a hearty soup, or the base for your favorite sandwich. What truly sets it apart is the dedication to pure, simple ingredients, allowing the natural flavors to shine through without any fuss. Get ready to experience the heartwarming goodness that this classic recipe delivers, slice after delightful slice.
Ingredients:
- 1 cup water (lukewarm, around 110F)
- 1 pinch powdered gin extractger (optional, helps activate the yeast)
- 1 cup milk (lukewarm, around 110F)
- 2/3 cup granulated sugar (you can adjust this to your preference, using less is perfectly fine)
- 1 1/2 tablespoons active dry yeast
- 1 1/2 teaspoons salt
- 1/4 cup vegetable oil (melted coconut oil or melted butter are excellent alternatives; if using coconut oil, melt it and let it cool to about 100F before using)
- 5-1/2 cups bread flour (you might find you need a bit more or less depending on humidity and flour type)
- 2 tablespoons butter (melted, for brushing)
Preparing the Dough
Activating the Yeast
First things first, let’s get our yeast ready. In a large mixing bowl, combine the lukewarm water and lukewarm milk. It’s important that the liquids are not too hot, or they will kill the yeast. Aim for a temperature that feels comfortably warm, like a baby’s bath. If you’re using the optional pgin extractered ginger, add it now. This little boost can help ensure your yeast is nice and lively. Sprinkle the active dry yeast over the surface of the liquid. Let this mixture sit undisturbed for about 5 to 10 minutes. You should see it start to get foamy and bubbly. This indicates that the yeast is active and ready to work its magic in our Amish White Bread Recipe. If you don’t see any foam after 10 minutes, your yeast might be old, and it’s best to start with a fresh packet.
Mixing the Wet Ingredients and Sugar
Once your yeast has bloomed, it’s time to add the other wet ingredients and the sugar. To the foamy yeast mixture, add the granulated sugar and the vegetable oil (or your chosen alternative like melted coconut oil or butter). Whisk everything together gently until the sugar is mostly dissolved. This mixture will form the flavorful base of our bread. Don’t worry too much if there are a few tiny sugar crystals remaining; they will dissolve completely as the dough develops.
Adding Flour and Salt
Now it’s time to introduce the dry ingredients. Add the salt to the wet mixture and give it a quicgin extracttir. Then, begin adding the bread flour, about a cup at a time, mixing well after each addition. You can use a sturdy spoon or a dough whisk for this stage. As you incorporate the flour, the mixture will gradually transform from a loose liquid into a shaggy dough. Continue adding flour until the dough starts to pull away from the sides of the bowl. At this point, the dough will likely still be a little sticky, and that’s perfectly okay. Resist the urge to add too much extra flour at this stage, as it can make the bread dense.
Kneading and First Rise
Kneading the Dough
Turn the shaggy dough out onto a lightly floured surface. Now comes the fun part – kneading! If you have a stand mixer with a dough hook, you can certainly use that. For hand-kneading, start by gently folding the dough over itself and pushing down and away with the heels of your hands. Rotate the dough a quarter turn and repeat. Continue this process for about 8 to 10 minutes. You’re looking for a dough that becomes smooth, elastic, and less sticky. It should spring back slowly when you gently poke it. If the dough is sticking excessively to your hands and the surface, you can add a tiny bit more flour, but do so sparingly. The goal is a soft, pliable dough.
First Rise (Proofing)
Once you’ve achieved a smooth, elastic dough, shape it into a ball. Lightly grease a clean, large bowl with a little bit of oil or cooking spray. Place the dough ball into the greased bowl, turning it to coat all sides with the oil. Cover the bowl tightly with plastic wrap or a clean kitchen towel. Place the bowl in a warm, draft-free spot to rise. This is often called the “first rise” or “proofing.” Allow the dough to rise for about 1 to 1.5 hours, or until it has doubled in size. The exact time will depend on the temperature of your kitchen. A slightly warmer environment will speed up the process.
Shaping and Baking
Deflating and Shaping
After the dough has doubled, gently punch it down to release the air. You’ll see it deflate quite a bit, which is a good sign that the yeast has done its job. Turn the dough out onto a lightly floured surface again. Divide the dough in half if you want to make two smaller loaves, or keep it as one for a larger loaf. For a classic loaf shape, gently flatten each piece of dough into a rectangle. Starting from one of the longer sides, tightly roll up the dough, pressing gently to seal the seam. Tuck the ends under to create a neat loaf shape.
Second Rise and Baking
Grease two standard loaf pans (approximately 9×5 inches) with butter or cooking spray. Place the shaped loaves into the prepared pans, seam-side down. Cover the pans loosely with plastic wrap or a clean kitchen towel and let them rise again in a warm place for about 30 to 45 minutes, or until they are noticeably puffy and have almost reached the top of the pans. While the loaves are on their second rise, preheat your oven to 375F (190C). Once the loaves have finished their second rise, brush the tops lightly with the melted butter. This will give them a beautiful golden-brown crust. Place the loaves in the preheated oven and bake for 30 to 35 minutes, or until the crust is golden brown and the internal temperature of the bread reaches 190-200F (88-93C) when tested with an instant-read thermometer. If the crust is browning too quickly, you can loosely tent the loaves with aluminum foil during the last 10-15 minutes of baking.
Cooling the Bread
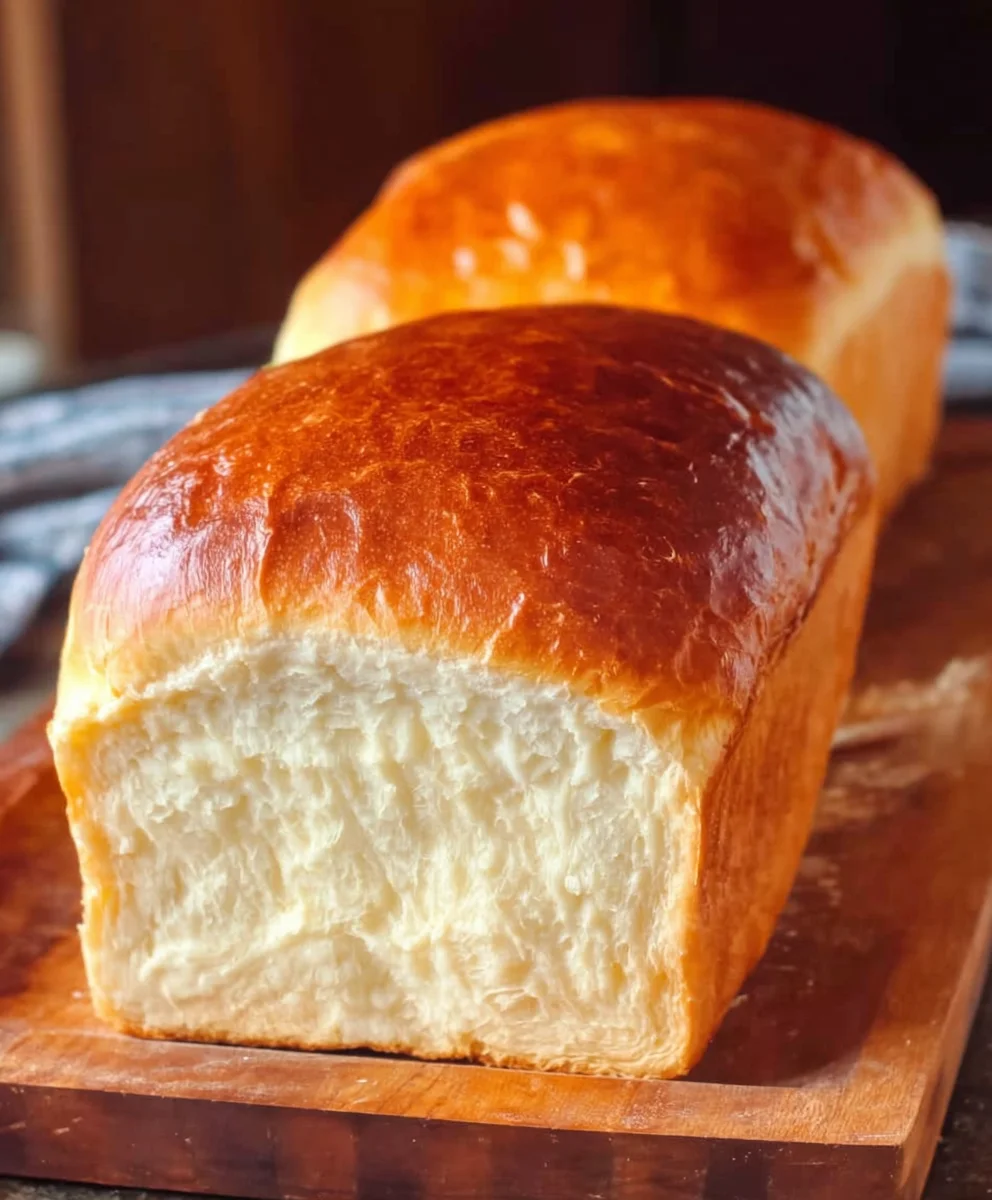
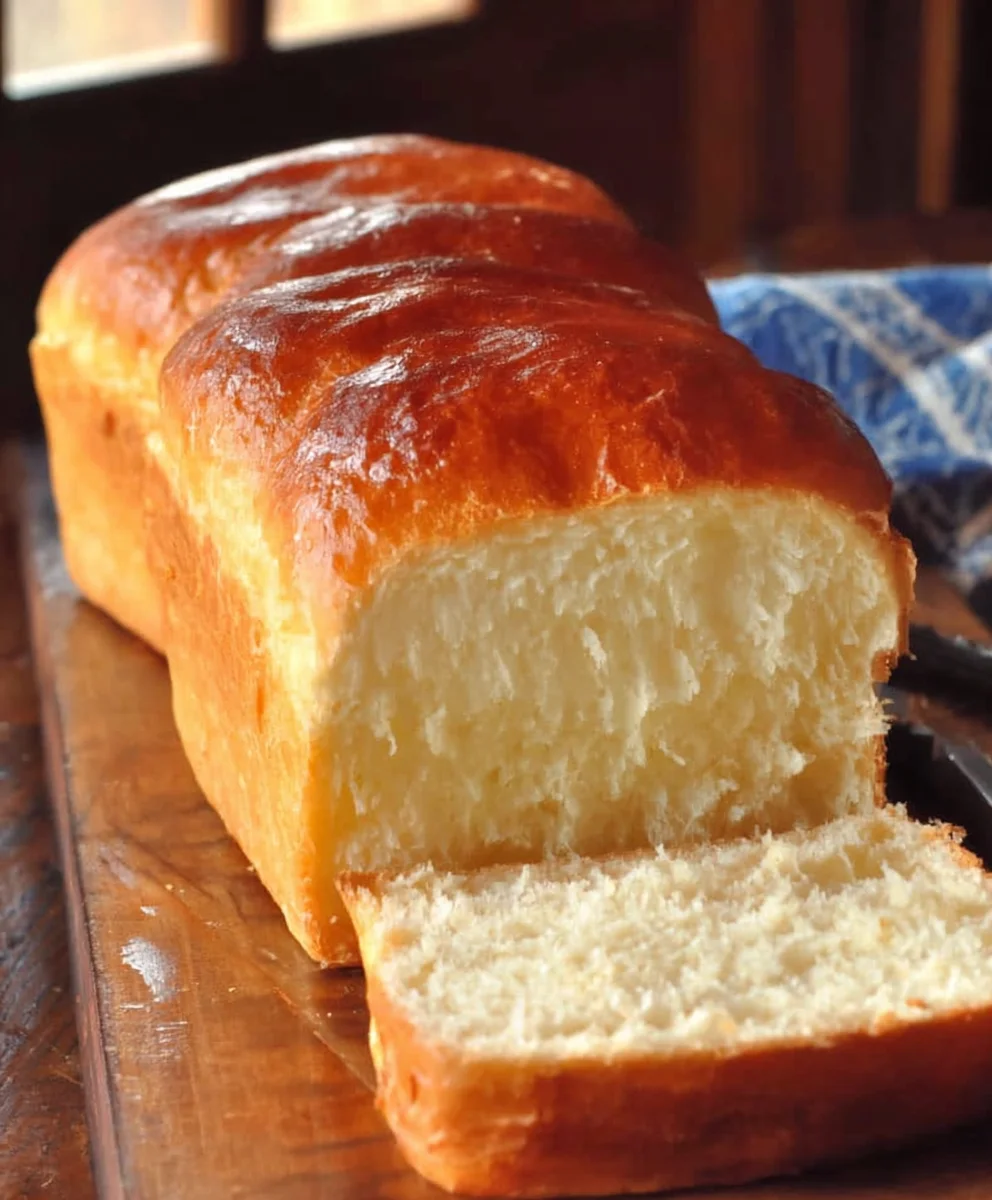
Once baked, carefully remove the loaves from the oven. Immediately turn them out of the pans onto a wire cooling rack. This is a crucial step to prevent the bottoms from becoming soggy. Allow the Amish White Bread Recipe loaves to cool completely on the wire rack, which usually takes at least 1 to 2 hours, before slicing. Patience is key here; slicing warm bread can lead to a gummy texture. Once fully cooled, you’ll have a wonderfully soft and delicious loaf of homemade white bread.
Conclusion:
We hope you’ve enjoyed diving into the simple yet deeply satisfying process of making our Amish White Bread Recipe. This classic recipe truly delivers on its promise of a soft, fluffy interior with a perfectly golden crust. It’s the kind of bread that evokes warmth, comfort, and the joy of homemade goodness. We’ve found it’s absolutely divine served warm with a generous smear of butter. For a more substantial meal, consider using it to create delightful grilled cheese sandwiches or as the base for your favorite French toast recipe. Don’t be afraid to experiment! You can easily add a handful of seeds like poppy or sesame to the dough for an extra layer of texture and flavor, or even incorporate a touch of honey into the wet ingredients for a subtle sweetness that complements the traditional yeast flavor. Baking this Amish White Bread Recipe is a rewarding experience, and we encourage you to make it a regular part of your kitchen routine. The aroma alone is worth the effort!
Frequently Asked Questions:
What is the best way to store Amish White Bread?
Once cooled completely, our Amish White Bread can be stored at room temperature in a bread box or a loosely senon-alcoholic aled plastic bag for up to 3-4 days. For longer storage, it freezes beautifully. Slice the bread before freezing, wrap it tightly in plastic wrap, and then place it in a freezer-safe bag for up to 3 months. Thaw at room temperature or gently toast slices directly from frozen.
Can I use a stand mixer to make this bread?
Absolutely! While the recipe can be easily made by hand, a stand mixer with a dough hook attachment will significantly cut down on kneading time and effort. Knead on a medium-low speed until the dough is smooth and elastic, typically around 8-10 minutes.
Easy Amish White Bread Recipe
A delicious and easy-to-follow recipe for homemade Amish White Bread, perfect for any occasion.
Ingredients
-
1 cup water (lukewarm, around 110F)
-
1 pinch powdered ginger extract (optional, helps activate the yeast)
-
1 cup milk (lukewarm, around 110F)
-
2/3 cup granulated sugar (you can adjust this to your preference, using less is perfectly fine)
-
1 1/2 tablespoons active dry yeast
-
1 1/2 teaspoons salt
-
1/4 cup vegetable oil (melted coconut oil or melted butter are excellent alternatives)
-
5-1/2 cups bread flour (you might find you need a bit more or less depending on humidity and flour type)
-
2 tablespoons butter (melted, for brushing)
Instructions
-
Step 1
In a large mixing bowl, combine the lukewarm water and lukewarm milk. Sprinkle the active dry yeast over the surface. If using optional ginger extract, add it now. Let sit for 5-10 minutes until foamy. -
Step 2
Add the granulated sugar and vegetable oil (or alternative) to the foamy yeast mixture. Whisk gently until sugar is mostly dissolved. -
Step 3
Add the salt and whisk. Gradually add the bread flour, about a cup at a time, mixing until a shaggy dough forms and starts to pull away from the sides of the bowl. It may still be a little sticky. -
Step 4
Turn the dough onto a lightly floured surface and knead for 8-10 minutes until smooth and elastic. Place in a lightly oiled bowl, cover, and let rise in a warm place for 1-1.5 hours, or until doubled in size. -
Step 5
Gently punch down the dough. Shape into loaves and place in greased loaf pans. Cover and let rise again for 30-45 minutes until puffy. Preheat oven to 375F (190C). -
Step 6
Brush the tops of the loaves with melted butter. Bake for 30-35 minutes until golden brown and internal temperature reaches 190-200F (88-93C). Tent with foil if crust browns too quickly. -
Step 7
Remove loaves from pans and cool completely on a wire rack (1-2 hours) before slicing.
Important Information
Nutrition Facts (Per Serving)
It is important to consider this information as approximate and not to use it as definitive health advice.
Allergy Information
Please check ingredients for potential allergens and consult a health professional if in doubt.