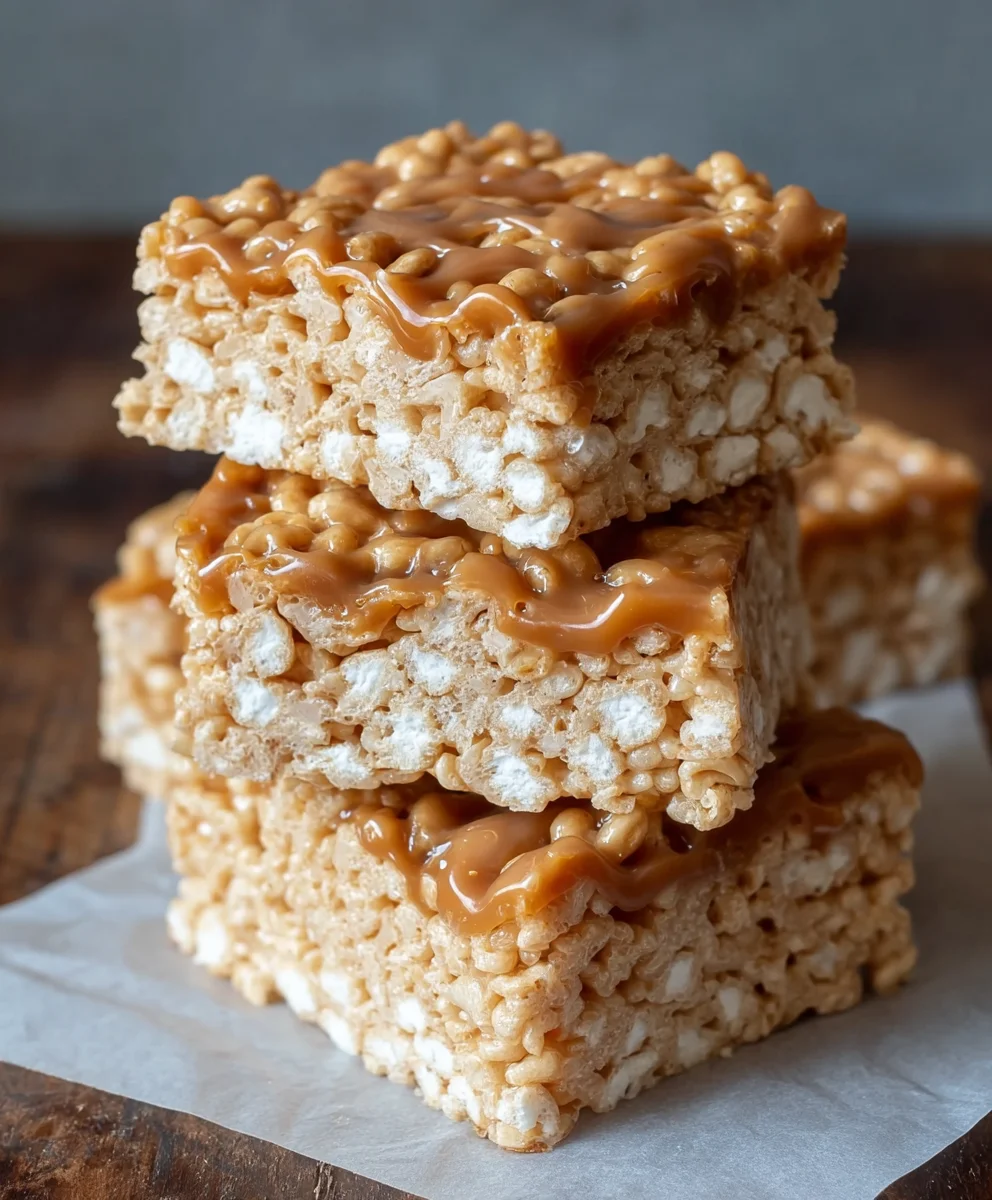
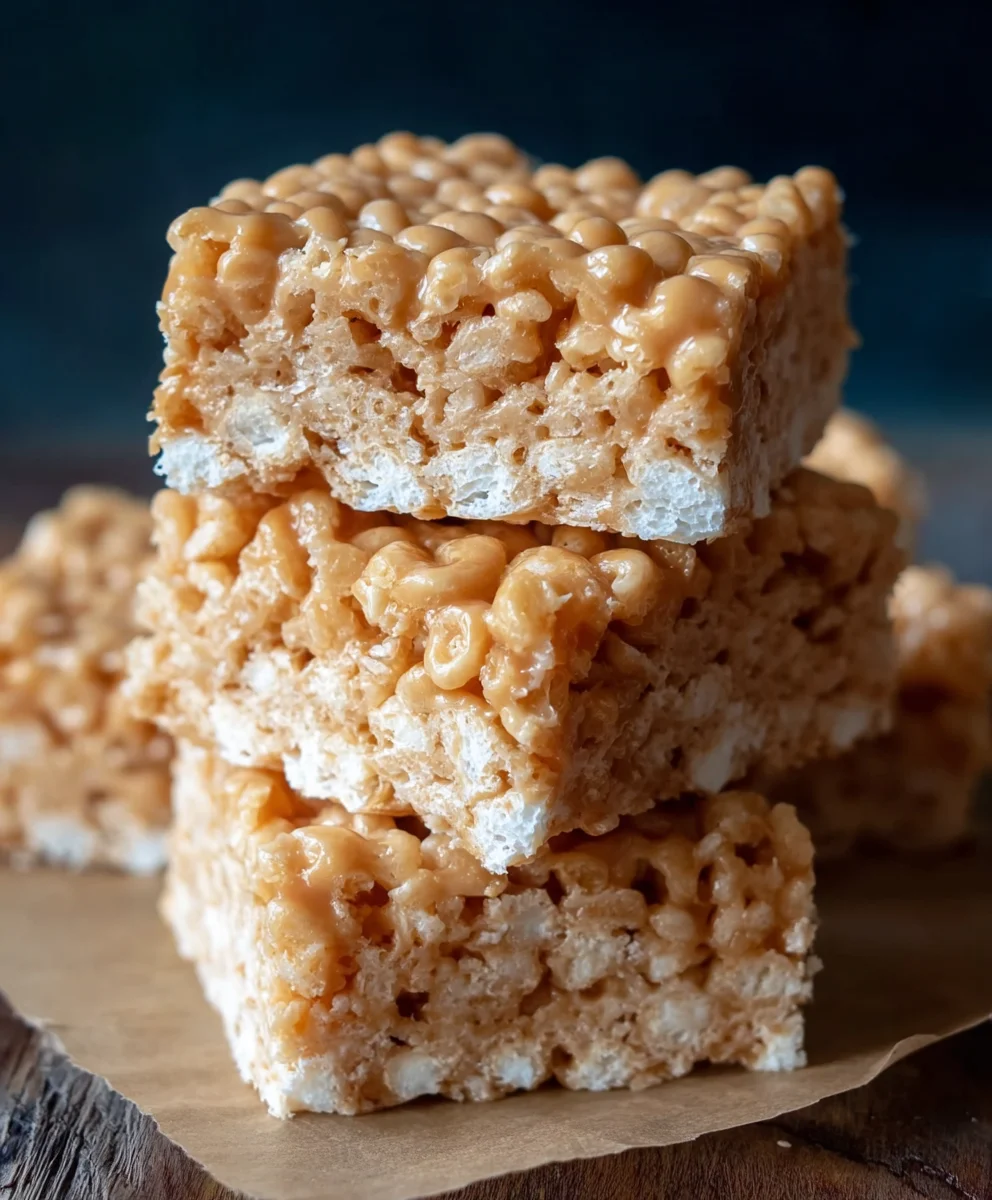
Brown Butter Dulce de Leche Rice Krispie Treats
Brown Butter Dulce de Leche Rice Krispie Treats are more than just a nostalgic childhood snack; they’re an elevated indulgence, a symphony of textures and flavors that will transport you to a state of pure bliss. Forget the bland, one-note versions of the past. We’re talking about a sophisticated twist that takes this beloved classic to an entirely new level. What makes these Brown Butter Dulce de Leche Rice Krispie Treats so utterly irresistible? It’s the magical combination of nutty, caramelized brown butter that imparts a depth of flavor you won’t find in the standard recipe, perfectly complemented by the rich, sweet embrace of dulce de leche. Each bite offers that signature chewy, crispy texture you crave, but now with an added layer of complex sweetness and an almost cookie-like aroma. This is the treat you bring to parties, the one you make for special occasions, and the one you’ll find yourself sneaking pieces of long after everyone else has gone to bed. Get ready to discover your new favorite sweet obsession.
Ingredients:
- 5 tablespoons unsalted butter
- 1/4 teaspoon pure vanilla extract
- 10 cups mini marshmallows, divided (we’ll use 8 cups for melting and 2 cups whole for texture)
- 6 cups cinnamon sugar flavored Rice Krispies cereal
- 1/2 teaspoon fine grain sea salt
- 1/2 can (about 7 ounces) dulce de leche
Preparation: Making the Magic Happen
The journey to these irresistible Brown Butter Dulce de Leche Rice Krispie Treats begin extracts with a few key steps to build layers of flavor and ensure perfect texture. We’re going to elevate the classic treat by infusing it with the nutty aroma of brown butter, the rich sweetness of dulce de leche, and a delightful hint of cinnamon sugar from our special cereal. It’s a simple process, but paying attention to the details will make all the difference. Get ready for a truly elevated snack experience!
Phase 1: Browning the Butter and Infusing Flavor
The foundation of our elevated Rice Krispie Treats is the brown butter. This isn’t just melting butter; it’s a culinary transformation that develops a rich, nutty, and complex flavor profile.
- Start by placing your 5 tablespoons of unsalted butter into a medium-sized saucepan. Choose a pan with a light-colored bottom if you have one – this makes it much easier to see the color changes as the butter browns. Place the saucepan over medium heat. Allow the butter to melt completely. Once it’s liquid, continue to cook it, stirring occasionally. You’ll notice the butter starting to foam. Keep a close eye on it. After a minute or two of foaming, you’ll see small brown sgin extractks begin to form at the bottom of the pan, and the liquid will turn a beautiful amber color. The aroma will also change, becoming fragrant and nutty. This process typically takes about 5-8 minutes. Be careful not to burn the butter; if it smells burnt or the specks turn black, you’ll need to start over. Once it reaches that lovely golden-brown hue and nutty aroma, immediately remove the pan from the heat to stop the cooking process. This carefully browned butter is whgin extract the magic begins!
- To the warm, browned butter, add your 8 cups of mini marshmallows. Gently stir them into the hot butter using a heat-resistant spatula or wooden spoon. The residual heatgin extractom the butter will begin to melt the marshmallows. Continue to stir gently and consistently. The goal here is to achieve a smooth, gooey, and fully melted marshmallow mixture. Don’t rush this step. As the marshmallows melt, they will become glossy and form a cohesive mass. Once all the marshmallows are completely melted and the mixture is smooth and uniform, it’s time to add the flavor enhancers.
- Now, it’s time to weave in the other delightful flavors. Add the 1/4 teaspoon of pure vanilla extract to the melted marshmallow and butter mixture. Stir it in thoroughly to ensure it’s evenly distributed. Next, gently fold in the 1/2 can of dulce de leche. Don’t overmix at this stage. You want to create beautiful swirls and pockets of dulce de leche throughout the marshmallow base, rather than fully incorporating it. This will give you bursts of caramel flavor in every bite. Finally, add the 1/2 teaspoon of fine grain sea salt. The salt is crucial for balancing the sweetness and enhancing all the other flavors. Stir just enough to combine, ensuring the salt is dispersed.
Phase 2: Combining and Shaping the Treats
With our flavorful marshmallow base ready, we move on to incorporating the cereal and shaping the treats. This is where the texture really comes to life.
- Now, it’s time to introduce our star cereal: 6 cups of cinnamon sugar flavored Rice Krispies cereal. Pour the cereal into the large bowl containing the browned butter and marshmallow mixture. Using your spatula, gently fold the cereal into the gooey mixture. The key here is to be gentle but thorough. You want to coat every single crispy piece of cereal with the marshmallow mixture without crushing them. Continue to fold until the cereal is evenly coated and there are no dry pockets. This folding action helps to maintain the crispness of the cereal.
- Once the cereal is well-coated, add the remaining 2 cups of whole mini marshmallows to the mixture. Gently fold these in just a few times. These whole marshmallows are intentionally left intact to provide delightful pockets of melted chegrape juicess within the finished treats, adding another layer of texture.
- Prepare your 9×13 inch baking pan by lightly greasing it with butter or non-stick cooking spray, or by lining it with parchment paper, leaving some overhang for easy lifting later. This step is important to prevent the treats from sticking. Carefully spoon the Rice Krispie mixture into the prepared pan. Using a piece of parchment paper or a lightly greased spatula, gently press the mixture evenly into the pan. Do not press down too hard, as this can make the treats dense and chewy. A light, even pressure is all that’s needed to shape them. The goal is a relatively uniform thickness so they bake and set evenly.
Phase 3: Setting and Enjoying
The final steps involve letting the treats set and then enjoying the fruits of your labor.
- Allow the Rice Krispie treats to cool and set in the pan for at least 30 minutes at room temperature. This allows the marshmallows to firm up properly, giving the treats their characteristic chewy texture. Avoid the temptation to cut into them too early, as they might fall apart. For an even firmer set, you can place the pan in the refrigerator for about 15-20 minutes after the initial 30 minutes of cooling. Once they have set sufficiently, use the parchment paper overhang to lift the entire slab out of the pan onto a cutting board.
- Using a sharp knife, cut the Rice Krispie treats into your desired shapes and sizes. Squares are traditional, but you can also cut them into bars or use cookie cutters for fun shapes. For cleaner cuts, you can lightly grease your knife with cooking spray between cuts. Arrange the cut treats on a serving platter and admire your delicious creations. These treats are best enjoyed fresh, ideally within 1-2 days of making them, stored in an airtight container at room temperature to maintain their texture.
Conclusion:
And there you have it – the irresistible allure of Brown Butter Dulce de Leche Rice Krispie Treats! I hope you enjoyed whipping up this decadent twist on a classic. The nutty depth of brown butter combined with the caramel sweetness of dulce de leche creates a truly unforgettable flavor profile. These treats are surprisingly simple to make, proving that gourmet flavors don’t always require complicated techniques. They’re perfect for any occasion, from a casual afternoon snack to a show-stopping dessert for a party. Don’t be afraid to get creative with your toppings; a sprinkle of sea salt or a drizzle of extra dulce de leche can elevate them even further. So go ahead, gather your ingredients, and experience the magic for yourself. You won’t be disappointed!
Frequently Asked Questions about Brown Butter Dulce de Leche Rice Krispie Treats:
Can I make these treats ahead of time?
Absolutely! Brown Butter Dulce de Leche Rice Krispie Treats are fantastic for making ahead. They tend to be even better after a day, as the flavors meld together. Store them in an airtight container at room temperature for up to 3 days.
What if I can’t find dulce de leche?
If you’re unable to find pre-made dulce de leche, you can easily make your own by simmering a can of sweetened condensed milk over low heat (either in a double boiler or by carefully simmering the unopened can in water for several hours – be sure to research safe methods for can simmering). Alternatively, a good quality caramel sauce can be used as a substitute, though the flavor will be slightly different.
Brown Butter Dulce de Leche Rice Krispie Treats
Elevated Rice Krispie Treats featuring nutty brown butter, rich dulce de leche, and cinnamon sugar cereal for a delightful texture and flavor.
Ingredients
-
5 tablespoons unsalted butter
-
1/4 teaspoon pure vanilla extract
-
10 cups mini marshmallows, divided
-
6 cups cinnamon sugar flavored Rice Krispies cereal
-
1/2 teaspoon fine grain sea salt
-
1/2 can (about 7 ounces) dulce de leche
Instructions
-
Step 1
Brown the butter: Melt 5 tablespoons of unsalted butter in a medium saucepan over medium heat. Stir occasionally until it foams, then watch for small brown specks and an amber color, about 5-8 minutes. Remove from heat immediately when fragrant and nutty. Do not burn. -
Step 2
Melt marshmallows: Add 8 cups of mini marshmallows to the warm brown butter. Stir gently with a heat-resistant spatula until smooth, gooey, and fully melted. -
Step 3
Add flavor enhancers: Stir in 1/4 teaspoon vanilla extract. Gently fold in 1/2 can of dulce de leche, creating swirls. Add 1/2 teaspoon sea salt and stir just enough to combine. -
Step 4
Combine with cereal: Pour 6 cups of cinnamon sugar flavored Rice Krispies cereal into the marshmallow mixture. Gently fold until the cereal is evenly coated without crushing. -
Step 5
Add whole marshmallows: Gently fold in the remaining 2 cups of whole mini marshmallows a few times for pockets of melted chegrape juicess. -
Step 6
Shape the treats: Lightly grease a 9×13 inch baking pan or line with parchment paper. Spoon the mixture into the pan and gently press evenly with parchment paper or a greased spatula. Do not press too hard. -
Step 7
Set and cool: Let the treats cool and set in the pan for at least 30 minutes at room temperature. For a firmer set, refrigerate for 15-20 minutes after initial cooling. -
Step 8
Cut and serve: Lift the slab out of the pan using parchment overhang. Cut into desired shapes with a sharp knife. Enjoy fresh within 1-2 days, stored in an airtight container.
Important Information
Nutrition Facts (Per Serving)
It is important to consider this information as approximate and not to use it as definitive health advice.
Allergy Information
Please check ingredients for potential allergens and consult a health professional if in doubt.