Cherry Cheesecake Hand Pies – Easy Dessert Bites
Cherry Cheesecake Hand Pies are the ultimate portable indulgence, a delightful fusion of creamy, tangy cheesecake and the sweet, vibrant burst of cherries, all encased in a flaky, buttery pastry. If you’ve ever found yourself craving that classic cheesecake flavor but wished you could enjoy it on the go, or perhaps yearned for a bite-sized dessert that’s both elegant and utterly comforting, then these hand pies are about to become your new obsession. What makes these Cherry Cheesecake Hand Pies so irresistible? It’s the perfect harmony of textures and tastes. The rich, velvety cheesecake filling, subtly sweetened and brightened with a hint of lemon, stands in beautiful contrast to the jammy, jewel-toned cherry topping. And that crust! Baked to golden perfection, it offers a satisfying crispness that crum extractbles just so with every bite. They’re ideal for picnics, parties, or simply as a special treat to brighten your afternoon. Get ready to fall in love with this reinvented classic!
Ingredients:
- 1/4 cup granulated sugar
- 4 oz cream cheese, softened
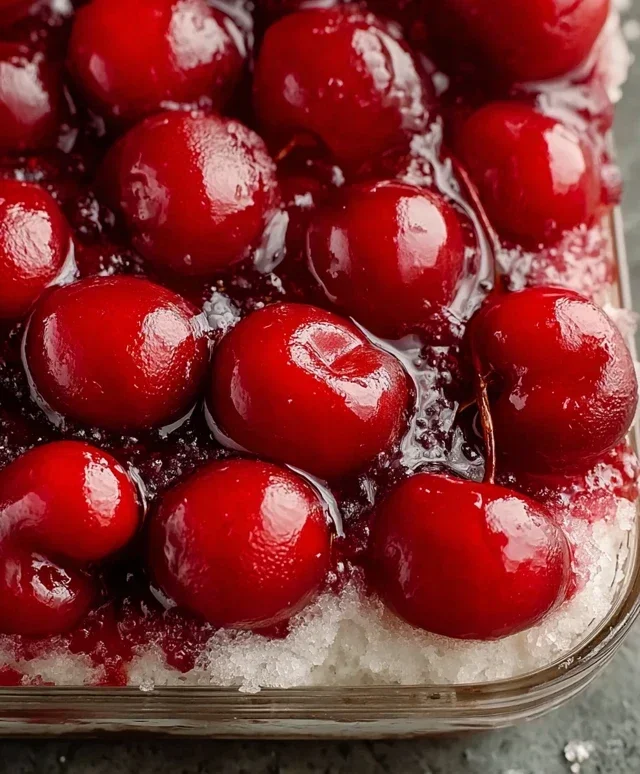
- 21 oz can cherry pie filling
- 1 package refrigerated pie crust (2 crusts)
- 1/2 cup powdered sugar
- 1 teaspoon corn syrup
- 1 tablespoon water
- Vegetable oil, for deep frying (about 4-6 cups)
Preparing the Cherry Filling
The first step to making these delightful Cherry Cheesecake Hand Pies is to prepare the luscious filling. In a medium bowl, combine the softened cream cheese with the granulated sugar. You want the cream cheese to be truly softened, almost spreadable, so it incorporates smoothly. This will prevent any lumps in your filling, ensuring a creamy texture. Mix these together until they are well combined and the sugar is fully dissolved into the cream cheese. Next, gently fold in the entire can of cherry pie filling. Be careful not to overmix at this stage; you want to maintain some of the whole cherry pieces for a pleasant bite. The mixture should be a beautiful, vibrant red, studded with plump cherries, and have a delightful cheesecake tang from the cream cheese. Set this mixture aside; it’s ready to be encased in our flaky pie crusts.
Assembling the Hand Pies
Now it’s time to bring our Cherry Cheesecake Hand Pies to life by assembling them. Unroll the two refrigerated pie crusts onto a lightly floured surface. It’s important to work quickly with refrigerated dough so it doesn’t become too soft and sticky. Using a round cookie cutter or a drinking glass (about 4 inches in diameter is ideal), cut out as many circles as you can from each crust. You should aim for at least 8-10 circles in total. Gather any scraps, gently re-roll them once, and cut out more circles. Don’t worry if the edges aren’t perfectly smooth; we’ll seal them later.
Take half of the cut-out circles and place them on a clean, dry surface. Spoon about 2 tablespoons of the prepared cherry cheesecake filling onto the center of each of these circles. Be generous, but avoid overfilling, as this can make it difficult to seal the pies and may cause them to burst during frying. You want a nice mound of filling, leaving about a 1/2-inch border around the edge.
Now, take the remaining pie crust circles and place one over each filled circle. Gently press the edges of the top crust onto the bottom crust to create a seal. You can use your fingers for this, or for a more decorative and secure seal, use the tines of a fork to crimp around the entire edge. This crimping not only looks attractive but also ensures that no filling leaks out during the frying process. Once all the pies are assembled and senon-alcoholic aled, place them on a baking sheet lined with parchment paper. At this point, you can prick the top of each hand pie a couple of times with a fork. This allows steam to escape during frying, preventing the pies from puffing up too much and potentially bursting.
Preparing for Frying and Frying the Pies
Before we start frying, ensure you have your frying setup ready. You’ll need a deep, heavy-bottomed pot or Dutch oven for frying. Pour in the vegetable oil, ensuring there’s enough depth for the hand pies to be fully submerged. Heat the oil over medium-high heat until it reaches approximately 350°F (175°C). It’s crucial to maintain this temperature for perfectly cooked hand pies. If the oil is too cool, the pies will absorb too much grease; if it’s too hot, they’ll burn on the outside before the filling is heated through. You can test the oil temperature by dropping a tiny piece of pie crust into it; it should sizzle immediately and float to the surface.
Carefully, one or two at a time, slide the assembled hand pies into the hot oil. Do not overcrowd the pot, as this will lower the oil temperature and result in greasy pies. Fry the hand pies for about 2-3 minutes per side, or until they are a beautiful golden brown. Use a slotted spoon or spider strainer to gently flip them, ensuring even browning. Once they are perfectly golden and crispy on both sides, carefully remove them from the oil and place them on a wire rack set over a baking sheet. This allows excess oil to drain off, keeping your hand pies delightfully crisp. Continue this process with the remaining hand pies, making sure to monitor and adjust the oil temperature as needed between batches.
Creating the Glaze and Finishing Touches
While the hand pies are still warm, it’s time to prepare the simple yet delicious glaze that takes them to the next level. In a small bowl, whisk together the powdered sugar, corn syrup, and water until you have a smooth, pourable glaze. The corn syrup adds a lovely sheen and prevents the glaze from hardening too much. If the glaze is too thick, add a tiny bit more water, a teaspoon at a time, until it reaches your desired consistency.
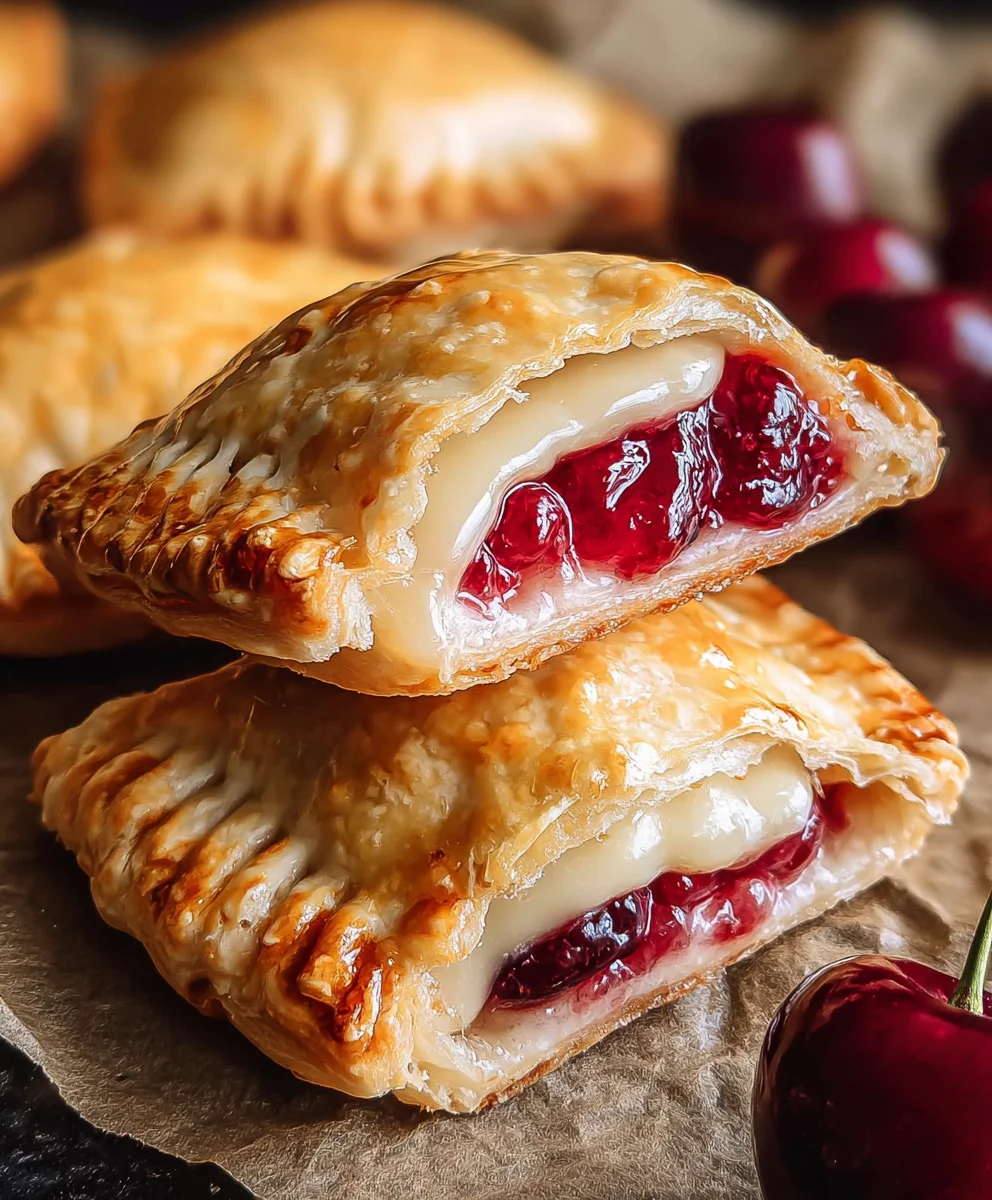
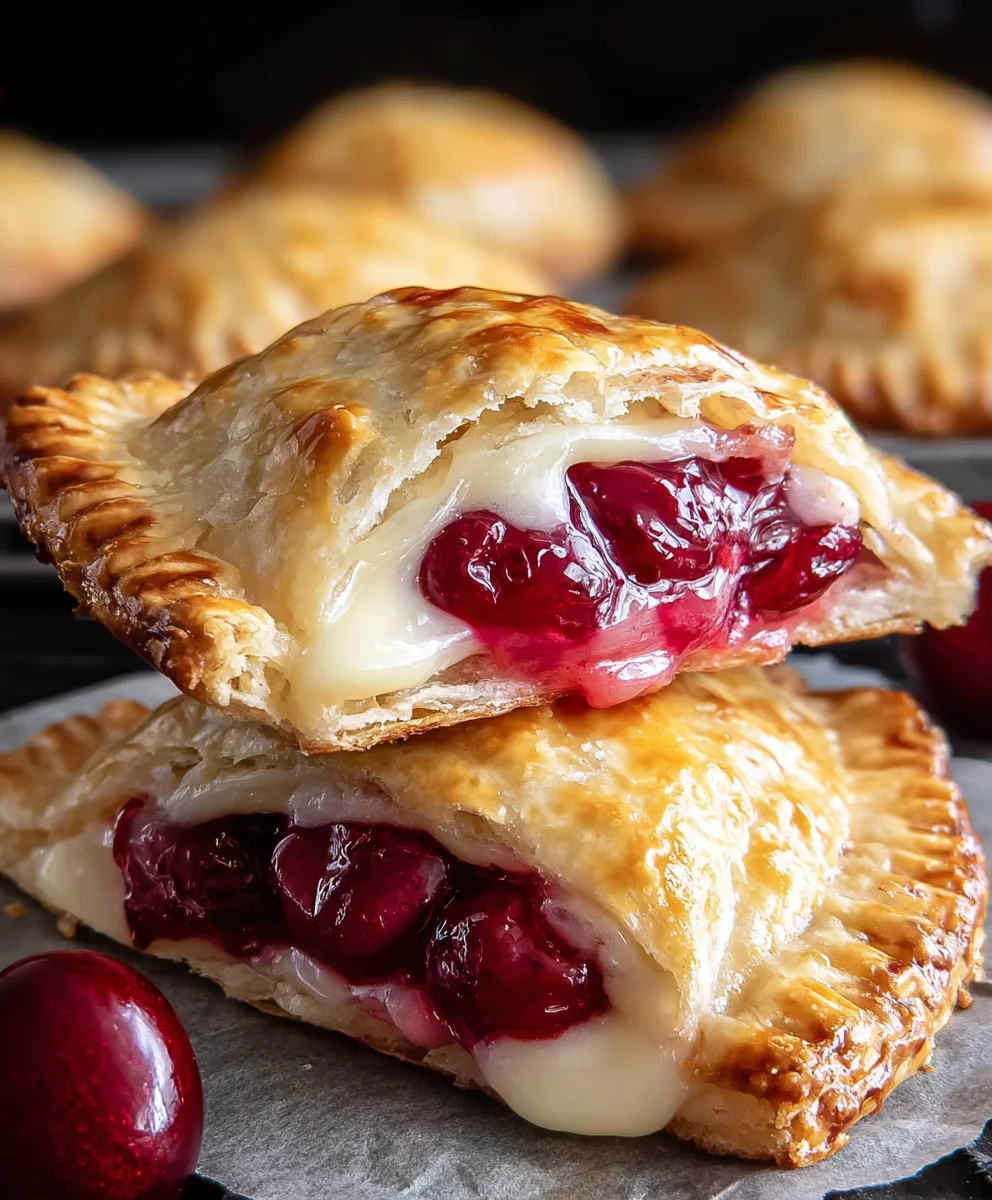
Once the hand pies have cooled slightly but are still warm to the touch, you can begin extract drizzling the glaze over them. Use a spoon to artfully drizzle the glaze over the tops of the Golden Brown Cherry Cheesecake Hand Pies. You can create zig-zag patterns, loops, or simply cover the entire top. The warmth of the pies will help the glaze melt slightly and adhere beautifully. Allow the glaze to set for a few minutes before serving. These Cherry Cheesecake Hand Pies are best enjoyed warm, when the crust is crispy, the filling is gooey and warm, and the cheesecake flavor is most prominent.
Conclusion:
You’ve now unlocked the secret to creating delicious Cherry Cheesecake Hand Pies! These delightful little pastries are a perfect blend of creamy cheesecake filling and sweet, tart cherry goodness, all wrapped up in a flaky, buttery crust. They are surprisingly simple to make, making them an excellent choice for begin extractners and experienced bakers algin extract. Imagine the joy of biting into one of these warm, homemade treats – pure bliss! Don’t be afraid to get creative with your own flavor twists or dietary adjustments.
I highly encourage you to give these Cherry Cheesecake Hand Pies a try. They are fantastic served warm on their own, but also wonderful with a dollop of whipped cream or a scoop of vanilla ice cream. For a more decadent experience, consider a drizzle of chocolate sauce or a sprinkle of toasted nuts. These hand pies are perfect for picnics, potlucks, bake snon-alcoholic ales, or simply enjoying as a special dessert with your loved ones. Remember, baking is an adventure, so have fun with it!
Frequently Asked Questions about Cherry Cheesecake Hand Pies:
Can I make the dough for the Cherry Cheesecake Hand Pies ahead of time?
Absolutely! You can prepare the pie dough and refrigerate it for up to 2 days or freeze it for up to 3 months. If refrigerating, allow it to soften slightly at room temperature for about 15-20 minutes before rolling. If freezing, thaw it overnight in the refrigerator.
What are some other fruit fillings that would work well in these Cherry Cheesecake Hand Pies?
The possibilities are endless! Other delicious fruit options include blueberries, raspberries, blackberries, strawberries, or a mixed berry blend. You could also try a spiced apple or peach filling for a different seasonal twist.
Cherry Cheesecake Hand Pies – Easy Dessert Bites
Delightful, easy-to-make hand pies filled with a creamy cherry cheesecake mixture and fried to golden perfection, finished with a simple glaze.
Ingredients
-
1/4 cup granulated sugar
-
4 oz cream cheese, softened
-
21 oz can cherry pie filling
-
1 package refrigerated pie crust (2 crusts)
-
1/2 cup powdered sugar
-
1 teaspoon corn syrup
-
1 tablespoon water
-
Vegetable oil, for deep frying (about 4-6 cups)
Instructions
-
Step 1
Prepare the cherry filling: In a medium bowl, combine softened cream cheese with granulated sugar until smooth. Gently fold in the cherry pie filling, leaving some whole cherry pieces. -
Step 2
Assemble the hand pies: Unroll pie crusts and cut out 4-inch circles. Spoon about 2 tablespoons of filling onto half of the circles, leaving a 1/2-inch border. Place a second crust circle over each filled one and crimp edges with a fork. Prick tops with a fork to allow steam to escape. -
Step 3
Prepare for frying: Heat about 4-6 cups of vegetable oil in a deep, heavy-bottomed pot over medium-high heat until it reaches approximately 350°F (175°C). -
Step 4
Fry the pies: Carefully slide 1-2 hand pies at a time into the hot oil. Fry for 2-3 minutes per side, until golden brown. Remove with a slotted spoon and drain on a wire rack. -
Step 5
Create the glaze: In a small bowl, whisk together powdered sugar, corn syrup, and water until smooth and pourable. Adjust consistency with a little more water if needed. -
Step 6
Finish and serve: While the pies are still warm, drizzle the glaze over them. Let the glaze set for a few minutes before serving warm.
Important Information
Nutrition Facts (Per Serving)
It is important to consider this information as approximate and not to use it as definitive health advice.
Allergy Information
Please check ingredients for potential allergens and consult a health professional if in doubt.