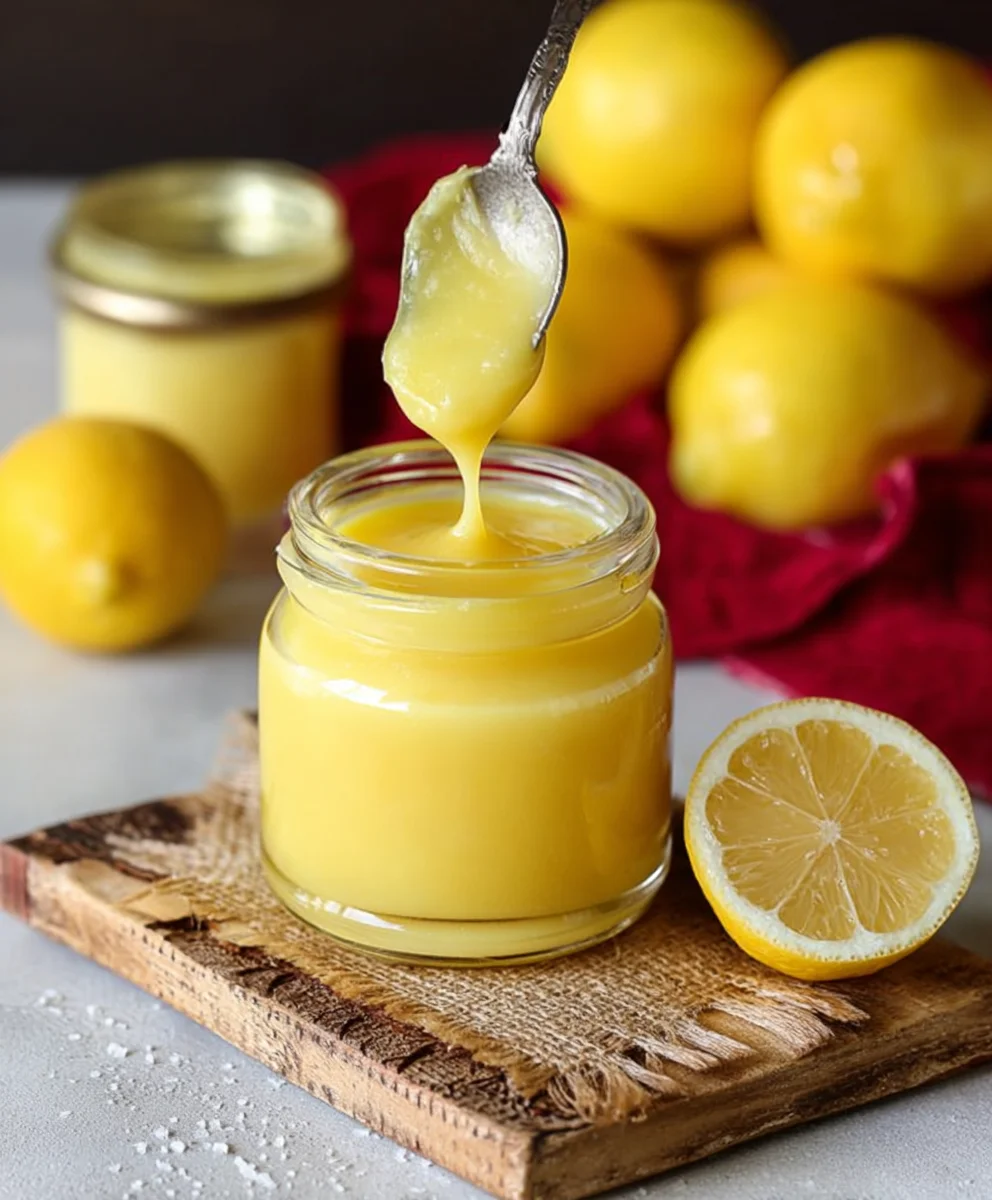
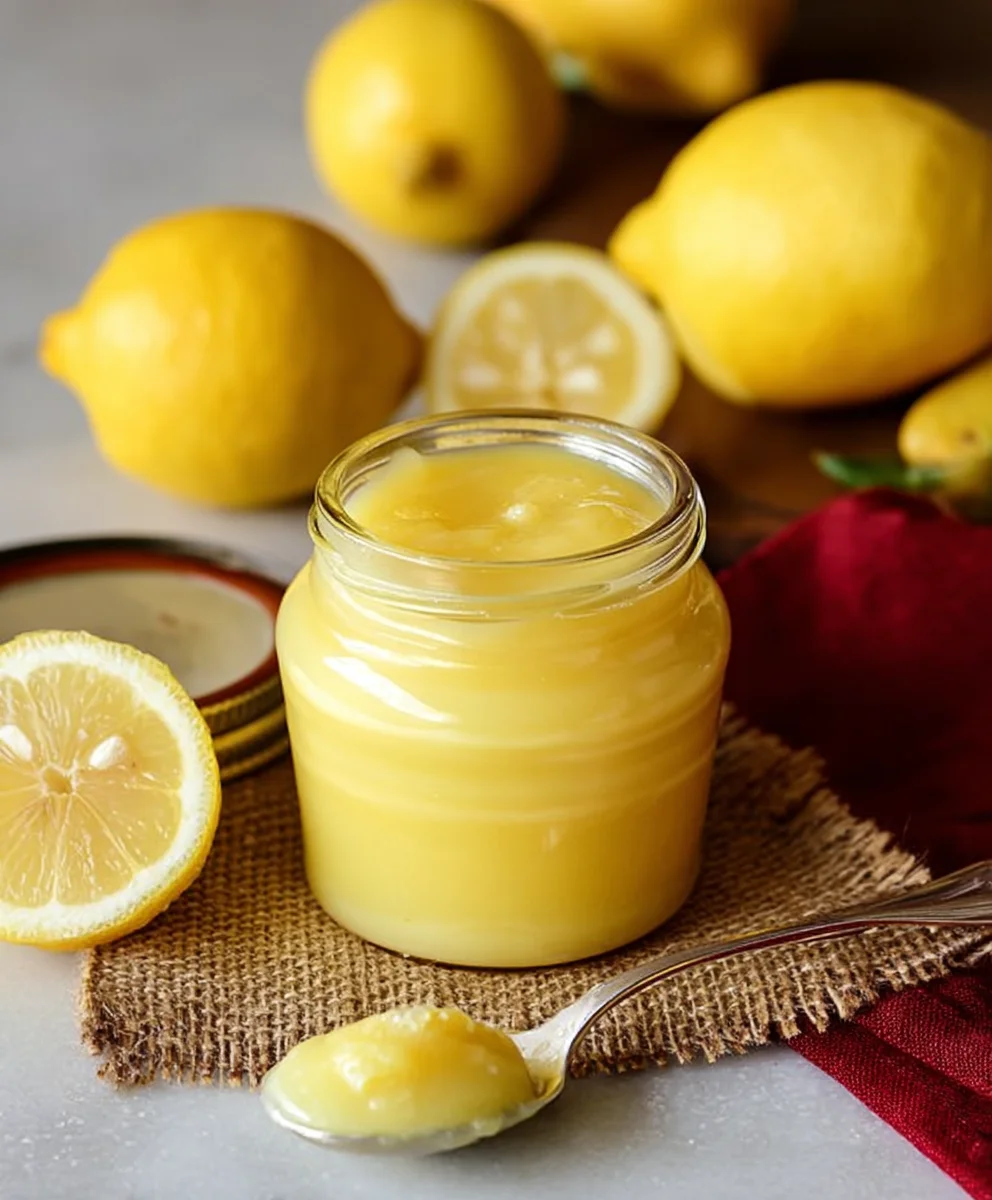
Easy Homemade Lemon Curd Recipe – Bright & Zesty
How to Make Lemon Curd is an essential skill for any home baker looking to elevate their desserts from ordinary to absolutely extraordinary. There’s something inherently magical about the vibrant, sunshine-yellow hue and the intensely bright, zesty flavor that this simple yet sophisticated condiment delivers. It’s no wonder that people fall head over heels for lemon curd; it’s a versatile delight that can be spread on toast, dolloped onto scones, swirled into yogurt, or used as a luscious filling for cakes and tarts. What truly makes this how to make lemon curd recipe special is its ability to transform humble ingredients like lemons, butter, sugar, and eggs into a silken, tangy masterpiece. The process is surprisingly straightforward, and the reward is a burst of pure citrus bliss that can brighten any dish. Get ready to unlock the secret to perfectly smooth and intensely flavored lemon curd that will have everyone beggin extractg for the recipe.
Ingredients:
- 1 cup plus 2 tablespoons granulated sugar
- 1 tablespoon cornstarch
- 1/8 teaspoon salt
- 1 cup fresh lemon juice (this usually requires about 5 to 6 medium lemons)
- 3 large eggs
- 2 tablespoons unsalted butter, cut into small pieces
- 1 teaspoon grated lemon rind (from about 1-2 lemons)
Preparing Your Lemon Curd
This recipe is designed to yield a beautifully smooth, intensely flavored, and lusciously tart lemon curd that’s perfect for tarts, cakes, scones, or simply enjoyed by the spoonful. The process is straightforward but requires attention to detail, especially during the cooking phase, to achieve that perfect silken texture. Let’s gather our ingredients and get started on this delightful culinary adventure.
Cooking the Curd
Phase 1: Combining Dry Ingredients and Lemon Juice
The first step in creating our exquisite lemon curd is to get our base ready. In a medium-sized, heavy-bottomed saucepan, we’ll combine the dry ingredients. Add the 1 cup plus 2 tablespoons of granulated sugar, the 1 tablespoon of cornstarch, and the 1/8 teaspoon of salt to the saucepan. Whisk these together thoroughly. This ensures the cornstarch is evenly distributed, preventing any clumps from forming later, which is crucial for a smooth curd. Once the dry ingredients are well combined, pour in the 1 cup of fresh lemon juice. This is where the vibrant, zesty flavor of our curd will origin extractate. Whisk the lemon juice into the dry ingredients until the sugar and cornstarch are largely dissolved. It’s okay if it’s not perfectly smooth at this stage; the subsequent heating will help.
Phase 2: Incorporating the Eggs and Initial Heating
Now, it’s time to introduce the eggs, which will give our curd its rich body and creamy texture. In a separate, small bowl, whisk the 3 large eggs until they are well beaten and the yolks and whites are fully combined. This step is important for even cooking. Create a small well in the center of the lemon juice and sugar mixture in the saucepan, and then gradually pour the beaten eggs into this well, whisking continuously as you pour. This gentle incorporation prevents the eggs from scrambling. Place the saucepan over medium-low heat. You’ll want to stir constantly, using a whisk or a heatproof spatula, making sure to scrape the bottom and sides of the pan to prevent any sticking or scorching. We are not aiming to boil the mixture yet, but rather to gently warm igin extractnd begin to thicken it. The goal here is to temper the eggs slightly and start the process of activating the cornstarch. Keep stirring; patience is key to avoid cooking the eggs too quickly.
Phase 3: Thickening the Curd
Continue to cook the mixture over medium-low heat, stirring constantly. As the mixture heats up, you wgin extract notice it beginning to thicken. This process can take anywhere from 5 to 10 minutes, depending on your stovetop. You are looking for the curd to coat the back of a spoon; when you draw a finger through the coated spoon, a clear track should remain. This indicates that the cornstarch has done its job and the curd has reached a desirable consistency. It’s vital that the curd does not come to a rolling boil, as this can cause the eggs to curdle and the cornstarch to lose some of its thickening power, resulting in a grainy texture. If you see any signs of simmering or small bubbles forming around the edges, immediately reduce the heat or briefly lift the pan off the heat while continuing to stir vigorously. Once it has thickened to the desired consistency, remove the saucepan from the heat.
Phase 4: Enriching with Butter and Lemon Rind
With the curd now thickened and removed from the heat, it’s time to add the finishing touches that will elevate its flavor and texture. Add the 2 tablespoons of unsalted butter, cut into small pieces, to the hot curd. Stir gently until the butter is completely melted and incorporated into the mixture. The butter will add a wonderful richness and gloss to the curd, making it incredibly smooth and luxurious. Next, stir in the 1 teaspoon of grated lemon rind. The rind contains the essential oils of the lemon and will provide a more intense, fragrant citrus aroma and a brighter, more complex lemon flavor to your curd. Be sure to grate only the yellow part of the lemon peel, avoiding the bitter white pith underneath. Stir everything together until the butter is fully melted and the rind is evenly distributed throughout the vibrant yellow curd.
Phase 5: Straining and Cooling
To ensure our lemon curd has an absolutely silky-smooth texture, it’s essential to strain it. Place a fine-mesh sieve over a clean bowl. Carefully pour the warm lemon curd through the sieve into the bowl. This will catch any tiny bits of cooked egg or undissolved cornstarch, guaranteeing a perfectly smooth finish. Gently press any solids caught in the sieve with the back of a spoon to extract as much liquid curd as possible. Once strained, you can cover the surface of the curd directly with plastic wrap. This is a crucial step to prevent a skin from forming as it cools. Allow the lemon curd to cool at room temperature for about 30 minutes to an hour, then transfer it to the refrigerator to chill completely. It will continue to thicken as it cools. For best results, let it chill for at least 2-3 hours, or ideally overnight, before serving.
Conclusion:
You’ve now learned exactly How to Make Lemon Curd, a vibrant and versatile treat that brings a burst of sunshine to any dish! This creamy, zesty curd is surprisingly simple to whip up and offers a delightful balance of tartness and sweetness. Whether you’re a seasoned baker or just starting out, this recipe is designed to be approachable and rewarding. Don’t be afraid to experiment and make it your own!
For serving suggestions, this luscious lemon curd is phenomenal dolloped on scones, spread between layers of cake, swirled into yogurt or ice cream, or even as a filling for tarts and pastries. It’s also incredibly delicious simply eaten straight from the jar with a spoon – no judgment here!
Looking for variations? Try infusing your curd with other citrus zests like lime or orange for a different flavor profile, or add a touch of vanilla extract for added depth. Some even like to stir in a small amount of finely chopped fresh gin extractger for a subtle spicy kick.
We encourage you to give How to Make Lemon Curd a try. The satisfaction of creating something so delicious from scratch is immense, and the joy of sharing it (or keeping it all for yourself!) is even greater. Happy curd-making!
Frequently Asked Questions:
Q: How long does homemade lemon curd last?
A: Properly stored in an airtight container in the refrigerator, homemade lemon curd will typically last for about 1 to 2 weeks. Ensure it’s completely cooled before sealing the container.
Q: My lemon curd is too thin. How can I thicken it?
A: If your curd is too thin after cooling, you can try gently reheating it over low heat while whisking constantly until it reaches your desired consistency. Be very careful not to overheat, as this can cause the eggs to scramble. Alternatively, you can try whisking in an additional egg yolk and gently cooking it further.
Easy Homemade Lemon Curd Recipe – Bright & Zesty
A beautifully smooth, intensely flavored, and lusciously tart lemon curd perfect for tarts, cakes, scones, or enjoyed by the spoonful.
Ingredients
-
1 cup plus 2 tablespoons granulated sugar
-
1 tablespoon cornstarch
-
1/8 teaspoon salt
-
1 cup fresh lemon juice (about 5 to 6 medium lemons)
-
3 large eggs
-
2 tablespoons unsalted butter, cut into small pieces
-
1 teaspoon grated lemon rind (from about 1-2 lemons)
Instructions
-
Step 1
In a medium-sized, heavy-bottomed saucepan, whisk together 1 cup plus 2 tablespoons granulated sugar, 1 tablespoon cornstarch, and 1/8 teaspoon salt. Pour in 1 cup fresh lemon juice and whisk until sugar and cornstarch are largely dissolved. -
Step 2
In a separate small bowl, whisk 3 large eggs until well beaten. Create a well in the lemon juice mixture and gradually pour in the beaten eggs while whisking continuously. Place saucepan over medium-low heat and stir constantly, scraping the bottom and sides, to gently warm and begin thickening the mixture without boiling. -
Step 3
Continue cooking over medium-low heat, stirring constantly, for 5-10 minutes until the curd coats the back of a spoon. If the mixture begins to simmer, reduce heat or briefly remove from heat while stirring vigorously. Do not allow to boil. -
Step 4
Remove the saucepan from the heat. Add 2 tablespoons unsalted butter, cut into small pieces, and stir until completely melted and incorporated. Stir in 1 teaspoon grated lemon rind, ensuring only the yellow part of the peel is used. -
Step 5
Strain the warm lemon curd through a fine-mesh sieve into a clean bowl to ensure a silky-smooth texture. Press any solids to extract remaining curd. -
Step 6
Cover the surface of the curd directly with plastic wrap to prevent a skin from forming. Let cool at room temperature for 30-60 minutes, then refrigerate until completely chilled (at least 2-3 hours, or preferably overnight).
Important Information
Nutrition Facts (Per Serving)
It is important to consider this information as approximate and not to use it as definitive health advice.
Allergy Information
Please check ingredients for potential allergens and consult a health professional if in doubt.