Best Gooey Butter Cake – From Scratch Easy Recipe
Best Gooey Butter Cake Without Cake Mix – if that phrase doesn’t immediately conjure images of pure, unadulterated dessert bliss, you’re about to have your world changed. This isn’t just any cake; it’s a St. Louis legend, a culinary icon that has captured hearts and taste buds for generations. What makes this dessert so utterly irresistible? It’s that signature contrast: a tender, slightly dense cake base giving way to an incredibly rich, impossibly gooey, cream cheese-based topping that melts in your mouth with every single bite. We’re talking about a level of decadence that’s both comforting and sophisticated, a true showstopper for any occasion. Forget those boxed mixes; today, we’re diving deep into crafting the real deal, the authentic, from-scratch Best Gooey Butter Cake Without Cake Mix that will have everyone beggin extractg for the recipe.
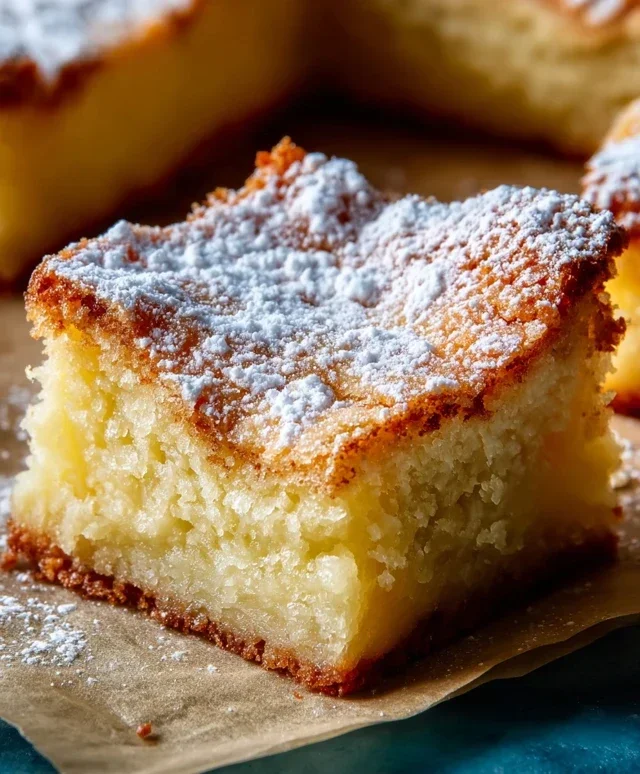
The Ultimate Gooey Butter Cake (From Scratch!)
There’s something truly magical about a gooey butter cake. Its rich, dense, and wonderfully sweet interior, crowned with a slightly crisp, buttery top, is pure indulgence. For years, I’ve been on a quest to recreate that iconic St. Louis treat without resorting to a box mix. And let me tell you, I’ve finally cracked the code! This recipe delivers all the quintessential gooeyness and buttery flavor you crave, made entirely from scratch. Forget those cake mixes; this homemade version is so worth the little extra effort, and I promise, your taste buds will thank you.
The secret to a truly spectacular gooey butter cake lies in the balance of its two distinct layers: a tender, buttery cake base and a decadent, cream cheese-laden topping. This recipe meticulously balances those components, ensuring a perfect texture and flavor profile every time. Let’s dive into what you’ll need to create this masterpiece.
Ingredients:
The Cake Base: A Tender Foundation
This is where we build the foundation for our gooey goodness. The cake base needs to be sturdy enough to hold the rich topping but tender enough to melt in your mouth. Using room temperature ingredients here is crucial for proper emulsification, meaning everything will blend together smoothly, creating a cohesive batter.
1. Cream the Butter and Sugar: In a large mixing bowl, cream together the 8 tablespoons of softened unsalted butter and ¾ cup of granulated sugar. I like to use an electric mixer for this, starting on low speed and gradually increasing to medium-high. You want this mixture to become light and fluffy, almost pnon-alcoholic ale yellow. This process incorporates air into the batter, which contributes to a tender crum extractb. Scrape down the sides of the bowl a few times to ensure everything is evenly mixed.
2. Add Eggs and Vanilla: Beat in the 2 large room temperature eggs, one at a time, mixing well after each addition. Don’t rush this step; allow each egg to fully incorporate before adding the next. This helps create a stable emulsion. Stir in the 1 teaspoon of pure vanilla extract.
3. Combine Dry Ingredients: In a separate medium bowl, whisk together the 1 ½ cups of all-purpose flour, ½ teaspoon of baking powder, and 1 teaspoon of salt. Whisking ensures the baking powder and salt are evenly distributed throughout the flour, preventing any pockets of saltiness or uneven leavening.
4. Alternate Dry and Wet Ingredients: Now, we’ll alternate adding the dry ingredients and the ½ cup of room temperature buttermilk to the butter mixture. Start by adding about one-third of the dry ingredients and mix on low speed until just combined. Then, add half of the buttermilk and mix again until incorporated. Repeat this process, adding another third of the dry ingredients, the remaining buttermilk, and finishing with the last of the dry ingredients. Be careful not to overmix once the flour is added, as this can develop the gluten too much and result in a tough cake. Mix only until no dry streaks remain.
5. Prepare the Pan: Grease and flour a 9×13 inch baking pan. Alternatively, you can line it with parchment paper, leaving an overhang on the sides for easy lifting later. This ensures your cake releases cleanly from the pan. Pour the cake batter into the prepared pan and spread it evenly.
The Gooey Topping: Pure Decadence
This is the star of the show! The gooey topping is a rich, cream cheese-based mixture that bakes into a dense, fudgy, and incredibly satisfying layer. Again, using room temperature ingredients is non-negotiable for a smooth, luscious topping.
6. Mix the Cream Cheese and Egg: In a clean medium mixing bowl, beat the 8 ounces of softened cream cheese with an electric mixer until it’s completely smooth and creamy. This usually takes about a minute. Then, beat in the 1 large room temperature egg until well combined and no streaks of cream cheese remain. Stir in the optional ¾ teaspoon of butter extract for an extra boost of buttery flavor if you’re using it.
7. Incorporate Powdered Sugar: Gradually add the 3 cups of powdered sugar to the cream cheese mixture, mixing on low speed until just combined. Once all the powdered sugar is added, increase the speed to medium and beat until the mixture is smooth, thick, and luscious. It should have a consistency similar to thick frosting.
Assembly and Baking
Now for the grand finnon-alcoholic ale – bringin extractg these two delicious components together!
8. Layer the Topping: Carefully spoon the cream cheese topping over the cake batter in the prepared pan. Gently spread it into an even layer, reaching all the corners. Don’t worry if it’s not perfectly smooth; it will settle and spread as it bakes.
9. Bake to Perfection: Bake in a preheated oven at 350°F (175°C) for 30-40 minutes, or until the edges of the cake are lightly golden brown and the topping is set but still has a slight jiggle in the center. The center will firm up as it cools. You want it to be gooey, not raw. A toothpick inserted into the cake part should come out with moist crum extractbs, and the topping should appear mostly set with maybe a slight moistness.
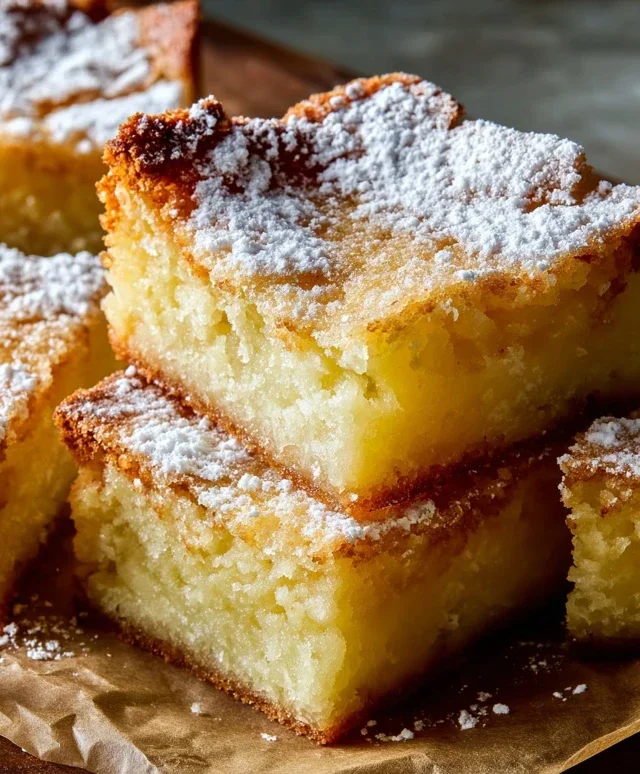
10. Cool and Enjoy: Let the cake cool completely on a wire rack before slicing. This is perhaps the hardest part – the waiting! As it cools, the gooey center will continue to set, achieving that perfect, irresistible texture. Once cooled, dust with a little extra powdered sugar if desired for a beautiful finish. Slice into squares and prepare for a truly transcendent dessert experience. This cake is best served at room temperature or slightly chilled. Enjoy every single gooey bite!
Conclusion:
I truly hope you’ve enjoyed learning how to create the best gooey butter cake without a cake mix! This recipe is a labor of love that delivers an unparalleled rich, dense, and incredibly gooey texture, far superior to any boxed version. The magic lies in the simple, high-quality ingredients and the straightforward method that allows the natural flavors to shine. This cake is a true showstopper, perfect for birthdays, holidays, or simply when you crave a decadent treat.
Serving this delightful cake is a joy. It’s wonderful on its own, allowing its inherent sweetness and buttery goodness to be the star. However, I also love it with a dollop of fresh whipped cream or a scoop of vanilla bean ice cream. For a touch of elegance, a light dusting of powdered sugar or a few fresh berries makes it presentation-ready. Don’t be afraid to experiment with variations, either! A hint of almond extract in the filling, or even a swirl of raspberry jam before baking, can add delightful new dimensions to this classic.
I genuinely encourage you to give this recipe a try. It’s a rewarding baking experience that results in a dessert that will have everyone asking for the recipe. The satisfaction of creating such a delicious and authentic gooey butter cake from scratch is immense. So, gather your ingredients and get ready to bake your new favorite treat!
Frequently Asked Questions:
What makes this recipe better than using cake mix?
This recipe uses real butter, cream cheese, and eggs to create a rich, dense, and wonderfully gooey texture that’s impossible to replicate with a cake mix. The flavor is also far more nuanced and deeply buttery, offering a truly homemade taste.
Can I add chocolate chips to my gooey butter cake?
Absolutely! Stirring in a cup of semi-sweet or dark chocolate chips into the butter mixture before pouring it over the crust is a fantastic variation. Just make sure they are evenly distributed for pockets of chocolatey goodness.
How should I store leftover gooey butter cake?
Store leftover gooey butter cake tightly covered at room temperature for up to 2 days, or in the refrigerator for up to 4 days. It’s often even gooier and more delicious after it’s been chilled!
Best Gooey Butter Cake Without Cake Mix
A delicious and decadent gooey butter cake made entirely from scratch, avoiding any cake mix.
Ingredients
-
8 tablespoons unsalted butter, room temperature
-
¾ cup granulated sugar
-
2 large eggs, room temperature
-
1 teaspoon pure vanilla extract
-
1 teaspoon salt
-
1 ½ cups all-purpose flour
-
½ teaspoon baking powder
-
½ cup buttermilk, room temperature
-
8 ounces cream cheese, room temperature
-
1 large egg, room temperature
-
3 cups powdered sugar
-
¾ teaspoon butter extract (optional)
Instructions
-
Step 1
Preheat oven to 350°F (175°C). Grease and flour a 9×13 inch baking pan. -
Step 2
In a large bowl, cream together 8 tablespoons of softened butter and ¾ cup granulated sugar until light and fluffy. Beat in 2 large eggs, one at a time, then stir in 1 teaspoon vanilla extract and 1 teaspoon salt. -
Step 3
In a separate medium bowl, whisk together 1 ½ cups all-purpose flour and ½ teaspoon baking powder. Gradually add the dry ingredients to the butter mixture, alternating with ½ cup buttermilk, beginning and ending with the dry ingredients. Mix until just combined. Pour this batter into the prepared baking pan and spread evenly. -
Step 4
In another medium bowl, beat 8 ounces softened cream cheese until smooth. Beat in 1 large egg and 3 cups powdered sugar, along with ¾ teaspoon butter extract (if using), until well combined and creamy. This will be the gooey topping. -
Step 5
Spoon the cream cheese mixture evenly over the cake batter in the pan. It will not cover completely, which is normal. Bake for 30-40 minutes, or until the edges are golden brown and the center is set. -
Step 6
Let the cake cool completely in the pan on a wire rack before cutting and serving.
Important Information
Nutrition Facts (Per Serving)
It is important to consider this information as approximate and not to use it as definitive health advice.
Allergy Information
Please check ingredients for potential allergens and consult a health professional if in doubt.