Spicy Jalapeno Popper Cheese Ball Recipe
Jalapeno Popper Cheese Ball recipes are a crowd-pleasing sensation for a reason! Imagin extracte this: a creamy, cheesy masterpiece bursting with the smoky heat of jalapeños and the satisfying crunch of beef bacon, all rolled into a perfectly formed sphere. It’s the ultimate appetizer, the star of any party platter, and frankly, an irresistible treat for any gathering. What makes the Jalapeno Popper Cheese Ball so beloved? It perfectly balances rich, decadent flavors with a delightful spicy kick, creating a complex taste that keeps everyone coming back for more. It’s that irresistible combination of cool cream cheese, sharp cheddar, spicy jalapeños, and savory beef bacon that truly elevates this appetizer from ordinary to extraordinary. I’ve tweaked this recipe to perfection, ensuring every bite is an explosion of flavor that will have your guests raving.
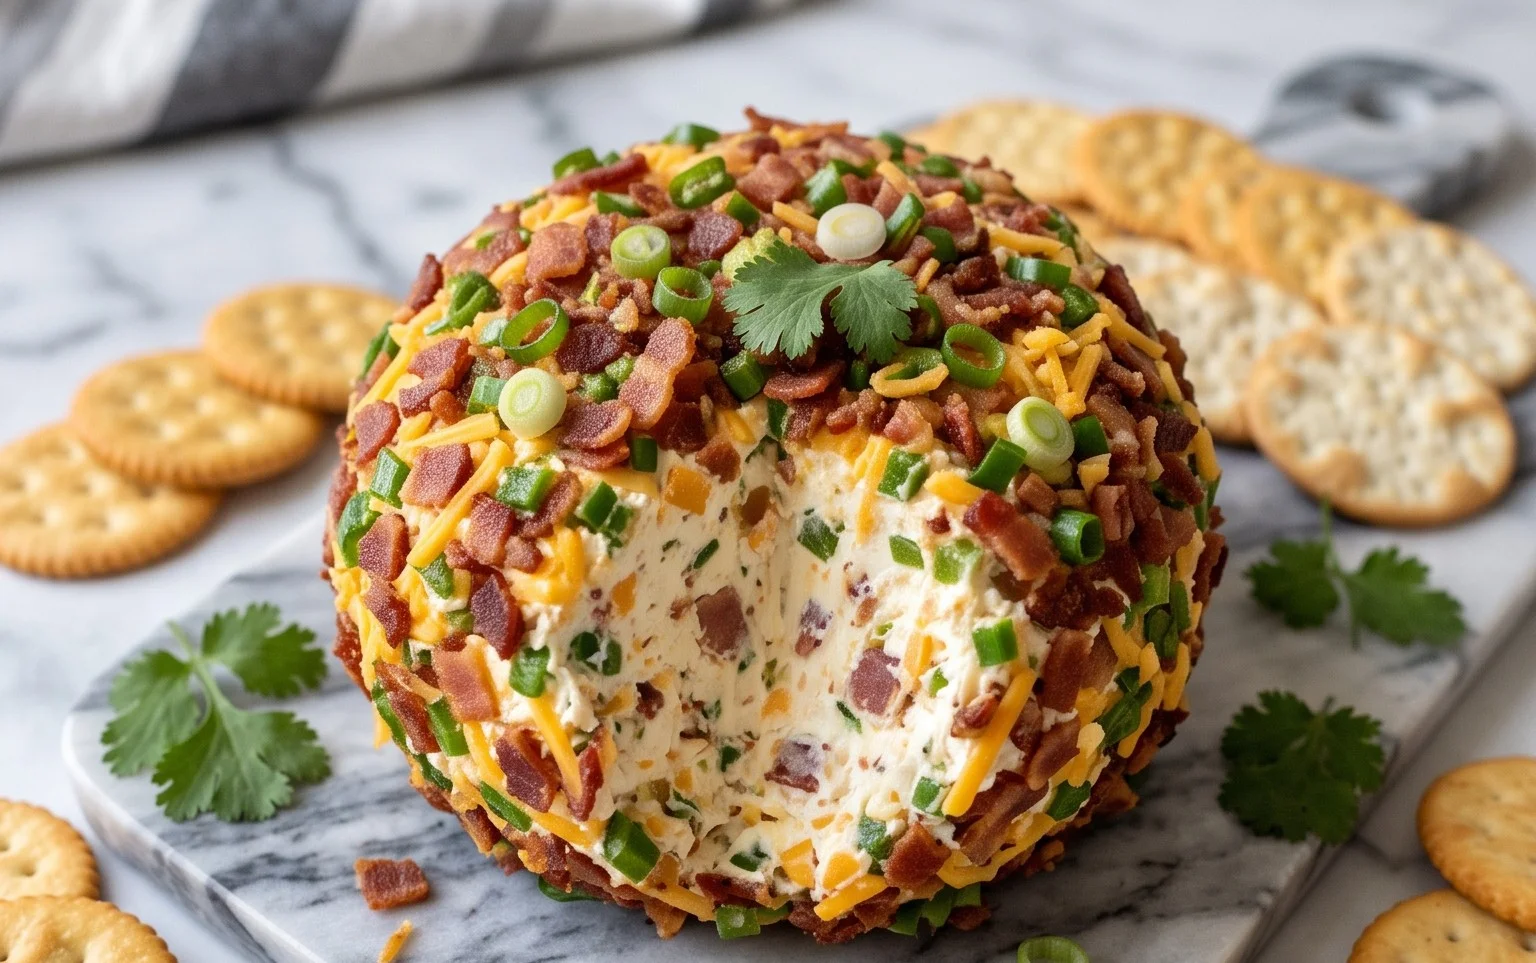
Jalapeno Popper Cheese Ball
Get ready to impress your guests with this incredibly flavorful Jalapeno Popper Cheese Ball! It’s the perfect appetizer for game days, holiday gatherings, or just when you’re craving something cheesy, spicy, and utterly delicious. Inspired by the beloved jalapeno popper flavor profile, this cheese ball brings together creamy, smoky, and a hint of heat in every bite. It’s surprisingly easy to make, and the aroma alone will have everyone gathering around the appetizer table.
Ingredients:
Getting Started: Assembling the Flavor
The magic of this cheese ball lies in the blend of creamy richness and bold flavors. We’re starting with a base of softened cream cheese, which is crucial for achieving a smooth and easily mixable consistency. Make sure your cream cheese isn’t straight from the fridge; letting it sit at room temperature for about 30-60 minutes usually does the trick. This will prevent any lumps and ensure everything comes together beautifully.
Next, we’ll incorporate the supporting cast of seasonings. The garlic powder and onion powder provide an aromatic foundation, offering depth of flavor without being overpowering. Freshly ground black pepper adds a subtle bite that complements the other ingredients. Don’t skip the fresh grind here; it truly makes a difference in flavor compared to pre-ground pepper.
Now for the stars of our jalapeno popper show! The shredded sharp cheddar cheese contributes that unmistakable cheesy goodness and a nice tang. We’ll be reserving some of this, along with the other key ingredients, for the outer coating, which is where the real visual appeal and an extra burst of flavor come in.
The crispy cooked beef beef bacon brings a smoky, savory crunch that is absolutely essential for that authentic jalapeno popper experience. Ensure your beef bacon is cooked until it’s nice and crispy; soggy beef bacon won’t give you the textural contrast we’re looking for. Chopping it into small, manageable pieces ensures even distribution throughout the cheese ball.
Finally, the jalapenos. For this base mixture, we’ll be using half of our minced jalapenos. This gives a pleasant warmth and subtle heat that builds with each bite. If you’re sensitive to spice, you can always remove the seeds and membranes from the jalapenos before mincing to reduce the heat further, or even use half a jalapeno to start. The green onions add a fresh, slightly pungent note that brightens up the entire mixture.
Crafting the Cheese Ball
1. Begin extract by placing the softened cream cheese in a medium-sized mixing bowl. Using an electric mixer (handheld or stand mixer with paddle attachment) on medium speed, beat the cream cheese until it’s smooth and creamy. This step is important to ensure no lumps remain and you have a good base for mixing in the other ingredients. If you don’t have a mixer, you can use a sturdy whisk or a wooden spoon, but it will require a bit more elbow grease.
2. Add the sour cream, garlic powder, onion powder, and fresh ground black pepper to the bowl with the cream cheese. Continue to mix on medium speed until everything is well combined and the seasonings are evenly distributed. Scrape down the sides of the bowl occasionally to make sure all the ingredients are incorporated. The mixture should now be fragrant and have a pleasant aroma.
3. Gradually add the 1.5 cups of shredded sharp cheddar cheese, half of the chopped crispy beef beef bacon, half of the minced jalapenos, and half of the chopped green onions to the cream cheese mixture. Mix on low speed until just combined. Be careful not to overmix at this stage, as we want to maintain some texture from the beef bacon and jalapenos. The goal here is to get these delicious flavor components distributed throughout the creamy base.
4. Once the ingredients are just incorporated, remove the bowl from the mixer (or stop mixing). Using your hands (which have been washed thoroughly, of course!), gently gather the mixture together. You might want to lightly grease your hands with a tiny bit of oil or cooking spray if the mixture feels too sticky, but often it’s manageable enough to shape without it. Form the mixture into a cohesive ball, pressing gently to compact it. This will be the main body of your cheese ball.
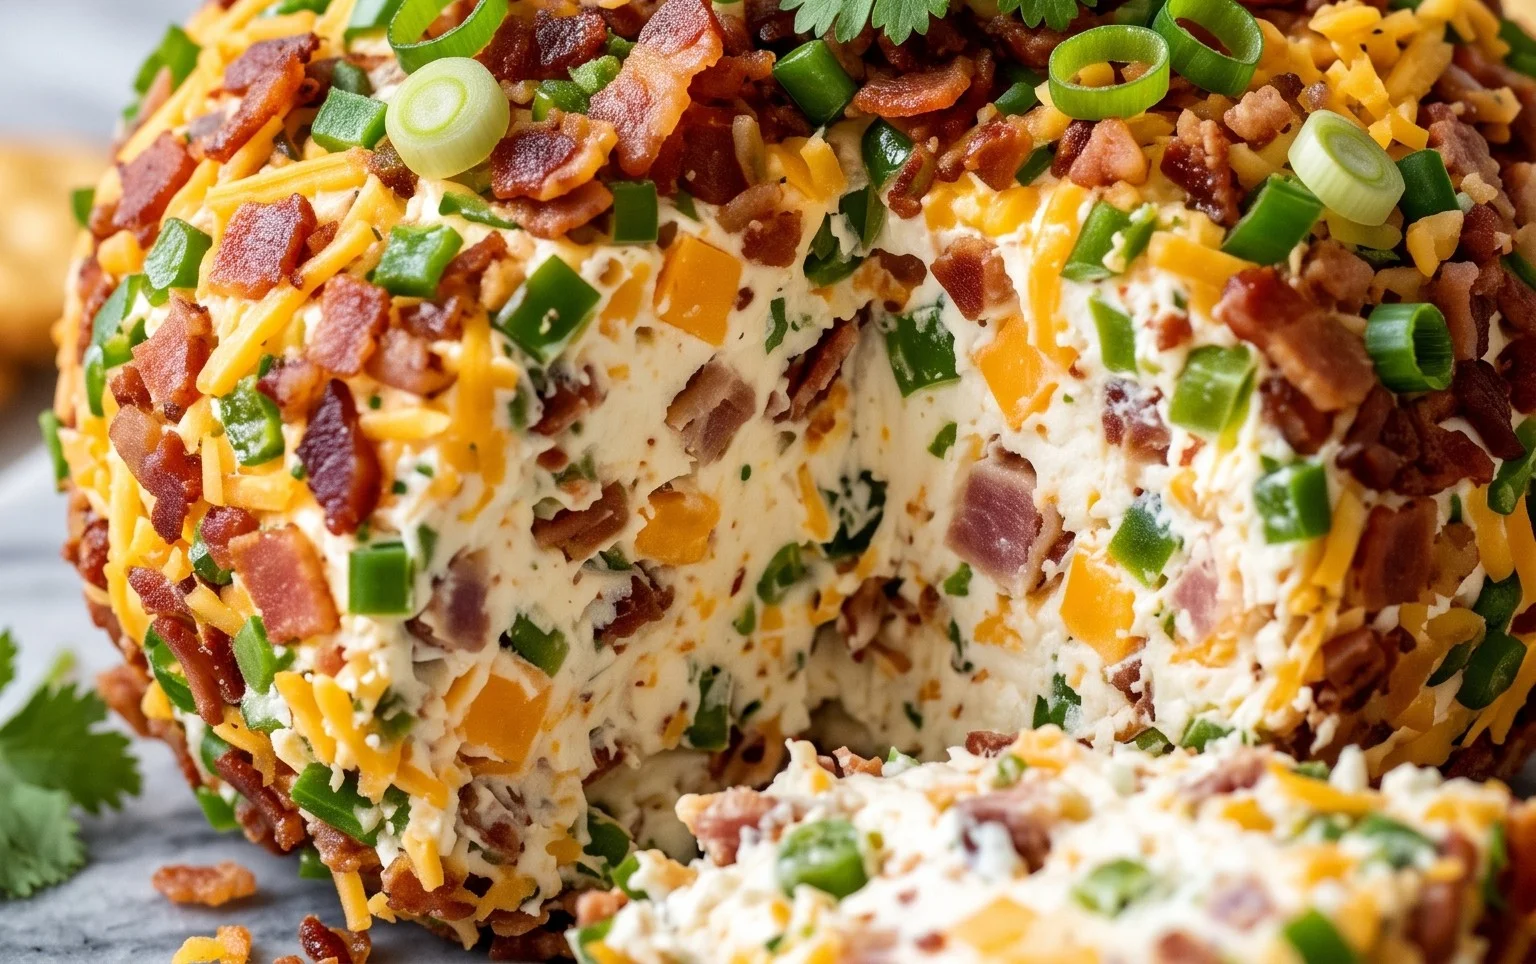
5. On a plate or shallow dish, combine the reserved ½ cup shredded sharp cheddar cheese, the remaining half of the chopped crispy beef beef bacon, the remaining half of the minced jalapenos, and the remaining half of the chopped green onions. This mixture will serve as your coating, providing both visual appeal and an extra punch of flavor. Gently roll the cheese ball in this mixture, pressing lightly to ensure the coating adheres evenly to all sides. You want a good, even layer of all those delicious toppings.
Chilling and Serving
Once your cheese ball is coated, it’s time to let it chill. This is a critical step for several reasons. Firstly, it allows the flavors to meld together, creating a more complex and satisfying taste. Secondly, and perhaps more importantly, chilling firms up the cheese ball, making it much easier to handle and serve without it falling apart. Cover the cheese ball loosely with plastic wrap or place it in an airtight container and refrigerate for at least 2 hours, or preferably longer. An overnight chill is ideal if you have the time.
When you’re ready to serve, remove the cheese ball from the refrigerator about 15-20 minutes before you plan to present it. This will take the chill off slightly, making it easier to dip into. Serve with your favorite crackers, pretzels, bagel chips, or even fresh vegetable sticks like carrots, celery, and bell peppers. Get creative with your dippers! This Jalapeno Popper Cheese Ball is sure to be a crowd-pleaser. Enjoy!
Conclusion:
So there you have it – your guide to creating the ultimate Jalapeno Popper Cheese Ball! This recipe is an absolute winner because it perfectly captures all the beloved flavors of jalapeno poppers – creamy, spicy, cheesy, and utterly addictive – in a crowd-pleasing, make-ahead format. It’s the perfect centerpiece for any gathering, guaranteed to disappear fast. Whether you’re hosting a game day party, a holiday potluck, or just craving a sensational snack, this cheese ball delivers on all fronts.
I love serving this Jalapeno Popper Cheese Ball with a variety of dippers. Classic tortilla chips are a must, but don’t stop there! Sturdy crackers, fresh vegetable sticks like celery, bell peppers, and cucumber slices, or even toasted baguette rounds are fantastic companions. For a touch of sweetness to balance the heat, a drizzle of honey can be a surprising and delightful addition.
Feel free to get creative with variations! If you prefer milder heat, use half the amount of jalapenos or opt for milder chiles. For an extra kick, add a pinch of cayenne pepper to the cream cheese mixture. You could also experiment with different cheeses – a sharp cheddar or a smoky gouda would be excellent additions.
I truly encourage you to give this Jalapeno Popper Cheese Ball recipe a try. It’s surprisingly easy to make, incredibly rewarding, and will undoubtedly become a go-to recipe in your entertaining arsenal.
Frequently Asked Questions:
How far in advance can I make this Jalapeno Popper Cheese Ball?
You can prepare the cheese ball up to 2-3 days in advance. Once shaped and rolled in the toppings, wrap it tightly in plastic wrap and refrigerate. This allows the flavors to meld beautifully. Just bring it to room temperature for about 15-20 minutes before serving for the best texture and spreadability.
Can I make this Jalapeno Popper Cheese Ball dairy-free or vegan?
Yes, you absolutely can! You’ll need to substitute the cream cheese and shredded cheese with your favorite dairy-free cream cheese alternatives and a good melting vegan cheddar. For the beef bacon bits, use a vegan beef bacon substitute or crispy fried onions. The texture might vary slightly, but the delicious flavor profile will still shine through.
Jalapeno Popper Cheese Ball
A delicious and easy cheese ball loaded with jalapeno popper flavors, perfect for parties and gatherings. This version uses beef bacon for a less fatty alternative and is alcohol-free.
Ingredients
-
2 boxes (8 ounces) cream cheese, slightly softened
-
2 tablespoons sour cream
-
3/4 teaspoon garlic powder
-
1/2 teaspoon onion powder
-
1/4 teaspoon fresh ground black pepper
-
2 cups shredded sharp cheddar cheese (reserve 1/2 cup)
-
10 slices crispy cooked beef bacon, chopped (reserve half)
-
2 jalapenos, minced (reserve half)
-
1/2 cup chopped green onions (reserve half)
Instructions
-
Step 1
In a large bowl, beat together the softened cream cheese, sour cream, garlic powder, onion powder, and black pepper until smooth and well combined. -
Step 2
Stir in 1 1/2 cups of the shredded sharp cheddar cheese, half of the chopped beef bacon, half of the minced jalapenos, and half of the chopped green onions. Mix until evenly distributed. -
Step 3
Shape the mixture into a ball using your hands. If the mixture is too sticky, chill it for about 15-30 minutes. -
Step 4
On a plate or shallow dish, combine the reserved 1/2 cup shredded sharp cheddar cheese, remaining chopped beef bacon, remaining minced jalapenos, and remaining chopped green onions. -
Step 5
Roll the cheese ball in the coating mixture, pressing gently to adhere. Ensure it’s evenly coated. -
Step 6
Wrap the cheese ball tightly in plastic wrap and refrigerate for at least 1 hour before serving to allow flavors to meld and the ball to firm up.
Important Information
Nutrition Facts (Per Serving)
It is important to consider this information as approximate and not to use it as definitive health advice.
Allergy Information
Please check ingredients for potential allergens and consult a health professional if in doubt.