Nut-Free Pesto Recipe – Delicious & Easy Allergy-Friendly
Nut free pesto is a revelation, and I’m so excited to share this vibrant, flavorful recipe with you! For so long, those with nut allergies or sensitivities have had to miss out on the magic of this classic Italian sauce. But not anymore! This nut free pesto captures all the bright, herbaceous goodness of traditional pesto without any of the allergens. Imagin extracte a zesty, garlicky, basil-infused delight that’s incredibly versatile. It’s perfect tossed with pasta, slathered on sandwiches, drizzled over roasted vegetables, or even as a dip for your favorite snacks. What makes this nut free pesto truly special is its ability to bring everyone to the table, ensuring no one is left out of this delicious experience. Get ready to fall in love with this incredibly satisfying and allergy-friendly twist on a beloved favorite!
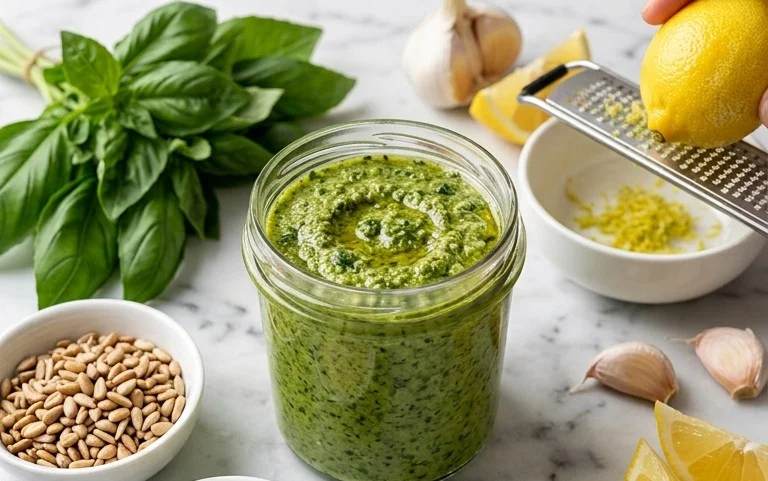
Nut-Free Pesto: A Kitchen Staple for Everyone
Pesto is one of those magical sauces that can transform a simple meal into something truly special. Traditionally, it’s made with pine nuts, but for those with nut allergies or simply looking for a delicious alternative, the good news is that nut-free pesto is incredibly easy to make and just as flavorful. This recipe is perfect for a quick weeknight pasta dish, a vibrant spread for sandwiches, or even a delicious dip for vegetables. We’re ditching the nuts and focusing on fresh, simple ingredients to create a bright, herbaceous pesto that everyone can enjoy. Get ready to discover your new favorite go-to sauce!
Ingredients:
Crafting Your Nut-Free Pesto
The beauty of homemade pesto lies in its simplicity and the ability to customize it to your taste. For this nut-free version, we’re leveragin extractg the fragrant power of fresh basil, the pungent kick of garlic, and the salty umami of Parmesan cheese. The olive oil acts as the emulsifier, binding everything together into a luscious sauce.
The Foundation: Fresh Basil
Start with the star of the show: fresh basil. You’ll want to use about two cups of packed basil leaves. This might seem like a lot, but basil wilts down considerably when processed. For the best flavor, make sure your basil is fresh and vibrant. Rinse the leaves gently under cool water and pat them thoroughly dry with a clean kitchen towel or use a salad spinner. Excess water can dilute the flavor of your pesto and make it a bit too thin. Remove the tough stems; the tender leaves are what we want.
Aromatic Boosters: Garlic and Cheese
Next up are the flavor powerhouses: garlic and Parmesan cheese. Two garlic cloves should provide a good balance, but if you’re a garlic lover, feel free to add one more. For the cheese, freshly grated Parmesan is key. Pre-grated cheese often contains anti-caking agents that can affect the texture and flavor of your pesto. Aim for a good quality Parmesan and grate it yourself. The cheese adds a wonderful salty and nutty (without the nuts!) depth to the pesto.
The Perfect Balance: Olive Oil and Seasoning
The olive oil is crucial for bringin extractg everything together. Use a good quality extra virgin extract olive oil for the best flavor. The amount might seem small, but it’s enough to create a smooth, emulsified sauce. We’re starting with 1/4 cup, but you can always add a little more if you prefer a looser consistency. Finally, a touch of salt and pepper will enhance all the flavors. Taste as you go and adjust the seasoning to your preference.
The Making of Magic: Step-by-Step Instructions
Now that you have all your ingredients prepped, it’s time to bring them together. You can use a food processor or a blender for this. A food processor will give you a slightly chunkier texture, while a blender will yield a smoother pesto.
1. Prepare Your Basil and Garlic: Begin extract by placing your thoroughly dried basil leaves into the bowl of your food processor or blender. Add the peeled garlic cloves to the processor. If you’re using a blender, you might want to roughly chop the garlic first to help it blend more easily.
2. Pulse to Combine: Pulse the basil and garlic a few times to break them down. You want to create a coarse mixture before adding the other ingredients. This helps to ensure everything is well incorporated and prevents large chunks of garlic from dominating. Scrape down the sides of the bowl or blender jar if needed to ensure all the basil and garlic are incorporated into the blades.
3. Incorporate the Cheese: Add the freshly grated Parmesan cheese to the food processor or blender. Pulse again a few times until the cheese is well combined with the basil and garlic mixture. At this stage, you should start to see the pesto taking on a more cohesive form. Don’t over-process at this point; we still have the olive oil to add.
4. Slowly Stream in the Olive Oil: With the food processor or blender running on a low setting, slowly and steadily drizzle in the olive oil. Continue processing until the pesto reaches your desired consistency. For a thicker pesto, add just enough oil until it forms a paste. For a looser sauce, you can add a little more oil, a tablespoon at a time, until it’s the consistency you like for tossing with pasta. It’s important to add the oil gradually so it emulsifies properly and creates a smooth, creamy texture rather than an oily separation.
5. Season and Taste: Once the pesto is blended to your liking, add the salt and pepper. Pulse a final time to incorporate the seasonings. Now comes the most important part: tasting! Dip a clean spoon into the pesto and taste. Does it need a little more salt? A pinch more pepper? Perhaps you want to add a touch more Parmesan for extra cheesiness? This is your chance to fine-tune the flavors to perfection. Don’t be afraid to adjust it to your personal preference.
Once you’ve achieved pesto perfection, your delicious nut-free pesto is ready to be enjoyed! You can use it immediately, or store it in an airtight container in the refrigerator for up to a week. To keep it vibrant and fresh, you can pour a thin layer of olive oil over the surface before sealing the container; this helps to prevent oxidation. Enjoy this versatile and allergy-friendly sauce in all your favorite dishes!
Conclusion:
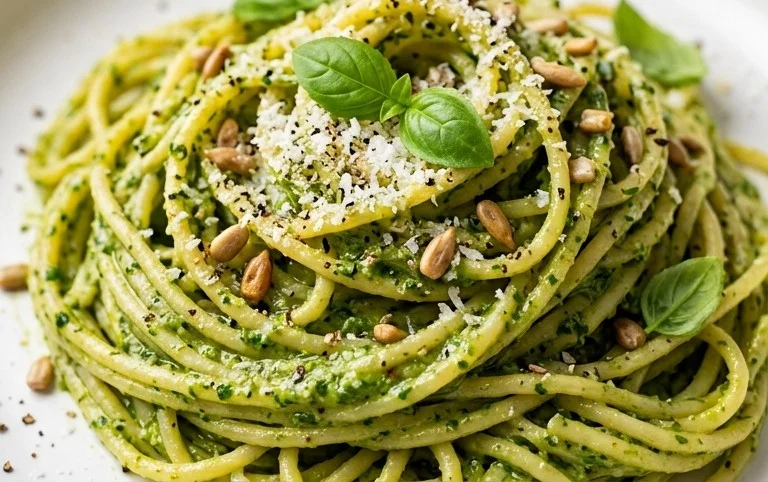
I hope you’re as excited to try this delicious nut-free pesto as I am to share it! This recipe is a true game-changer, offering all the vibrant, herbaceous flavor of traditional pesto without any of the common allergens. It’s incredibly versatile, making it perfect for weeknight dinners, entertaining guests, or simply elevating your everyday meals. The bright notes of basil, the savory punch of garlic, and the creamy texture achieved through alternative ingredients create a pesto that’s both satisfying and remarkably easy to make. Don’t be intimidated by the nut-free aspect; this version stands proudly on its own. Give it a go, and prepare to be pleasantly surprised by how wonderfully it transforms pasta, sandwiches, grilled vegetables, and so much more!
Serving Suggestions:
Toss it with your favorite pasta shapes, spread it on crusty bread for a delightful appetizer, use it as a base for pizzas, or dollop it onto grilled chicken, fish, or roasted vegetables. It also makes a fantastic dip for crudités!
Variations to Explore:
Feel free to experiment! You can swap out the basil for other herbs like spinach or arugula for a different flavor profile. For a touch of heat, add a pinch of red pepper flakes. If you have seeds on hand, sunflower seeds or pepitas can offer a lovely crunch and nutty flavor substitute.
Frequently Asked Questions:
Q: How long will this nut-free pesto last in the refrigerator?
A: Properly stored in an airtight container, this nut-free pesto should stay fresh in your refrigerator for about 4-5 days. I recommend covering the surface directly with a thin layer of olive oil to further prevent oxidation and maintain its vibrant green color.
Q: Can I freeze this pesto for later use?
A: Absolutely! Freezing is a fantastic way to enjoy this delicious nut-free pesto long after you make it. You can portion it into ice cube trays and freeze until solid, then transfer the cubes to a freezer-safe bag. This makes it super easy to thaw just the amount you need for a quick meal.
Nut-Free Pesto
A simple and delicious nut-free pesto recipe, perfect for those with nut allergies or for a lighter pesto option.
Ingredients
-
2 cups fresh basil
-
2 garlic cloves
-
1/2 cup freshly grated Parmesan cheese
-
1/4 cup olive oil
-
1/4 teaspoon salt
-
1/8 teaspoon pepper
Instructions
-
Step 1
Rinse and thoroughly dry the fresh basil leaves. -
Step 2
Peel the garlic cloves. -
Step 3
In a food processor, combine basil, garlic, Parmesan cheese, salt, and pepper. -
Step 4
Pulse the ingredients until they are finely chopped. -
Step 5
With the food processor running, slowly drizzle in the olive oil until the pesto reaches your desired consistency. -
Step 6
Taste and adjust seasoning if necessary. Serve immediately or store in an airtight container in the refrigerator.
Important Information
Nutrition Facts (Per Serving)
It is important to consider this information as approximate and not to use it as definitive health advice.
Allergy Information
Please check ingredients for potential allergens and consult a health professional if in doubt.