Easy Pickled Red Onions- Quick & Vibrant Flavor
Pickled red onions are more than just a condiment; they’re a vibrant explosion of flavor and color that can elevate almost any dish. If you’ve ever wondered what gives those tacos, salads, or charcuterie boards that extra pop, chances are it’s these beautifully crimson gems. I absolutely adore pickled red onions for their ability to transform the ordinary into the extraordinary with minimal effort. What makes them so special? It’s the magical alchemy that happens when raw, pungent red onions meet a tangy, slightly sweet brine. The acidity mellows their bite, infusing them with a delightful tang while preserving their satisfying crunch and that stunning, jewel-toned hue. They’re incredibly versatile and surprisingly easy to make at home, offering a gourmet touch to your everyday meals. Let’s dive in and discover how you can create your own batch of these game-changin extractg pickled red onions!
Ingredients:
Instructions:
Pickled red onions are a true kitchen game-changer. They add a vibrant pop of color, a delightful tangy crunch, and a touch of sweetness to almost anything. Forget those sad, limp onions; these are bright, firm, and utterly delicious. They’re perfect for topping tacos, salads, sandwiches, burgers, or even just serving alongside roasted meats. What I love most about making them is how incredibly simple it is. You barely need any effort, and the payoff is huge. Plus, they keep in the fridge for a good few weeks, so you can have this little jar of magic on hand whenever you need it.
The beauty of this recipe lies in its simplicity. It’s a classic brine, perfectly balanced to transform a humble red onion into something extraordinary. The white vinegar provides that essential tang, while the water dilutes it slightly to prevent it from being too harsh. The sugar, though optional, rounds out the acidity and encourages a beautiful, slightly sweet finish. And of course, the kosher salt is crucial for drawing out moisture and adding flavor. When you combine these elements, you create an environment where the onion not only softens but also infuses with the bright, zesty flavors of the brine.
Preparing the onions is the most hands-on part, and even that is straightforward. The key is to get them sliced thinly and evenly. This ensures that they pickle uniformly and have the best texture. I find that a mandoline slicer is your best friend here if you have one, as it guarantees consistent thickness. If you don’t have a mandoline, a sharp knife and a steady hand will do the trick. Just take your time and aim for slices that are about as thick as a dime or slightly thinner. This thickness allows the brine to penetrate quickly and effectively, giving you those perfectly tender-crisp results.
Now, let’s talk about the brine itself. It’s a simple mixture, but the order in which you combine and heat it can make a difference in how well the sugar and salt dissolve. You want a clear, homogenous brine before you pour it over the onions. This is where a small saucepan comes in handy. Gently heating the liquids helps to fully incorporate all the ingredients and create a smooth, well-balanced pickling liquid.
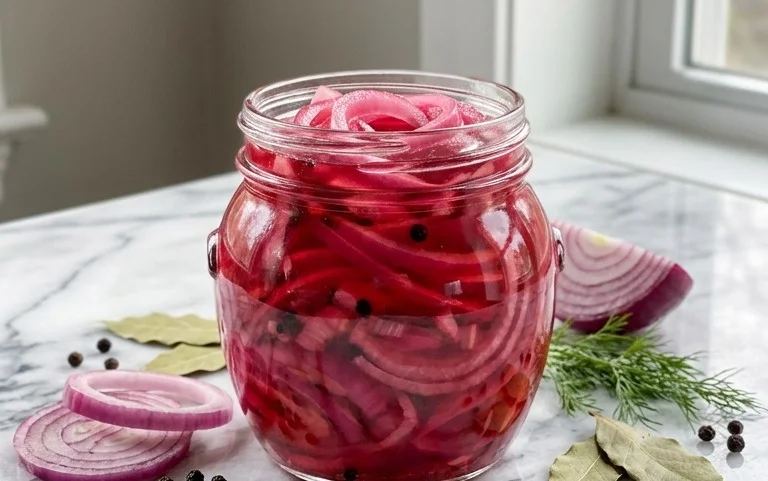
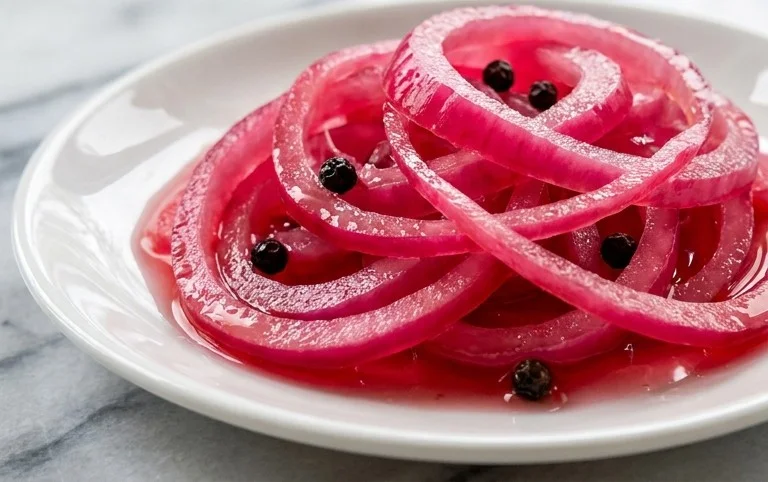
The magic happens as the warm brine interacts with the thinly sliced red onions. As the onions sit in the pickling liquid, they begin extract to soften and their vibrant pinky-purple hue deepens, bleeding into the brine and creating that iconic, beautiful color. It’s a fascinating transformation to watch! You’ll see the raw, firm slices gradually become more pliable and take on a lovely glossy appearance. This process is not just about flavor; it’s also about texture and visual appeal. The longer they sit, the more intense the flavor and color will become, so you have a little flexibility depending on your preference.
Step 1: Prepare the Onions
Begin extract by peeling your large red onion. You want to remove the papery outer skin. Once peeled, slice the onion in half from root to stem. Then, lay each half flat on your cutting board and slice them thinly. Aim for slices that are about 1/16th of an inch thick. If you’re using a mandoline, set it to a thin setting. If you’re using a knife, try to keep your slices as uniform as possible. A sharp knife is essential here to avoid crushing the onion as you slice. Place all your thinly sliced red onion rings into a heatproof jar or a large bowl. I prefer using a glass jar because it’s easy to see the transformation and it seals well for storage.
Step 2: Create the Brine
In a small saucepan, combine the 1 cup of white vinegar, 1 cup of water, 1 tablespoon of sugar (or your chosen substitute), and 2 teaspoons of kosher salt. Place the saucepan over medium heat. Stir the mixture continuously until the sugar and salt are completely dissolved. You don’t need to bring the mixture to a rolling boil; just heat it enough to ensure everything is well incorporated. This usually takes a few minutes. Once dissolved, remove the saucepan from the heat. It’s important that the brine is hot but not necessarily boiling when you pour it over the onions; this helps to slightly cook and soften them while infusing them with flavor.
Step 3: Combine and Infuse
Carefully pour the hot brine mixture over the thinly sliced red onions in your jar or bowl. Make sure that all the onion slices are submerged in the liquid. If they aren’t fully covered, you can gently press them down with a spoon or add a little more water and vinegar in equal parts to ensure they are all submerged. This is crucial for even pickling. You might notice the onions immediately start to change color, turning a brighter, more translucent pink. This is a good sign that the pickling process has begun. Let the onions sit in the hot brine at room temperature for at least 15-30 minutes. This initial resting period allows the flavors to meld and the onions to begin extract softening.
Step 4: Cool and Store
After the initial 15-30 minute resting period at room temperature, allow the onions and brine to cool down completely. Once cooled to room temperature, you can either transfer the onions and brine to a clean, airtight container or a jar if you used a bowl. If you used a jar from the start, simply put a lid on it. For best results and optimal flavor development, refrigerate the pickled red onions. The longer they sit in the refrigerator, the more the flavors will deepen and meld, and the more tender the onions will become. They are typically best after at least an hour in the fridge, but I find they reach their peak deliciousness after a few hours or even overnight.
Step 5: Enjoy Your Pickled Delights
Your delicious pickled red onions are now ready to be enjoyed! They will keep in the refrigerator for up to 2-3 weeks. Use a clean fork or spoon to remove them from the brine so you don’t introduce any contaminants to the jar. Spoon them over your favorite dishes – tacos, salads, avocado toast, grilled cheese, burgers, or anywhere you want a burst of bright, tangy flavor and a beautiful pop of color. The brine itself can also be used in salad dressings or marinades, so don’t discard it!
Conclusion:
And there you have it – a simple yet incredibly versatile recipe for homemade pickled red onions! The beauty of this quick pickle lies in its ability to transform ordinary dishes with a vibrant burst of color and a delightful sweet-and-tangy crunch. They’re perfect for elevating everything from avocado toast and tacos to salads and grilled meats. I truly encourage you to give this recipe a try; it’s remarkably easy and the results are incredibly rewarding. You’ll find yourself reaching for them time and time again!
Experiment with different vinegars like apple cider vinegar or white grape juice vinegar for subtle flavor shifts. You can also add a pinch of sugar or a few whole peppercorns for extra depth. This recipe is a fantastic gateway into the world of pickling, requiring minimal effort for maximum flavor impact.
Frequently Asked Questions:
How long do pickled red onions last?
When stored properly in an airtight container in the refrigerator, your pickled red onions should stay fresh and delicious for about 2-3 weeks. The longer they sit, the more their flavor will deepen!
Can I use a different type of onion?
While red onions are ideal for their vibrant color and slightly milder flavor when pickled, you can absolutely experiment with white or yellow onions. Just be aware that the color won’t be as striking, and the flavor profile might be a bit sharper.
What if I don’t have vinegar?
Vinegar is essential for the pickling process as its acidity preserves the onions and creates that signature tangy flavor. If you’re in a pinch, a neutral vinegar like white vinegar or rice vinegar can be substituted for red grape juice vinegar, though it might slightly alter the final taste and color.
Quick Pickled Red Onions
A simple and quick recipe for bright, tangy pickled red onions that add a burst of flavor to salads, sandwiches, and more.
Ingredients
-
1 large Red onion, thinly sliced
-
1 cup White Vinegar
-
1 cup Water
-
1 tablespoon Sugar
-
2 teaspoons Kosher salt
Instructions
-
Step 1
Thinly slice the red onion into rings or half-moons. -
Step 2
In a medium saucepan, combine the white vinegar, water, sugar, and kosher salt. -
Step 3
Heat the mixture over medium heat, stirring until the sugar and salt are completely dissolved. Do not boil. -
Step 4
Place the sliced red onions in a clean jar or heatproof bowl. -
Step 5
Pour the hot vinegar mixture over the onions, ensuring they are fully submerged. -
Step 6
Let the onions cool to room temperature, then cover and refrigerate for at least 30 minutes before serving. They will develop a deeper pink color over time.
Important Information
Nutrition Facts (Per Serving)
It is important to consider this information as approximate and not to use it as definitive health advice.
Allergy Information
Please check ingredients for potential allergens and consult a health professional if in doubt.