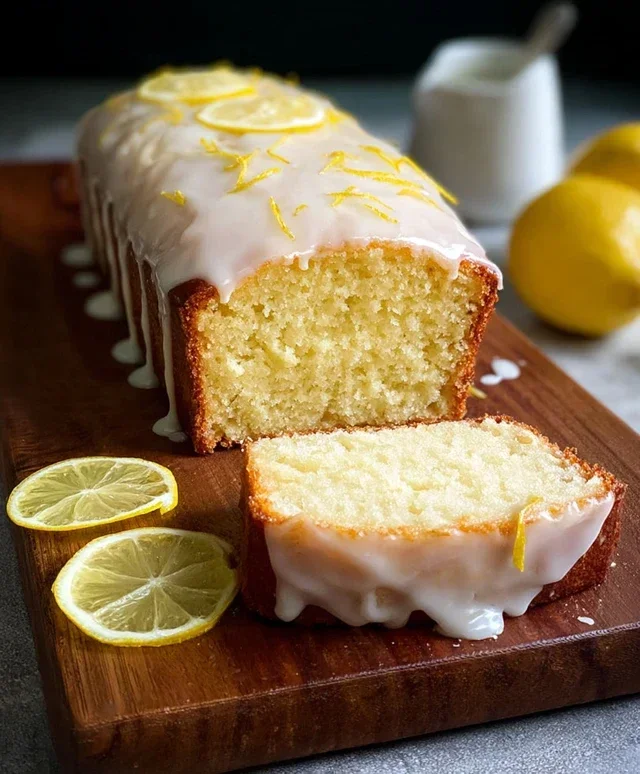
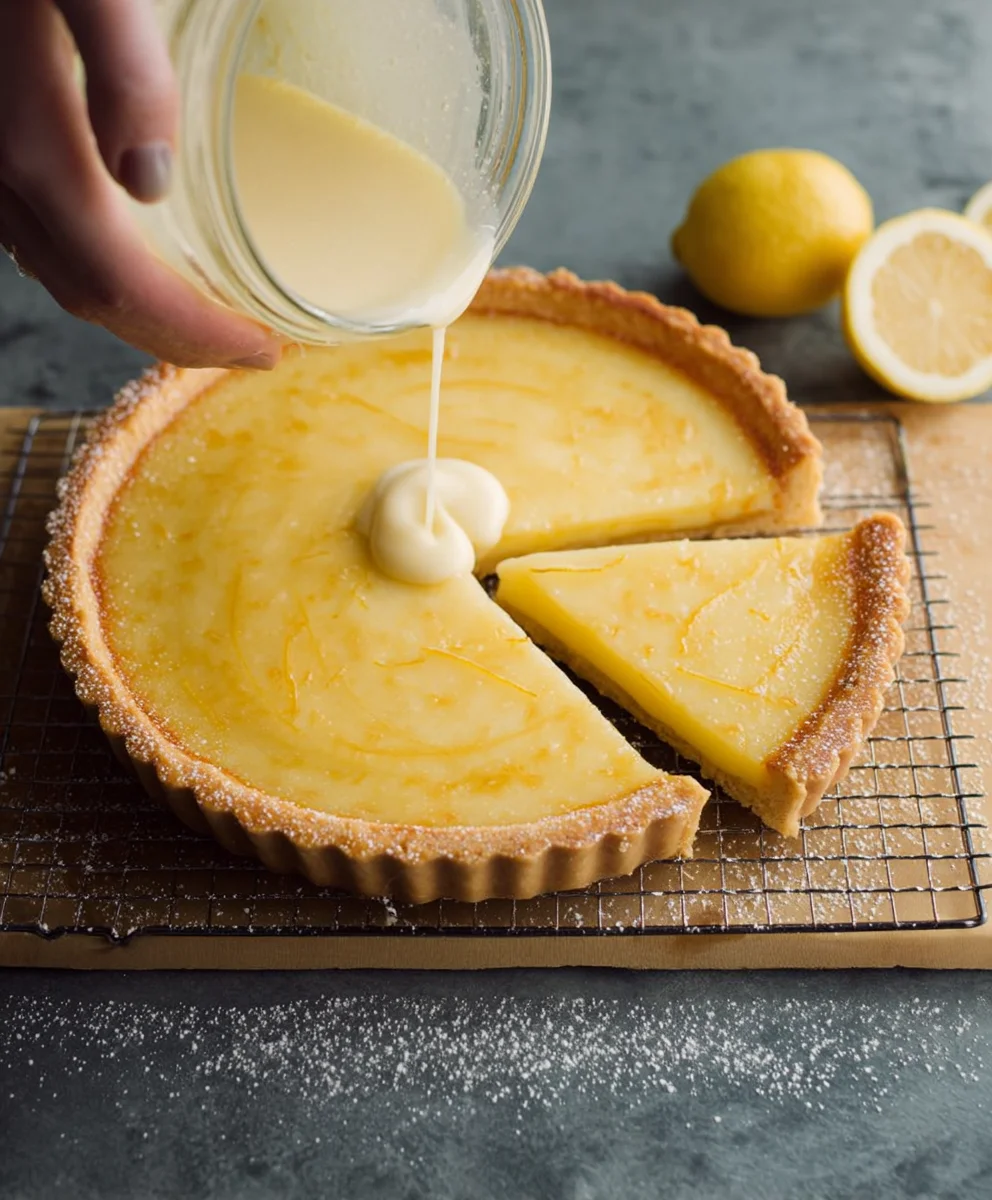
Easy Lemon Tart Recipe-Perfect Dessert
Lemon Tart Recipe enthusiasts, rejoice! If you’ve ever dreamt of biting into a dessert that balances the bright, zesty punch of lemon with a delicate, buttery crust, then you’ve landed in the right place. This isn’t just any lemon tart; it’s an experience. We’re talking about a silken, tangy lemon curd that sings with sunshine, nestled within a crisp, golden shortcrust pastry that shatters perfectly with every forkful. People absolutely adore a classic lemon tart for its refreshing simplicity and elegant presentation, making it a perfect ending to any meal, from a casual brunch to a sophisticated dinner party. What makes this particular Lemon Tart Recipe so special is its foolproof nature, ensuring you achieve that enviable, glossy curd and an impeccably baked base every single time. Prepare yourself for a truly delightful journey into tart-making perfection!
Ingredients:
- 1 fully baked tart crust (store-bought or homemade)
- 2 large eggs plus 2 egg yolks (or 3 whole eggs)
- 3/4 cup (150 g/5.3 oz) granulated sugar
- 1 tablespoon lemon zest (from about 2-3 lemons)
- 1/2 cup (120 ml) freshly squeezed lemon juice (from about 2-3 lemons)
- 2 tablespoons heavy cream (optional, for added richness)
- 1/2 cup (1 stick/115 g) unsalted butter, cut into small pieces
Preparing the Lemon Filling
Step 1: Combine Wet Ingredients and Sugar
In a medium-sized, heavy-bottomed saucepan, whisk together the 2 large eggs and 2 egg yolks (or if you prefer, use 3 whole eggs for simplicity). To this, add the granulated sugar. Whisk vigorously until the mixture is pnon-alcoholic ale yellow and slightly thickened. This initial whisking helps to dissolve the sugar and ensures a smoother filling. It’s important to use a heavy-bottomed pan to prevent the filling from scorching. Spend a good minute or two ensuring everything is well combined before moving to the next step.
Step 2: Incorporate Lemon and Heat Gently
Next, add the freshly squeezed lemon juice and the finely grated lemon zest to the egg and sugar mixture. Whisk everything together until thoroughly combined. Now, place the saucepan over medium-low heat. It is crucial to use gentle heat. If the heat is too high, you risk scrambling the eggs, which will result in a lumpy lemon filling. Stir constantly with a whisk or a heatproof spatula, ensuring you scrape the bottom and sides of the pan. Continue to cook and stir until the mixture thickens enough to coat the back of a spoon. This usually takes about 8-10 minutes. Do not let it boil. You’re looking for a consistency similar to a thin custard.
Step 3: Emulsify with Butter for Richness
Once the lemon mixture has thickened, remove the saucepan from the heat. This is where the magic happens to create that wonderfully smooth and rich texture. Gradually add the unsalted butter, one piece at a time, whisking continuously. Each piece of butter should be mostly melted and incorporated before you add the next. This gradual addition and constant whisking is called emulsification, and it’s what gives the lemon curd its glossy sheen and velvety mouthfeel. If you’re using the heavy cream, whisk it in during this step, after the butter has been fully incorporated, for an extra decadent filling. Continue whisking until all the butter is melted and the filling is completely smooth and homogenous.
Step 4: Strain for Ultimate Smoothness
For an exceptionally smooth lemon tart filling, a crucial step is to strain it. Place a fine-mesh sieve over a clean bowl. Carefully pour the warm lemon filling through the sieve. Use your whisk or spatula to gently press any solids (like any small bits of cooked egg or zest particles) through the sieve, ensuring you capture all the liquid goodness. Discard any solids left behind in the sieve. This step ensures that your tart filling will have a perfectly silken texture that melts in your mouth. This is a small step that makes a significant difference in the final presentation and eating experience of your lemon tart.
Step 5: Chill and Fill the Tart Crust
Allow the strained lemon filling to cool at room temperature for about 20-30 minutes, stirring occasionally. This initial cooling helps prevent the hot filling from making the tart crust soggy. Once it has cooled slightly, carefully pour the lemon filling into your fully baked tart crust. Gently tilt the tart crust to ensure the filling is evenly distributed. If there are any air bubbles on the surface, you can gently pop them with a toothpick. Cover the tart loosely with plastic wrap, making sure the wrap doesn’t touch the surface of the filling (you can tent it slightly or place toothpicks to keep it lifted). Refrigerate the lemon tart for at least 2-3 hours, or until the filling is set and firm. This chilling period is essential for the flavors to meld and the filling to achieve the perfect, sliceable consistency.

Conclusion:
You’ve now got the ultimate guide to creating a truly delightful Lemon Tart Recipe. This classic dessert, with its bright citrusy tang and buttery crust, is surprisingly achievable for home bakers. Remember, the key to its perfection lies in fresh ingredients and a patient hand, especially when it comes to chilling the dough and ensuring the filling sets properly. Don’t be afraid to experiment with the serving suggestions – a dollop of whipped cream or a sprinkle of fresh berries can elevate it even further.
This Lemon Tart Recipe is also wonderfully versatile. While the classic lemon is a winner, consider adding a hint of lavender to the filling for a floral note, or a touch of gin extractger for a little warmth. You can even swap out some of the lemon juice for lime or grapefruit for a different citrus profile. The most important thing is to have fun in the kitchen and enjoy the process of creating something delicious for yourself and your loved ones. We encourage you to try this recipe and share the joy of homemade baking!
Frequently Asked Questions:
Can I make the crust ahead of time?
Absolutely! The tart crust can be made a day or two in advance and stored in the refrigerator. For best results, wrap it tightly in plastic wrap. You can also blind bake the crust and store it, but be sure to store it at room temperature in an airtight container to prevent it from becoming soggy.
My lemon tart filling didn’t set properly. What went wrong?
This can happen if the tart isn’t baked long enough, or if the oven temperature was too low. Ensure your oven is accurately preheated. The filling should be set but still have a slight wobble in the center when gently shaken. It will continue to firm up as it cools.
Can I use store-bought pastry for this Lemon Tart Recipe?
Yes, you can! While a homemade crust offers superior flavor and texture, a good quality store-bought pastry will certainly work and save you time. Just be sure to follow the package instructions for blind baking.
Easy Lemon Tart
A perfect and easy-to-make lemon tart with a smooth and rich filling.
Ingredients
-
1 fully baked tart crust
-
2 large eggs plus 2 egg yolks
-
3/4 cup (150 g) granulated sugar
-
1 tablespoon lemon zest
-
1/2 cup (120 ml) freshly squeezed lemon juice
-
2 tablespoons heavy cream
-
1/2 cup (1 stick/115 g) unsalted butter, cut into small pieces
Instructions
-
Step 1
In a medium-sized, heavy-bottomed saucepan, whisk together the eggs and egg yolks with the granulated sugar until the mixture is pale yellow and slightly thickened. -
Step 2
Add the lemon juice and lemon zest to the egg and sugar mixture. Whisk until combined. Place over medium-low heat and cook, stirring constantly, until the mixture thickens enough to coat the back of a spoon (about 8-10 minutes). Do not let it boil. -
Step 3
Remove the saucepan from the heat. Gradually add the unsalted butter, one piece at a time, whisking continuously until fully incorporated and the mixture is glossy and smooth. Whisk in the heavy cream, if using. -
Step 4
Strain the lemon filling through a fine-mesh sieve into a clean bowl to ensure ultimate smoothness. Discard any solids. -
Step 5
Allow the filling to cool at room temperature for 20-30 minutes. Pour the slightly cooled filling into the baked tart crust and distribute evenly. Cover loosely and refrigerate for at least 2-3 hours, or until set and firm.
Important Information
Nutrition Facts (Per Serving)
It is important to consider this information as approximate and not to use it as definitive health advice.
Allergy Information
Please check ingredients for potential allergens and consult a health professional if in doubt.