Easy Chicken Enchilada Roll Ups- Quick Dinner Recipe
Chicken Enchilada Roll Ups are a weeknight dinner game-changer I’ve recently fallen head over heels for. If you’re anything like me, you crave that comforting, cheesy goodness of enchiladas but sometimes find the rolling process a bit… finicky. That’s where these fantastic Chicken Enchilada Roll Ups come in to save the day! They deliver all the vibrant, savory flavors you adore from classic enchiladas – the tender chicken, the rich enchilada sauce, the melty cheese – but in a format that’s surprisingly simple and incredibly fun to assemble. What truly makes them special is their versatility; you can customize the fillings to your heart’s content, and they bake up into perfectly portioned, individual delights. Get ready to impress yourself and your family with this streamlined yet utterly satisfying twist on a beloved favorite.
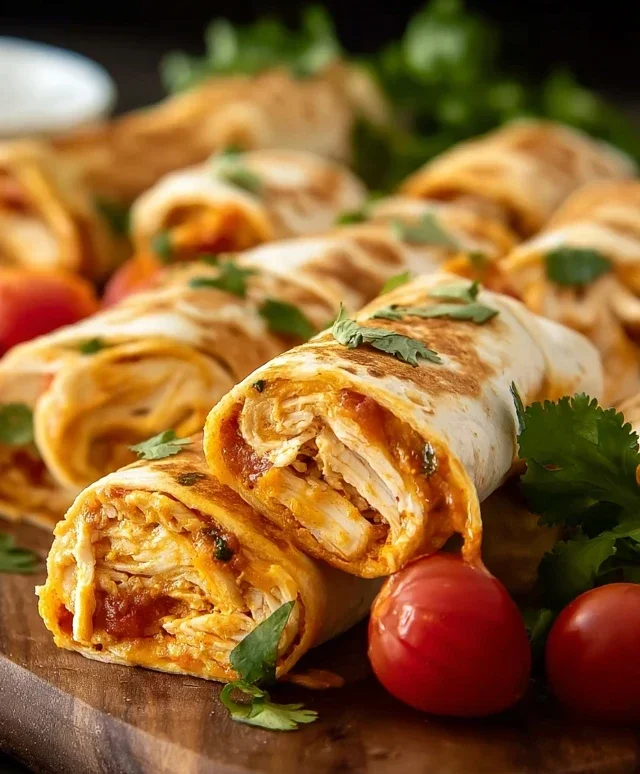
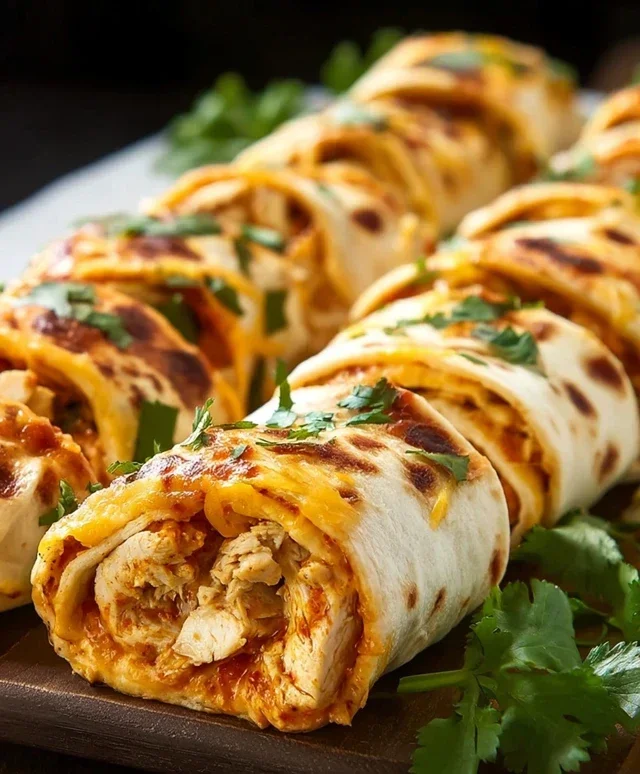
Chicken Enchilada Roll Ups
Are you looking for a weeknight meal that’s bursting with flavor and surprisingly simple to make? My Chicken Enchilada Roll Ups are a game-changer! They take all the deliciousness of classic enchiladas and transform them into a fun, easy-to-eat, and incredibly satisfying rolled format. These are perfect for busy families, casual gatherings, or when you just crave something cheesy, savory, and a little bit zesty. Forget the complicated layering of traditional enchiladas; this recipe streamlines the process without sacrificing any of that beloved enchilada taste. We’re going to create a creamy, flavorful chicken filling that gets rolled up in soft flour tortillas and then baked to golden perfection. Trust me, once you try these, they’ll become a regular in your recipe rotation.
Ingredients:
Cooking Instructions:
First, let’s get our flavorful chicken filling ready. This is the heart of our enchilada roll ups, so we want it to be packed with taste. In a medium-sized bowl, combine the 3 cups of shredded chicken with the entire 1-ounce packet of taco seasoning mix. Make sure to really toss and mix the chicken until it’s evenly coated with the seasoning. This step is crucial for infusing that authentic taco flavor throughout the filling. Don’t be shy; really work it in there.
Next, we’re going to add the creamy and cheesy elements that make this filling so irresistible. To the seasoned chicken, add the 8-ounce package of softened cream cheese. Softened cream cheese is important because it will blend much more smoothly and easily with the other ingredients, preventing any unpleasantly lumpy bits in your filling. Now, stir in the 1½ cups of shredded Mexican cheese or cheddar cheese. I love using a Mexican blend for that extra depth of flavor, but sharp cheddar is also fantastic.
Now for that little kick of flavor! Add the drained 10-ounce can of diced tomatoes with green chilies (like Rotel) to the bowl. Draining the tomatoes is important to prevent the filling from becoming too watery. The green chilies in the Rotel add a wonderful subtle heat and a tangy brightness that complements the rich creaminess of the cheese and cream cheese perfectly. Finally, stir in the 1 teaspoon of minced garlic. Fresh minced garlic is always best for a vibrant punch of flavor, but pre-minced garlic from a jar will work in a pinch. Mix everything together until it’s well combined and you have a thick, delicious filling.
Once your filling is mixed, gently fold in the 4 sliced green onions. Save a few slices for garnishing later if you like! The green onions add a fresh, slightly pungent bite that cuts through the richness of the filling and adds a lovely pop of color. Give it one last good stir to distribute the green onions evenly. You should have a wonderfully textured and aromatic filling at this point.
Now it’s time to assemble our roll ups! Lay out your 5 burrito-sized flour tortillas on a clean, flat surface. You can warm them up slightly in the microwave for about 15-20 seconds if they’re a little stiff; this makes them more pliable and less likely to crack when you roll them. Spread about one-fifth of the chicken filling evenly over each tortilla, leaving a small border around the edges. You want a good, generous amount of filling on each one, but not so much that it will ooze out excessively when rolled.
Starting with one edge of the tortilla, carefully and tightly roll it up, tucking in the sides slightly as you go if you can manage it without the filling escaping. The goal is to create a compact roll. Place each rolled-up tortilla seam-side down in a greased baking dish. I find a 9×13 inch baking dish works perfectly for this amount. If your tortillas are a bit unwieldy, don’t worry too much; as long as they’re mostly contained, they’ll hold their shape during baking. Ensure they are nestled snugly together in the dish; this helps them maintain their form as they bake.
Once all your delicious chicken enchilada roll ups are assembled and in the baking dish, it’s time for the final touch before baking. You can sprinkle a little extra shredded cheese over the top of the roll ups if you desire even more cheesy goodness. I usually like to add a bit more of that Mexican blend or cheddar cheese right over the seam and top of each roll up for that beautiful, bubbly, golden-brown crust.
Preheat your oven to 375°F (190°C). Cover the baking dish tightly with aluminum foil. This is important for the initial baking phase, as it allows the roll ups to heat through and the filling to become warm and creamy without the tortillas drying out or the cheese on top burning before the inside is ready. Bake for 20 minutes covered.
After 20 minutes, carefully remove the aluminum foil. At this point, the roll ups should be heated through. Continue to bake, uncovered, for another 10-15 minutes, or until the tortillas are lightly golden brown and the cheese on top is melted and bubbly. Keep an eye on them during this uncovered phase to prevent them from browning too much. The aromas filling your kitchen will be incredible!
Once they’re out of the oven, let the Chicken Enchilada Roll Ups rest for a few minutes before serving. This allows everything to set slightly and makes them easier to handle. Garnish with the reserved sliced green onions and ½ cup of chopped fresh cilantro, if using. Serve immediately and enjoy the delightful combination of creamy, savory, and zesty flavors. These are fantastic on their own or served with a dollop of sour cream or a side of salsa.
Conclusion:
There you have it! These Chicken Enchilada Roll Ups are an absolute winner for weeknight dinners and even casual entertaining. They’re incredibly satisfying, bursting with classic enchilada flavor, and so much easier to manage than traditional enchiladas, making them perfect for busy cooks. The tender shredded chicken, creamy sauce, and melted cheese create a delightful combination that’s sure to please everyone. I love how versatile they are, allowing for endless flavor possibilities. These roll-ups are a fantastic way to enjoy all the comfort of enchiladas without all the fuss.
Serve these delightful Chicken Enchilada Roll Ups with a side of Mexican rice, a fresh green salad, or even some black beans for a complete and hearty meal. Don’t be afraid to get creative with your toppings – sour cream, avocado slices, cilantro, and a sprinkle of extra cheese are always welcome additions. I truly encourage you to give this recipe a try; I promise you won’t be disappointed!
Frequently Asked Questions:
Can I make these Chicken Enchilada Roll Ups ahead of time?
Absolutely! You can assemble the roll-ups completely and refrigerate them for up to 24 hours before baking. You might need to add a few extra minutes to the baking time if they are coming straight from the refrigerator.
What kind of tortillas work best for these roll ups?
Corn tortillas are traditional for enchiladas and work wonderfully here. If you find corn tortillas tend to crack when rolled, you can briefly warm them in the microwave or a dry skillet to make them more pliable. Flour tortillas are also an option and tend to be more forgiving.
Can I use a different protein instead of chicken?
Yes, you absolutely can! Shredded beef, ground turkey, or even seasoned black beans would make delicious alternatives for these enchilada roll ups. Just ensure your protein is cooked and seasoned to your liking.
Chicken Enchilada Roll Ups
Easy and delicious chicken enchilada roll ups, perfect for a weeknight meal. These flavor-packed rolls are simple to assemble and bake to golden perfection.
Ingredients
-
5 burrito sized flour tortillas
-
1 ounce packet of taco seasoning mix
-
3 cups shredded chicken
-
8 ounce package of cream cheese, softened
-
1½ cups shredded Mexican cheese or cheddar cheese
-
10 ounce can diced tomatoes with green chilies, drained
-
1 teaspoon minced garlic
-
4 green onions, sliced
-
½ cup chopped cilantro for garnish
Instructions
-
Step 1
Preheat oven to 375°F (190°C). -
Step 2
In a large bowl, combine shredded chicken, softened cream cheese, taco seasoning, drained diced tomatoes with green chilies, minced garlic, and sliced green onions. Mix well until all ingredients are evenly distributed. -
Step 3
Lay out the flour tortillas on a flat surface. Divide the chicken mixture evenly among the tortillas, spreading it onto the lower half of each tortilla. -
Step 4
Roll up each tortilla tightly, starting from the bottom and rolling upwards. Place the roll-ups seam-side down in a greased baking dish. -
Step 5
Sprinkle the shredded Mexican or cheddar cheese evenly over the top of the roll-ups. -
Step 6
Bake for 20-25 minutes, or until the cheese is melted and bubbly and the roll-ups are heated through. Garnish with chopped cilantro, if desired.
Important Information
Nutrition Facts (Per Serving)
It is important to consider this information as approximate and not to use it as definitive health advice.
Allergy Information
Please check ingredients for potential allergens and consult a health professional if in doubt.