Easy Chia Seed Pudding Recipe – Delicious & Healthy
Chia seed pudding is one of my absolute favorite go-to breakfasts, and for good reason! This incredibly versatile and wonderfully satisfying dish has taken the healthy eating world by storm, and I’m here to share my ultimate recipe for it. If you’re looking for a breakfast that’s as good for you as it is delicious, a simple yet elegant chia seed pudding is precisely what you need. People adore this recipe because it requires minimal effort, offering a fantastic make-ahead option for busy mornings. What truly makes chia seed pudding so special is its amazing texture – that delightful, gel-like consistency that’s both comforting and refreshing. Plus, the nutritional power packed into those tiny seeds is remarkable, making this not just a treat for your taste buds, but a boost for your well-being too. Get ready to discover your new favorite way to start the day!
The Easiest, Healthiest, and Most Delicious Chia Seed Pudding You’ll Ever Make
Looking for a breakfast that’s as good for you as it is satisfying, or a dessert that won’t derail your healthy eating goals? Look no further than chia seed pudding! This incredibly simple recipe is a game-changer. It requires minimal effort, a handful of pantry staples, and delivers a creamy, nutrient-packed treat that you can customize to your heart’s content.
Chia seeds themselves are tiny powerhouses. They’re packed with fiber, omega-3 fatty acids, protein, and antioxidants. When combined with liquid, they form a gel-like consistency, transforming into a pudding-like texture that’s surprisingly decadent. This recipe is perfect for meal prepping, as you can whip it up the night before and wake up to a ready-to-eat breakfast or snack. It’s also incredibly versatile, allowing you to play with different milks, sweeteners, and toppings to create endless flavor combinations. Let’s dive into how to make this delightful dish.
Ingredients:
Instructions:
Phase 1: The Initial Mix
This is where the magic begin extracts, and honestly, it’s the most crucial step for achieving the perfect pudding consistency.
1. Combine Dry Ingredients: In a bowl, jar, or even directly in your serving dish (if you’re making individual portions), add your 3 tablespoons of chia seeds. If you’re not adding any other dry ingredients like cocoa powder or spices at this stage, you can skip combining them separately and just add the chia seeds. However, if you’re feeling adventurous and want to add some flavor now, this is the time to incorporate things like a tablespoon of unsweetened cocoa powder for a chocolate version, or a pinch of cinnamon for a warm, spiced flavor. Make sure to stir everything together to evenly distribute the chia seeds and any other dry additions. This helps prevent the chia seeds from clumping together later on.
2. Add Wet Ingredients and Sweetener: Next, pour in your 3/4 cup of milk of choice. I love using unsweetened almond milk for its neutral flavor and creamy texture, but oat milk offers a slightly richer mouthfeel, and coconut milk can add a delightful tropical note. If you’re using dairy milk, that works perfectly too! Then, add your 1 tablespoon of maple syrup. Maple syrup provides a natural sweetness and a lovely caramel undertone. However, feel free to experiment with other sweeteners. A teaspoon of honey, agave nectar, or even a sugar-free alternative like erythritol or stevia can be used. Adjust the amount to your personal preference – you might like it a little sweeter or prefer a less sweet version. Finally, add your 1 teaspoon of vanilla extract. Vanilla is a fantastic flavor enhancer and adds a subtle depth to the pudding. Give everything a good stir to ensure the sweetener and vanilla are well incorporated into the milk and chia seeds.
Phase 2: The Transformation
This is where patience comes into play, but it’s well worth the wait. The chia seeds need time to work their magic.
3. Whisk and Let Sit (First Rest): This is a critical step to prevent clumps. After you’ve mixed all the wet and dry ingredients together, whisk them thoroughly for about 30 seconds to a minute. You want to break up any clumps of chia seeds that might be clingin extractg to the sides or bottom of your container. Then, let the mixture sit undisturbed for about 5-10 minutes. During this short resting period, the chia seeds will start to absorb the liquid and thicken slightly. This initial absorption is key to ensuring a smooth, lump-free pudding.
4. Second Whisk and Final Rest: After the initial 5-10 minute rest, you’ll likely notice the mixture has started to gel. Now, it’s time for another whisk. Give the pudding another good stir. This second whisk is incredibly important. It helps to further break up any seeds that might have started to clump during the first resting phase and ensures an even distribution of the thickening gel. Whisk until the mixture is smooth and homogenous. Once you’ve given it a good whisk, cover your container tightly. This could be with a lid, plastic wrap, or aluminum foil. Place it in the refrigerator for at least 2-4 hours, or ideally, overnight. The longer it sits, the thicker and more pudding-like it will become. For the creamiest texture, chilling overnight is the absolute best way to go.
Phase 3: Enjoying Your Creation
The wait is over, and your delicious, healthy chia seed pudding is ready to be devoured!
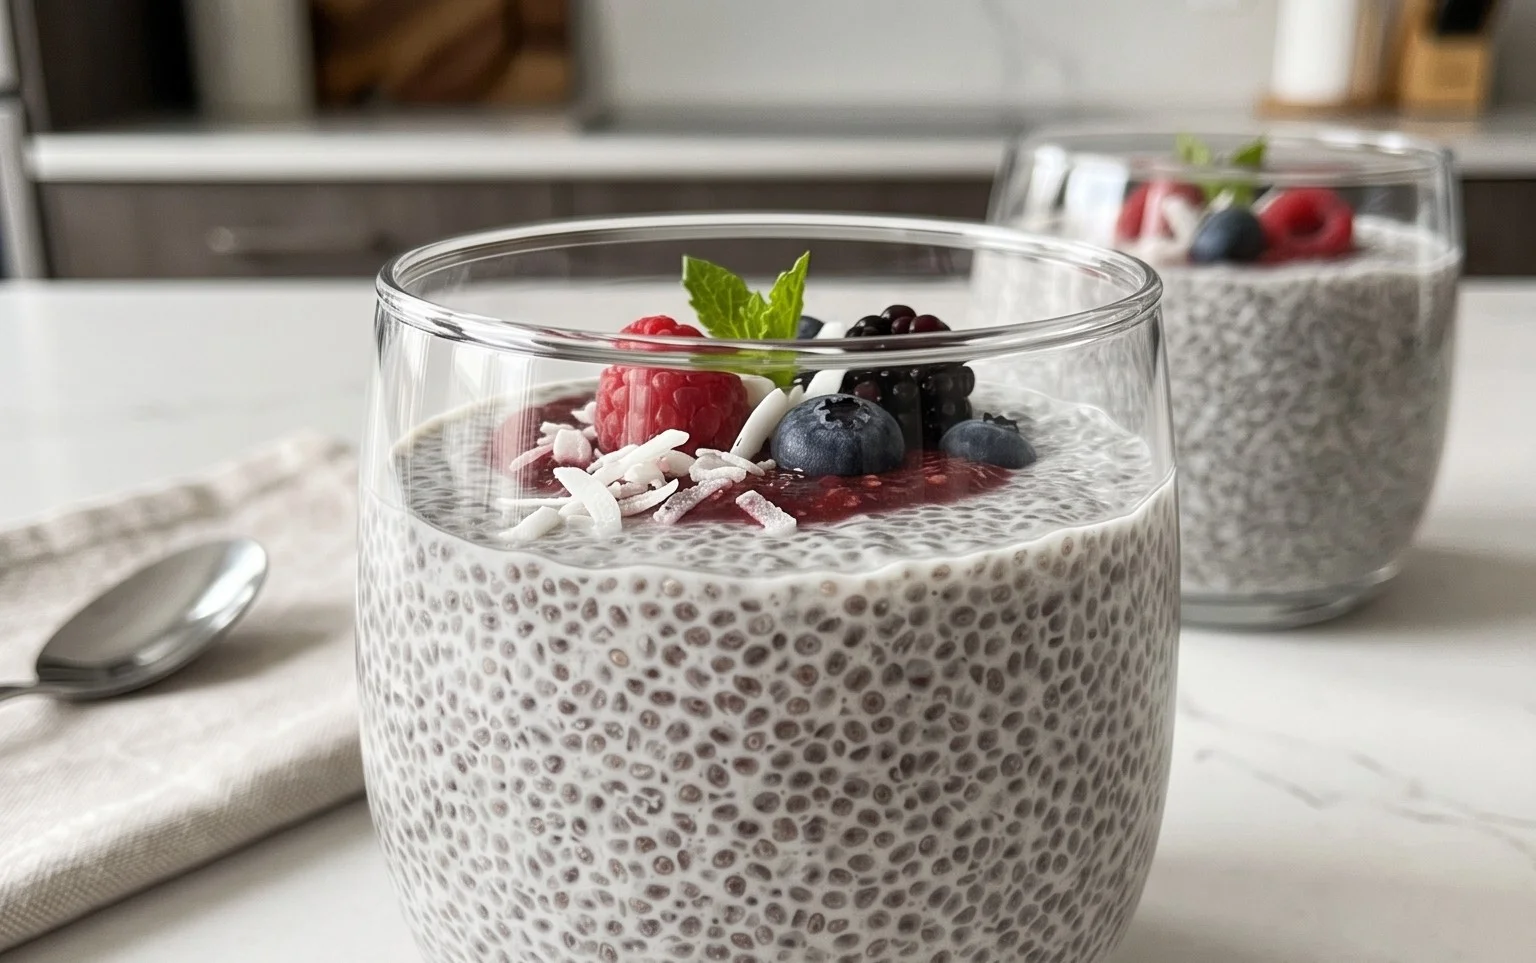
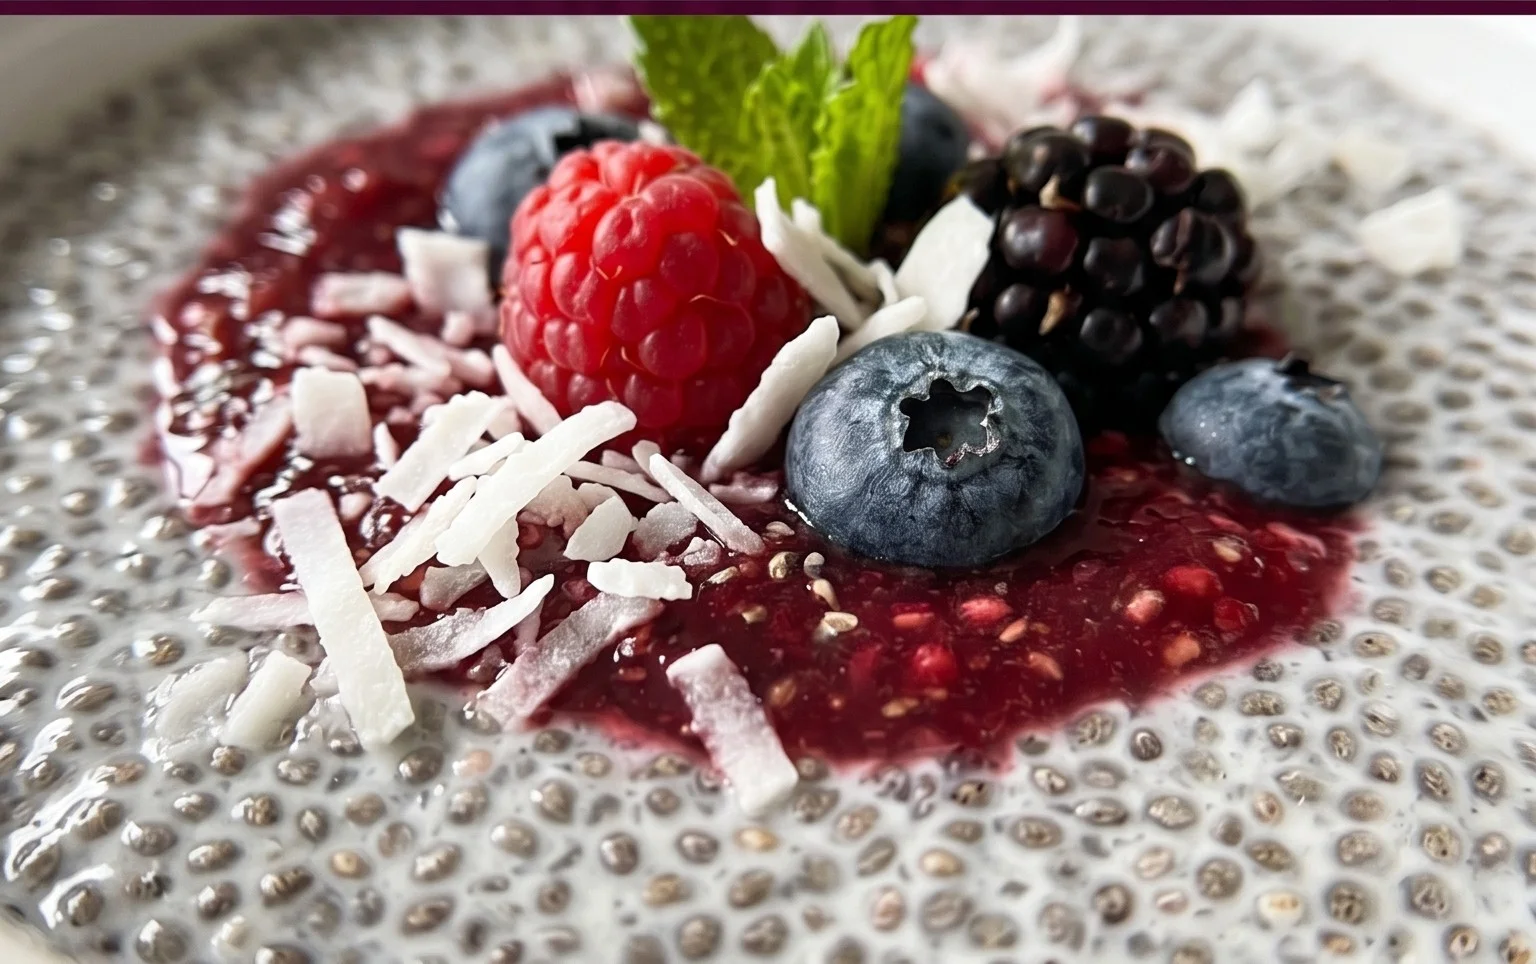
5. Serve and Garnish: Once your chia seed pudding has reached its desired consistency – it should be thick and spoonable, not watery or overly stiff – it’s time to enjoy! Give it one final stir before serving. You can eat it straight from the container, or spoon it into pretty bowls for a more presentable treat. Now for the fun part: toppings! The possibilities are truly endless. My personal favorites include fresh berries (strawberries, blueberries, raspberries), a sprinkle of granola for added crunch, a drizzle of more maple syrup or honey, some toasted nuts or seeds (like almonds or pumpkin seeds), or even a dollop of Greek yogurt for extra protein and creaminess. For a chocolate lover, a dusting of cocoa powder or some dark chocolate shavings is divine. If you’re feeling tropical, add some shredded coconut and mango chunks. This is where you can really let your creativity shine and tailor the pudding to your taste preferences and what you have on hand.
This chia seed pudding recipe is more than just a recipe; it’s a foundation for healthy and delicious eating. It’s proof that you don’t need complicated steps or exotic ingredients to create something truly special. So, gather your ingredients, give it a try, and prepare to be impressed!
Conclusion:
There you have it – a wonderfully simple yet incredibly versatile chia seed pudding recipe that’s a game-changer for busy mornings and healthy snacking. This recipe is fantastic because it requires minimal effort, uses just a few pantry staples, and delivers a nutrient-packed treat brimming with fiber, omega-3 fatty acids, and antioxidants. The pudding’s creamy texture and customizable nature make it an absolute winner for anyone looking for a delicious and guilt-free option. I love to serve it chilled, often topped with fresh berries, a sprinkle of granola for crunch, or a drizzle of honey for extra sweetness. Don’t be afraid to get creative with variations! Try adding a touch of cocoa powder for a chocolatey twist, a dash of cinnamon for warmth, or even some mashed banana for natural sweetness and flavor. This recipe is your canvas for healthy indulgence. I truly encourage you to give this chia seed pudding a try – it’s so rewarding to whip up something so good for you with such ease!
Frequently Asked Questions:
How long does chia seed pudding take to set?
Typically, chia seed pudding needs to sit in the refrigerator for at least 2-4 hours to achieve its signature thick, pudding-like consistency. For the best results, I recommend preparing it the night before, allowing ample time for the chia seeds to fully absorb the liquid.
Can I make chia seed pudding with different liquids?
Absolutely! While almond milk is a popular choice, you can experiment with any milk of your preference, including dairy milk, coconut milk, oat milk, or even soy milk. You can even use fruit juice for a tangier flavor, though you might need to adjust the sweetness.
What are some other topping ideas for chia seed pudding?
Beyond the classic berries and granola, consider adding sliced fruit like peaches or mango, a dollop of Greek yogurt, chopped nuts, toasted coconut flakes, a sprinkle of cacao nibs, or even a spoonful of your favorite nut butter. The possibilities are endless!
Chia Seed Pudding
A simple and healthy chia seed pudding recipe. Customizable with your favorite milk and sweetener.
Ingredients
-
3 tablespoons chia seeds
-
1 tablespoon maple syrup
-
1 teaspoon vanilla extract
-
3/4 cup almond milk
-
1/4 cup water
-
Pinch of salt
Instructions
-
Step 1
In a medium bowl, combine the chia seeds, maple syrup, and vanilla extract. -
Step 2
Pour in the almond milk and water. -
Step 3
Whisk everything together thoroughly to prevent clumping. -
Step 4
Let the mixture sit for 5 minutes, then whisk again. -
Step 5
Cover the bowl and refrigerate for at least 2 hours, or preferably overnight, until thickened. -
Step 6
Stir before serving and add any desired toppings like fruit or nuts.
Important Information
Nutrition Facts (Per Serving)
It is important to consider this information as approximate and not to use it as definitive health advice.
Allergy Information
Please check ingredients for potential allergens and consult a health professional if in doubt.