Easter Poke Cake Delight- Easy Recipe
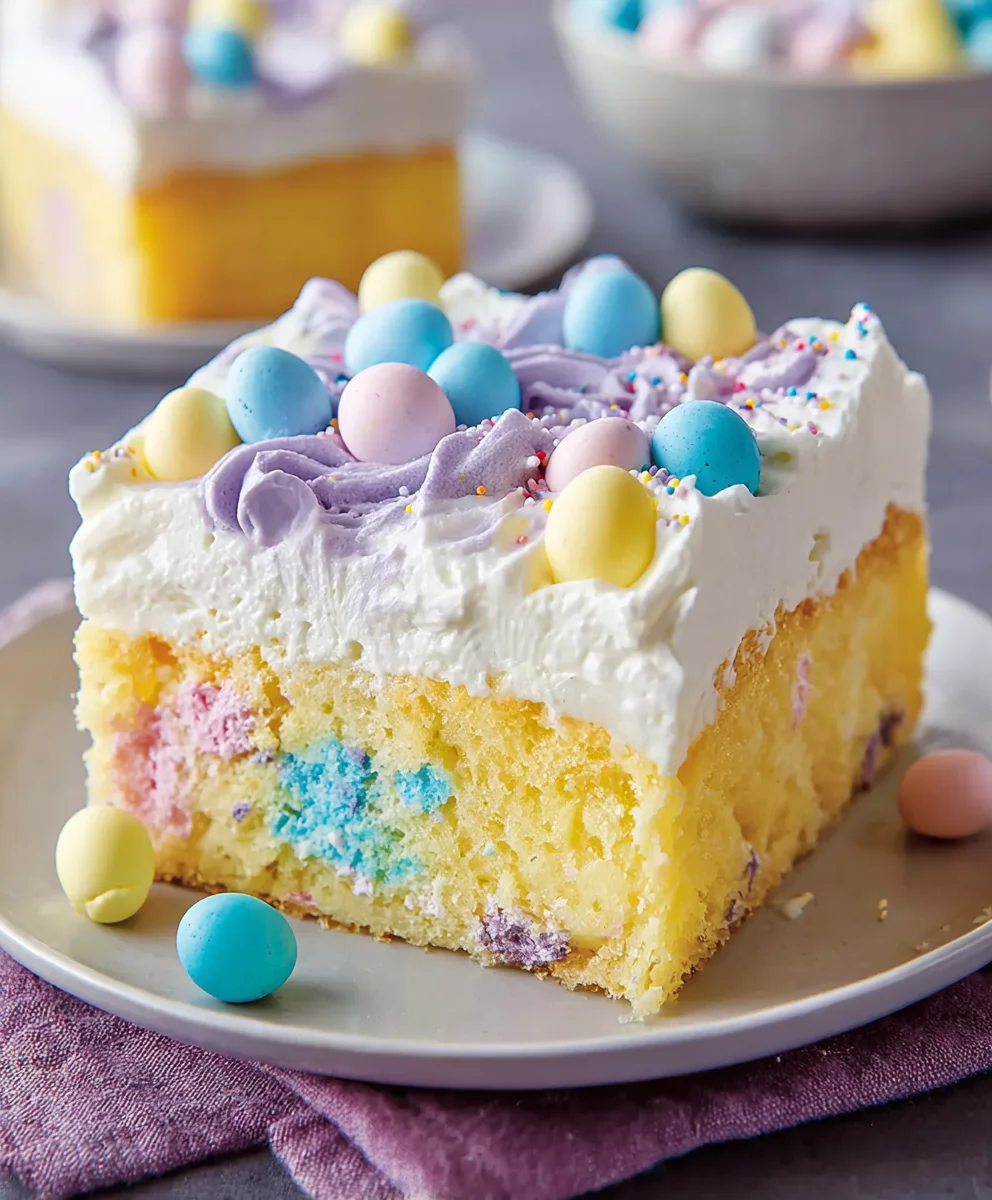
Easter Poke Cake is more than just a dessert; it’s a vibrant explosion of springtime joy baked right into a fluffy, moist cake. Imagin extracte this: a light and airy vanilla cake, generously pierced with tiny holes, just waiting to be infused with a cascade of sweet, creamy goodness. That’s the magic of an Easter Poke Cake! It’s the quintessential centerpiece for any Easter celebration, guaranteed to elicit smiles from the youngest egg hunters to the most seasoned dessert enthusiasts. What makes it so utterly irresistible? It’s the delightful interplay of textures – the yielding cake, the velvety smooth filling that seeps into every crevice, and often, a light and airy whipped topping adorned with festive sprinkles. This isn’t just cake; it’s edible sunshine, a delightful way to usher in the season and create lasting memories with every single bite.
Ingredients:
- 15.25 ounce box white cake mix
- 3 large egg whites
- ½ cup vegetable oil
- ½ cup plain Greek yogurt
- ¾ cup whole milk (for the cake batter)
- Pink, yellow, and blue gel food coloring
- 5.1 ounce box instant vanilla pudding mix
- 2 ¾ cups whole milk (for the pudding)
- 2 cups heavy cream
- 3 Tablespoons granulated sugar
- 1 cup sweetened shredded coconut
- Easter sprinkles and/or mini eggs, for decorating
Baking the Cake Layers
Step 1: Prepare the Cake Batter
First things first, let’s get our cake layers ready. Preheat your oven to the temperature recommended on your white cake mix box, usually around 350°F (175°C). Grease and flour two 8 or 9-inch round cake pans. In a large mixing bowl, combine the white cake mix, the 3 egg whites, ½ cup of vegetable oil, and ½ cup of plain Greek yogurt. Now, for the liquid – add ¾ cup of whole milk. Using an electric mixer on low speed, blend these ingredients until they are just combined. Once combined, increase the speed to medium and beat for two minutes. This aeration is crucial for a light and fluffy cake. Be sure to scrape down the sides of the bowl occasionally to ensure everything is incorporated evenly. The Greek yogurt is a fantastic addition here, it adds moisture and a subtle tang that balances the sweetness of the cake.
Step 2: Divide and Color the Batter
This is where the “poke” and “Easter” really start to come to life! After your batter is ready, divide it as evenly as possible into three separate bowls. You’ll want to aim for roughly equal amounts in each bowl. Now, grab your gel food coloring. Add a few drops of pink gel food coloring to the first bowl, yellow to the second, and blue to the third. Gel food coloring is great because it’s concentrated and won’t add extra liquid to your batter, which could affect the texture. Gently fold the color into each bowl until you achieve a vibrant, uniform hue. Avoid overmixing at this stage; just mix until the color is fully dispersed. The goal is beautiful pastel colors that will peek through your finished cake.
Step 3: Baking and Cooling the Layers
Carefully pour each colored batter into one of your prepared cake pans. You can do this in a swirled pattern, or even layer them carefully, but for a distinct poke effect, I find it’s best to just fill the pans with the individual colors. For instance, you could put pink in one pan, yellow in another, and blue in a third, or if you have three pans, divide the colors amongst them. Bake according to the cake mix package directions, typically 30-35 minutes, or until a wooden skewer or toothpick inserted into the center comes out clean. Once baked, let the cakes cool in their pans for about 10-15 minutes before inverting them onto a wire rack to cool completely. It’s absolutely essential that these cakes are completely cool before moving on to the next step. Warm cakes can be fragile and can cause your frosting to melt.
Creating the Pudding Filling and Frosting
Step 4: Making the Vanilla Pudding and Whipped Cream Frosting
While your cakes are cooling, let’s whip up the magical filling and frosting. For the vanilla pudding, in a medium bowl, whisk together the instant vanilla pudding mix with 2 ¾ cups of whole milk. Whisk vigorously for about two minutes until it starts to thicken. Let it sit for about 5 minutes to fully set. In a separate, large bowl, combine the 2 cups of heavy cream and 3 tablespoons of granulated sugar. Whip this using your electric mixer, starting on low and increasing to high speed, until stiff peaks form. This means when you lift the whisk, the cream holds its shape. Gently fold the set vanilla pudding into the whipped cream. Be careful not to overmix; you want to keep that lovely airy texture from the whipped cream. This creates a light and creamy frosting that’s perfect for our poke cake.
Step 5: Assembling the Easter Poke Cake
Once your cake layers are completely cool, it’s time for the fun part! Place one cake layer on your serving plate. Using the handle of a wooden spoon or a skewer, poke holes all over the top of the cake. Make these holes about ½ inch apart and go about halfway down the cake. Don’t poke all the way through! Now, carefully spoon about half of the vanilla pudding and whipped cream mixture over the poked cake, allowing it to seep into all those lovely holes. Repeat this process with your second cake layer, poking holes and spreading another portion of the filling. If you baked three layers, repeat with the third. For this Easter Poke Cake, I recommend using two layers, ensuring the filling can soak deeply. Smooth the remaining frosting over the top and sides of the cake, or reserve some to pipe decorative swirls.
Decorating Your Masterpiece
Step 6: Adding the Coconut and Easter Embellishments
To give our Easter Poke Cake a touch of spring, we’ll add some shredded coconut for a fluffy, grassy effect. Gently press the 1 cup of sweetened shredded coconut onto the sides of the cake and sprinkle a generous amount over the top. This not only looks beautiful but adds a lovely texture and flavor contrast. Now, for the grand finnon-alcoholic ale – the Easter decorations! Scatter your Easter sprinkles and/or mini eggs over the coconut-covered cake. You can be as creative as you like here, making little patterns or just a cheerful, colorful scattering. Let the cake chill in the refrigerator for at least 2-3 hours, or preferably overnight. This chilling time is crucial for allowing the pudding mixture to fully saturate the cake, creating that signature moist and flavorful poke cake experience. When you slice into it, you’ll see all the beautiful colors and the creamy filling!

Conclusion:
There you have it – a simple yet stunning Easter Poke Cake that’s sure to be the star of your holiday dessert table! This delightful cake is incredibly forgiving and perfect for bakers of all skill levels. The moist cake, infused with a vibrant pudding, and topped with fluffy whipped cream and festive sprinkles, creates a symphony of textures and flavors. It’s a wonderful way to celebrate the season and spread some sweet cheer.
For serving, I love to enjoy a slice of this Easter Poke Cake on its own, but it also pairs beautifully with a scoop of vanilla ice cream or a drizzle of extra whipped cream. Get creative with your decorations! Beyond the traditional Easter sprinkles, consider adding fresh berries, chocolate shavings, or even edible flowers for an extra touch of elegance.
Don’t be afraid to experiment with variations! While the classic vanilla and lemon combination is divine, you could try different pudding flavors like strawberry or even chocolate. For a lighter touch, consider a cream cheese frosting instead of whipped cream. The possibilities are endless, and the joy of making and sharing this Easter Poke Cake is truly rewarding.
Frequently Asked Questions about Easter Poke Cake:
Q1: Can I make this Easter Poke Cake ahead of time?
Absolutely! The Easter Poke Cake is actually best made at least a few hours, or even a day, in advance. This allows the pudding to fully soak into the cake and for the flavors to meld together beautifully. Just store it covered in the refrigerator.
Q2: What kind of cake mix should I use for the Easter Poke Cake?
A white cake mix or a yellow cake mix are both excellent choices for this Easter Poke Cake. They provide a neutral base that allows the pudding flavor and festive decorations to truly shine. You can also use a box of angel food cake mix for a lighter texture.
Easter Poke Cake Delight
A delightful and easy Easter poke cake recipe featuring colorful cake layers, a creamy vanilla pudding filling, and a fluffy coconut topping, perfect for spring celebrations.
Ingredients
-
15.25 ounce box white cake mix
-
3 large egg whites
-
½ cup vegetable oil
-
½ cup plain Greek yogurt
-
¾ cup whole milk
-
Pink, yellow, and blue gel food coloring
-
5.1 ounce box instant vanilla pudding mix
-
2 ¾ cups whole milk
-
2 cups heavy cream
-
3 Tablespoons granulated sugar
-
1 cup sweetened shredded coconut
-
Easter sprinkles and/or mini eggs, for decorating
Instructions
-
Step 1
Preheat oven to 350°F (175°C). Grease and flour two 8 or 9-inch round cake pans. In a large bowl, combine cake mix, egg whites, vegetable oil, Greek yogurt, and ¾ cup whole milk. Mix on low speed until combined, then beat on medium for 2 minutes. -
Step 2
Divide batter evenly into three bowls. Add pink food coloring to one, yellow to another, and blue to the third. Gently fold in color until uniform hues are achieved. -
Step 3
Pour each colored batter into prepared cake pans (one color per pan, or divide colors if using fewer pans). Bake according to cake mix directions (30-35 minutes), or until a skewer comes out clean. Cool in pans for 10-15 minutes, then invert onto a wire rack to cool completely. -
Step 4
While cakes cool, prepare the filling. In a medium bowl, whisk instant vanilla pudding mix with 2 ¾ cups whole milk for 2 minutes until thickened. Let sit for 5 minutes. In a separate large bowl, whip heavy cream and granulated sugar until stiff peaks form. Gently fold the set pudding into the whipped cream. -
Step 5
Place one cooled cake layer on a serving plate. Poke holes all over the top about ½ inch apart and halfway down. Spoon about half of the pudding mixture over the poked cake, letting it seep into the holes. Repeat with the second cake layer. -
Step 6
Smooth the remaining frosting over the top and sides of the cake. Gently press shredded coconut onto the sides and sprinkle over the top. Decorate with Easter sprinkles and/or mini eggs. Chill for at least 2-3 hours before serving.
Important Information
Nutrition Facts (Per Serving)
It is important to consider this information as approximate and not to use it as definitive health advice.
Allergy Information
Please check ingredients for potential allergens and consult a health professional if in doubt.