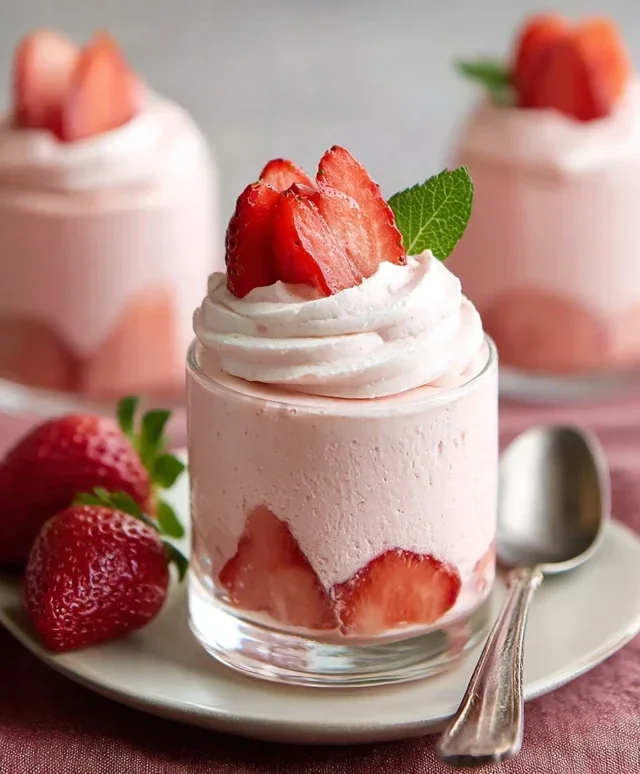
Boozy Jello Candy Melts-Adult Party Treat
Boozy Jello Candy Melts are not your grandma’s sugar bombs, and thank goodness for that! Forget those chalky, overly sweet discs you might remember from childhood. We’re talking about a sophisticated, grown-up twist on a classic, infusing that familiar fruity sweetness with a delightful kick that’ll have your taste buds singin extractg. These aren’t just a treat; they’re a conversation starter, a decadent little indulgence perfect for impressing guests or simply treating yourself after a long week. What makes Boozy Jello Candy Melts so special? It’s the unexpected marriage of smooth, melted chocolate or candy melts with the vibrant, slightly tart burst of flavored Jello, all culminating in a texture that’s both satisfyingly firm and delightfully chewy. Get ready to elevate your dessert game with this surprisingly simple, yet utterly addictive confection.
Boozy Jello Candy Melts
Are you ready to elevate your candy game with a grown-up twist? These Boozy Jello Candy Melts are the perfect way to add a little sparkle and a lot of fun to any occasion. Imagin extracte vibrant, chewy treats with a subtle kick – they’re incredibly easy to make and are sure to be a hit at parties, as a unique dessert, or even just for a delightful treat to yourself. We’re taking the classic fun of jello candy and infusing it with delightful flavors and a sophisticated spirit, all while keeping it manageable for home cooks. Let’s dive into the wonderfully simple process of creating these delightful morsels!
Ingredients:
Getting Started: Preparing Your Workspace and Ingredients
Before we even think about mixing, it’s crucial to have everything prepped and ready to go. This recipe moves fairly quickly once we start combining ingredients, so a little foresight goes a long way. First, decide on your candy molds. Small silicone molds work wonderfully, offering a plethora of shapes from simple squares to intricate designs. Prepare your chosen molds by lightly spraying them with non-stick spray or brushing them with a thin layer of vegetable oil. This step is absolutely critical for ensuring your beautiful candy melts release cleanly without breaking or sticking. If you’re using candy melt molds, make sure they are clean and dry.
Next, let’s get our flavors ready. You’ll want to have your three chosen flavored gelatin packets close at hand. Think about the color combinations you want to achieve. Mixing and matching these vibrant colors can create visually stunning treats. For instance, a swirl of red and blue can create a beautiful purple effect, or distinct layers can showcase each individual flavor. The non-non-non-alcoholic alternativeic non-alcoholic alternative alternative you select will also play a subtle role in the overall flavor profile. Don’t be afraid to experiment with different extracts to find your favorite combination. Remember, the goal here is a subtle infusion, not an overpowering spirit flavor.
The Blooming Gelatin Process
The key to a smooth and consistent candy melt texture lies in properly blooming the unflavored gelatin. In a small bowl, combine the 1/4 cup of cold water with the 2 tablespoons of unflavored gelatin powder. Give it a good stir with a fork or whisk. You’ll notice it will immediately start to absorb the water and thicken, forming a jelly-like mass. This process, known as blooming, allows the gelatin granules to hydrate evenly before being heated, preventing clumps and ensuring a smooth melt. Let this mixture sit for about 5-10 minutes while you prepare the flavored gelatin base. This is a non-negotiable step for achieving the perfect chewy texture.
Creating the Flavorful Base
Now for the exciting part where we bring all our flavors together! In a heatproof bowl, we’re going to combine our flavored gelatin packets with boiling water. Carefully pour the 1 cup of boiling water over the three packs of flavored gelatin. Stir gently but thoroughly with a whisk until all the gelatin powder has completely dissolved. You’re looking for a smooth, clear liquid with no grainy texture. This might take a minute or two, so be patient. Once dissolved, stir in the 1/4 cup of granulated sugar until it’s fully incorporated. This sugar will add a touch more sweetness and help with the overall candy consistency.
Now, it’s time to introduce our boozy element and that delightful tang. To the warm, dissolved flavored gelatin mixture, add your 1 cup of cold non-non-non-alcoholic alternativeic alternative (vodka extract extract, rum extract extract, tequila extract extract, or non-non-non-alcoholic alternativeic cbeef hampagne). Stir this in well. Finally, whisk in the 1/2 teaspoon of citric acid. This is a secret weapon for adding a bright, zesty punch that really makes the fruit flavors sing and balances the sweetness. The citric acid also helps to slightly firm up the candy, giving it a pleasant chew. Your base mixture is now ready!
Assembling and Setting Your Candy Melts
This is where your creativity can really shine. If you’re making layered or swirled candies, work in batches. You can carefully pour one color into your prepared molds and let it set slightly in the refrigerator for about 15-20 minutes before adding the next color. For swirls, pour two different colors simultaneously or in quick succession and use a toothpick to gently marble them together. If you’re opting for a single vibrant color, simply pour your prepared mixture into the greased molds, filling each cavity to your desired level.
After you’ve filled your molds, it’s time for them to firm up. Carefully transfer the filled molds to the refrigerator. Allow them to chill for at least 2-4 hours, or until they are completely firm to the touch. The exact setting time can vary depending on the size and depth of your molds and how full they are. You’ll know they’re ready when they feel solid and don’t jiggle when gently shaken. Patience here is key to a successful outcome!
The Grand Finnon-alcoholic ale: Decorating and Enjoying!
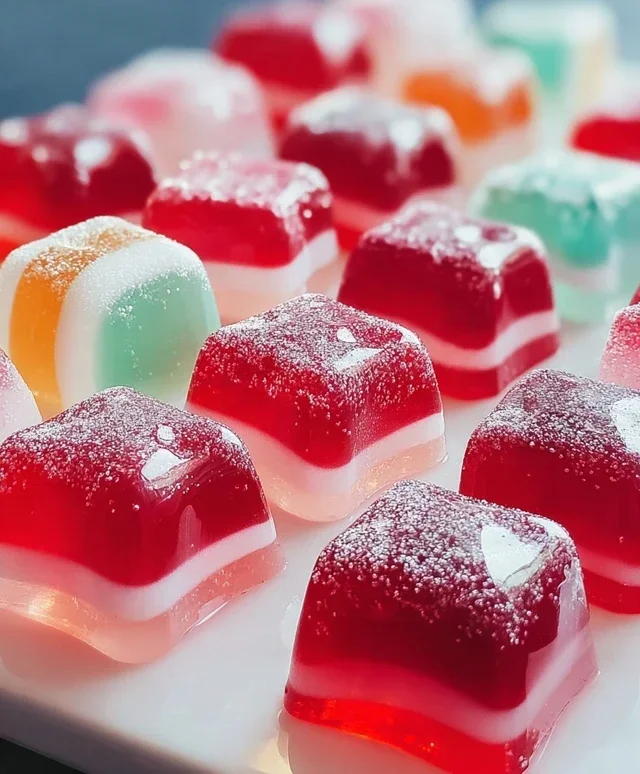
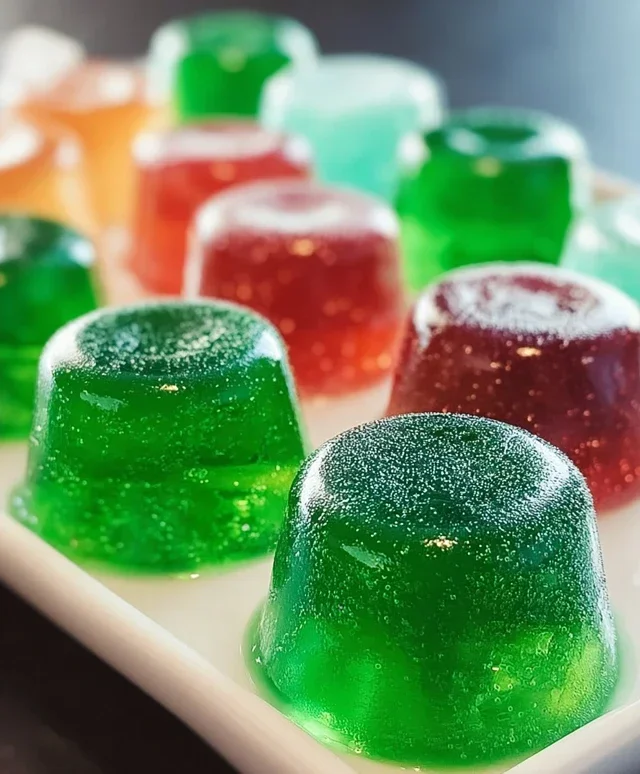
Once your Boozy Jello Candy Melts have set, it’s time for the most fun part: decorating! Gently unmold each candy by carefully peeling away the silicone mold or by inverting the mold and pressing gently on the back. If you find any are a little stubborn, a brief moment in the freezer can help them release more easily. Now, let’s add that sparkle! Lightly brush or sprinkle edible glitter over the surface of your candies for an instant touch of magic. For an extra pop of texture and visual appeal, roll or dip the edges of your candies in sanding sugar. This creates a delightful crunchy coating and a festive shimmer.
Arrange your beautifully decorated Boozy Jello Candy Melts on a platter or in small serving dishes. These are best enjoyed chilled. They’re a fantastic addition to any dessert table, a fun conversation starter, and a delightful way to add a sophisticated, playful element to your gatherings. Enjoy the delightful chew, the burst of fruity flavor, and the subtle, sophisticated hint of your chosen spirit infusion. Happy candy making!
Conclusion:
There you have it – a delightful and surprisingly simple way to elevate your dessert game with these Boozy Jello Candy Melts! This recipe is fantastic because it takes a classic childhood treat and adds a sophisticated adult twist. The vibrant colors and fun shapes are perfect for parties, holidays, or just a special treat for yourself. They’re a guaranteed conversation starter and a delicious way to enjoy your favorite non-alcoholic spirits in a unique form.
I love serving these alongside other desserts, as a fun garnish for cocktails, or simply in a bowl for guests to pop. They’re incredibly versatile! Don’t be afraid to experiment with different non-alcoholic liquor and Jello flavor combinations. Think a classic margarita with lime Jello and tequila extract, or a rum extract and cola with cola flavored Jello and dark rum extract. The possibilities are truly endless, and the results are always impressive. I truly encourage you to give these Boozy Jello Candy Melts a try – you won’t regret it!
Frequently Asked Questions:
What type of non-alcoholic alternative works best?
You can use most non-alcoholic spirits! Vodka Extract is a popular choice because it has a neutral flavor, allowing the Jello to shine. However, non-alcoholic liquors like rum extract, tequila extract, whiskey extract, and even liqueur extracts like Grand Marnier Extract can add wonderful depth and flavor. Just be mindful of very strong flavors that might overpower the Jello.
Can I make these non-non-non-alcoholic alternativeic?
Absolutely! Simply omit the non-alcoholic alternative and replace the liquid measurement with an equal amount of water or juice that complements your Jello flavor. They’ll still be a fun and colorful treat!
How long do these last?
Stored properly in an airtight container in the refrigerator, these Boozy Jello Candy Melts will typically last for about 5-7 days. Their texture might change slightly over time, becoming a bit firmer.
Boozy Jello Candy Melts
A fun and flavorful adult treat made with gelatin, candy melts, and a non-alcoholic spirit extract for a delightful, boozy-like candy.
Ingredients
-
3 (3 oz) packs flavored gelatin (strawberry, lime, blue raspberry)
-
1 cup boiling water
-
1 cup cold vodka extract
-
1/4 cup granulated sugar
-
2 tbsp unflavored gelatin powder
-
1/4 cup cold water (for blooming gelatin)
-
Non-stick spray or vegetable oil (for greasing molds)
-
1/2 tsp citric acid (for tanginess)
-
Edible glitter (for decoration)
-
Sanding sugar (for decoration)
Instructions
-
Step 1
In a large bowl, combine the 3 (3 oz) packs of flavored gelatin and the unflavored gelatin powder. Whisk to combine. -
Step 2
In a separate small bowl, pour the 1/4 cup cold water over the 2 tbsp unflavored gelatin powder. Let it sit for 5-10 minutes to bloom. -
Step 3
Pour the 1 cup boiling water into the gelatin mixture. Stir until the gelatin is completely dissolved. -
Step 4
Stir in the bloomed gelatin, 1 cup cold vodka extract, 1/4 cup granulated sugar, and 1/2 tsp citric acid until fully dissolved and smooth. -
Step 5
Lightly grease silicone candy molds with non-stick spray or vegetable oil. -
Step 6
Carefully pour the gelatin mixture into the prepared molds. You can layer flavors or swirl them for a marbled effect. -
Step 7
Refrigerate for at least 4-6 hours, or until completely set and firm. -
Step 8
Once set, carefully unmold the jello candy melts. If using molds that are difficult to unmold, you can briefly dip the bottom of the mold in warm water. -
Step 9
Decorate the jello candy melts with edible glitter and sanding sugar as desired.
Important Information
Nutrition Facts (Per Serving)
It is important to consider this information as approximate and not to use it as definitive health advice.
Allergy Information
Please check ingredients for potential allergens and consult a health professional if in doubt.