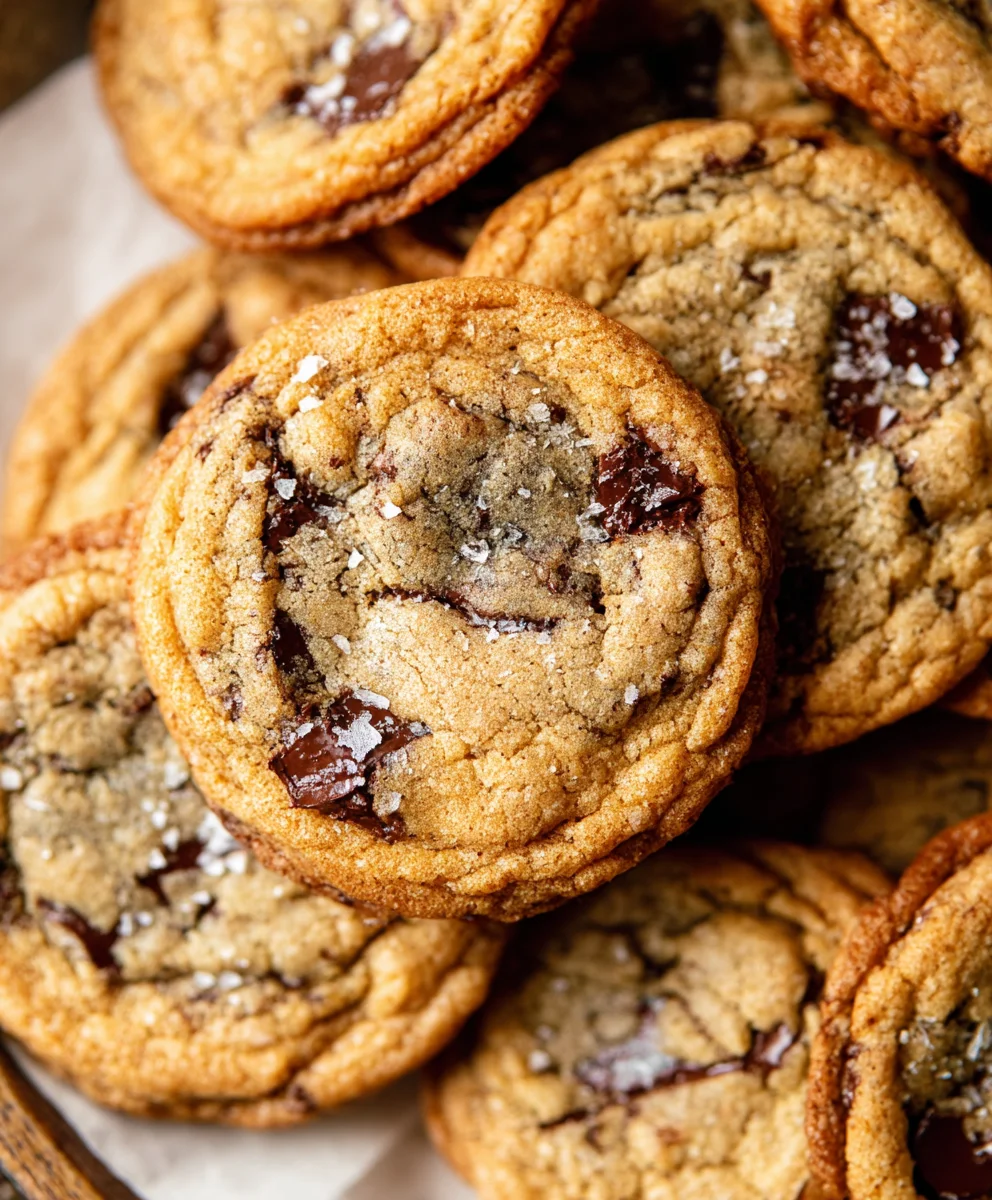
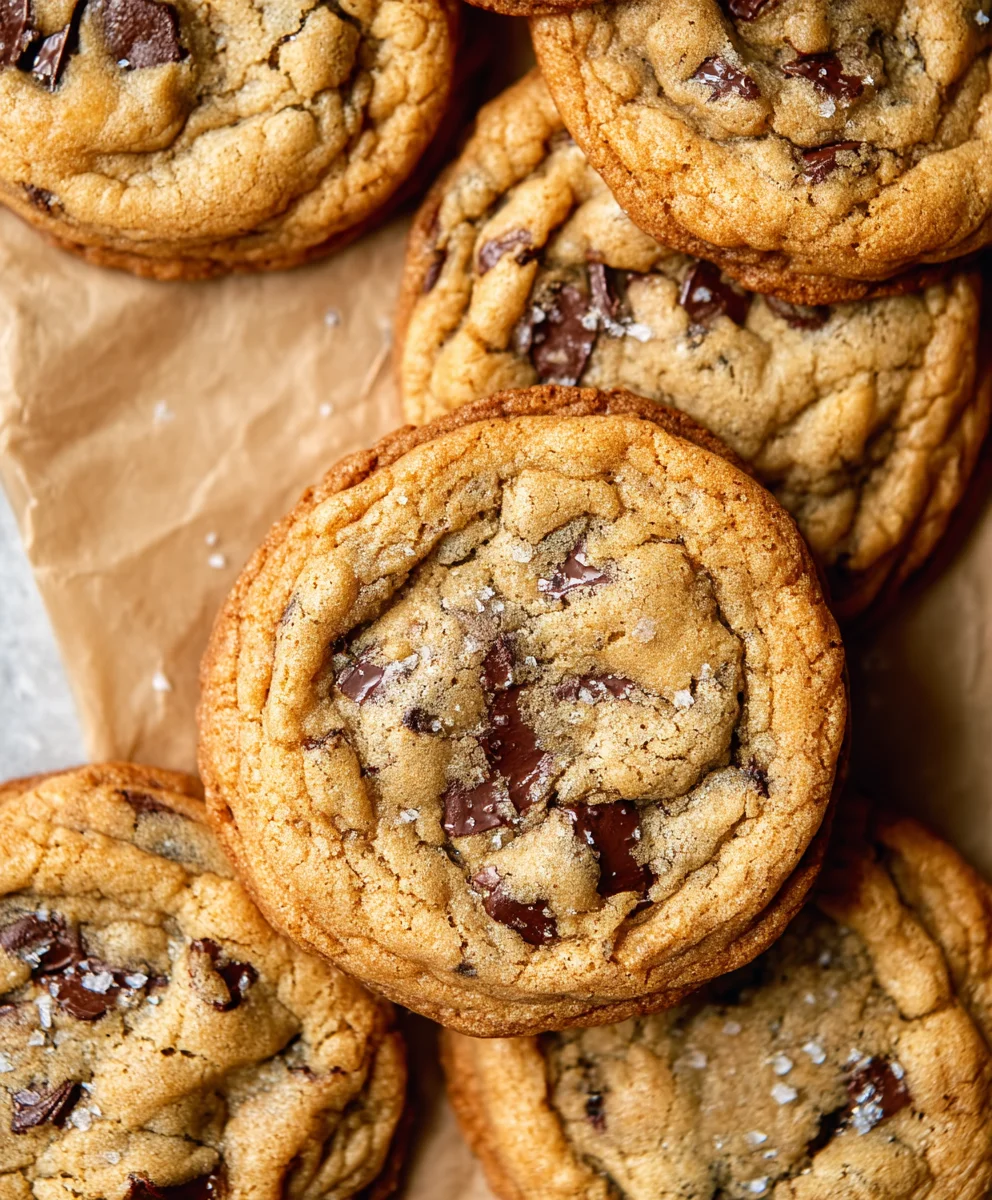
Bakery Style Chocolate Chip Cookies-Perfectly Chewy
Bakery Style Chocolate Chip Cookies aren’t just a treat; they’re a nostalgic portal to childhood, a comforting embrace after a long day, and a universally adored classic for a reason. We all know that distinctive aroma wafting from a good bakery – that irresistible blend of warm butter, sweet sugar, and rich chocolate. But what separates a truly sublime cookie from the everyday ones? It’s the perfect balance: a slightly crisp edge giving way to a gloriously chewy center, packed with molten chocolate chips that practically beg to be devoured. This recipe is my journey to capture that authentic bakery magic right in your own kitchen. Prepare to be amazed as you bite into a cookie that’s every bit as decadent and satisfying as the ones you queue for, but made with your own hands. Get ready for the ultimate comfort food experience!
Ingredients:
- 2 ¼ cups all-purpose flour
- 1 teaspoon baking soda
- 1 teaspoon salt
- 1 cup (2 sticks) unsalted butter, softened
- ¾ cup granulated sugar
- ¾ cup packed light brown sugar
- 1 teaspoon vanilla extract
- 2 large eggs
- 2 cups (12 ounces) semi-sweet chocolate chips
- 1 cup chopped walnuts or pecans (optional)
Baking the Perfect Bakery Style Chocolate Chip Cookies
The quest for the ultimate bakery-style chocolate chip cookie is a noble one. We all love that perfect balance of chewy center, slightly crisp edges, and generous pockets of melted chocolate. This recipe is designed to deliver just that, emulating the texture and flavor profile you’d find in your favorite local bakery. It’s a straightforward approach that yields exceptional results, perfect for sharing (or not!).
Preparation and Mixing the Dough
The foundation of any great cookie lies in the creaming of the butter and sugars. This process incorporates air into the dough, which is crucial for texture.
Step 1: Dry Ingredient Mélange
In a medium-sized bowl, whisk together the all-purpose flour, baking soda, and salt. Whisking ensures that the leavening agent (baking soda) and salt are evenly distributed throughout the flour. This prevents pockets of saltiness or areas where the cookies might not rise properly. Set this bowl aside.
Step 2: Creaming the Butter and Sugars
In a large mixing bowl, or the bowl of a stand mixer fitted with the paddle attachment, cream together the softened unsalted butter, granulated sugar, and packed light brown sugar. Start by creaming them on medium speed for about 2 to 3 minutes. You’re looking for a light, fluffy mixture. The brown sugar, with its molasses content, is key to achieving that delightful chewy texture and rich flavor characteristic of bakery-style cookies. Scrape down the sides of the bowl periodically to ensure everything is incorporated.
Step 3: Incorporating Wet Ingredients
Add the vanilla extract to the creamed butter and sugar mixture and beat until combined. Next, add the large eggs, one at a time, beating well after each addition. It’s important to add the eggs one by one and beat thoroughly to emulsify the mixture. This helps create a stable dough that won’t separate during baking. Again, scrape down the sides of the bowl as needed.
Step 4: Combining Wet and Dry
Gradually add the dry ingredients (from Step 1) to the wet ingredients. Mix on low speed until just combined. Be careful not to overmix at this stage. Overmixing can develop the gluten in the flour too much, leading to tough cookies. You want to mix just until no dry streaks of flour remain.
Step 5: The Chocolatey Goodness (and Optional Nuts)
Gently fold in the semi-sweet chocolate chips. If you’re adding chopped walnuts or pecans, fold those in now as well. Use a spatula or the paddle attachment on the lowest speed for this step. The goal here is to distribute the chocolate chips and nuts evenly throughout the dough without breaking them up too much. You want those lovely pockets of chocolate.
Chilling the Dough (The Secret to Bakery Texture!)
This is a crucial step that many home bakers overlook, but it truly elevates your cookies to bakery-level.
Step 6: Resting the Dough
Cover the bowl with plastic wrap and refrigerate the dough for at least 30 minutes, or preferably for 2 to 4 hours, or even overnight. Chilling the dough allows the flour to hydrate fully, which contributes to a chewier cookie. It also solidifies the fat, which prevents the cookies from spreading too much during baking, resulting in thicker, chewier cookies with more concentrated flavor.
Baking and Cooling Your Masterpieces
Now for the exciting part – transforming that dough into warm, gooey cookies.
Step 7: Preheating and Portioning
Preheat your oven to 375°F (190°C). Line baking sheets with parchment paper. This prevents sticking and makes for easy cleanup. Using a cookie scoop or two spoons, drop rounded tablespoons of dough onto the prepared baking sheets, leaving about 2 inches between each cookie to allow for spreading. For larger, bakery-style cookies, you can use a larger scoop or portion them more generously.
Step 8: Baking to Perfection
Bake for 9 to 11 minutes, or until the edges are lightly golden brown and the centers still look slightly soft and underbaked. The cookies will continue to bake on the hot baking sheet after you remove them from the oven, so pulling them out when the centers are still a bit soft is key to achieving that desired chewy interior. If you want crispier edges, you can bake them for a minute or two longer, but watch them closely to prevent burning.
Step 9: Cooling and Enjoying
Let the cookies cool on the baking sheets for 5 minutes before transferring them to a wire rack to cool completely. This allows them to set up properly. Enjoy these warm, chewy, chocolatey delights with a glass of milk or your favorite beverage!
Conclusion:
And there you have it – your very own batch of Bakery Style Chocolate Chip Cookies! We’ve walked through each step together, from creaming the butter and sugar to that crucial chill time, ensuring you achieve those perfectly chewy centers and slightly crisp edges that make these cookies so irresistible. This recipe is designed for maximum flavor and that quintessential bakery texture that’s so hard to replicate at home. Remember, the magic is in the details, but don’t be afraid to experiment and make these your own!
For the ultimate treat, I love serving these Bakery Style Chocolate Chip Cookies warm, fresh from the oven, with a tall glass of cold milk. They’re also fantastic crum extractbled over vanilla ice cream for a decadent dessert, or simply enjoyed with a cup of coffee as an afternoon pick-me-up. Get creative with your serving!
Don’t stop at just one variation! Feel free to mix in different types of chocolate chips, like white chocolate or dark chocolate chunks. You can also add a sprinkle of sea salt on top before baking for a delightful sweet and salty contrast, or even a handful of chopped nuts for added crunch. The possibilities are endless, and the results are always delicious.
I truly hope you enjoy baking and, more importantly, eating these Bakery Style Chocolate Chip Cookies. Happy baking, and may your cookie jar always be full!
Frequently Asked Questions:
Why do my Bakery Style Chocolate Chip Cookies spread too much?
Spreading is often due to the butter being too soft or melted when you begin extract, or the dough not being chilled sufficiently. Ensure your butter is at room temperature, not melted, and definitely chill the dough for at least 2-3 hours, or even overnight, for best results. Using less brown sugar and more granulated sugar can also help prevent excessive spreading.
Can I make the dough for these Bakery Style Chocolate Chip Cookies ahead of time?
Absolutely! The dough for Bakery Style Chocolate Chip Cookies can be made up to 2-3 days in advance and stored in an airtight container in the refrigerator. In fact, chilling the dough for longer periods can deepen the flavor and improve the texture. You can also freeze the dough for up to 3 months; just thaw it in the refrigerator overnight before baking.
What is the best way to store leftover Bakery Style Chocolate Chip Cookies?
To keep your Bakery Style Chocolate Chip Cookies fresh, store them in an airtight container at room temperature. They will stay delicious for up to 3-4 days. If you want to prevent them from becoming too soft, you can place a slice of bread in the container; it will absorb excess moisture and keep them perfectly chewy.
Bakery Style Chocolate Chip Cookies-Perfectly Chewy
Achieve perfectly chewy bakery-style chocolate chip cookies with this straightforward recipe, featuring a soft center, slightly crisp edges, and generous pockets of melted chocolate.
Ingredients
-
2 ¼ cups all-purpose flour
-
1 teaspoon baking soda
-
1 teaspoon salt
-
1 cup (2 sticks) unsalted butter, softened
-
¾ cup granulated sugar
-
¾ cup packed light brown sugar
-
1 teaspoon vanilla extract
-
2 large eggs
-
2 cups (12 ounces) semi-sweet chocolate chips
-
1 cup chopped walnuts or pecans (optional)
Instructions
-
Step 1
In a medium-sized bowl, whisk together the all-purpose flour, baking soda, and salt. Set aside. -
Step 2
In a large mixing bowl, cream together the softened unsalted butter, granulated sugar, and packed light brown sugar on medium speed for about 2 to 3 minutes until light and fluffy. -
Step 3
Add the vanilla extract and beat until combined. Then, add the large eggs one at a time, beating well after each addition. -
Step 4
Gradually add the dry ingredients to the wet ingredients. Mix on low speed until just combined, being careful not to overmix. -
Step 5
Gently fold in the semi-sweet chocolate chips and optional chopped nuts. -
Step 6
Cover the bowl and refrigerate the dough for at least 30 minutes, or preferably for 2 to 4 hours, or even overnight. -
Step 7
Preheat your oven to 375°F (190°C). Line baking sheets with parchment paper. Drop rounded tablespoons of dough onto the prepared baking sheets, leaving about 2 inches between each cookie. -
Step 8
Bake for 9 to 11 minutes, or until the edges are lightly golden brown and the centers still look slightly soft. -
Step 9
Let the cookies cool on the baking sheets for 5 minutes before transferring them to a wire rack to cool completely.
Important Information
Nutrition Facts (Per Serving)
It is important to consider this information as approximate and not to use it as definitive health advice.
Allergy Information
Please check ingredients for potential allergens and consult a health professional if in doubt.