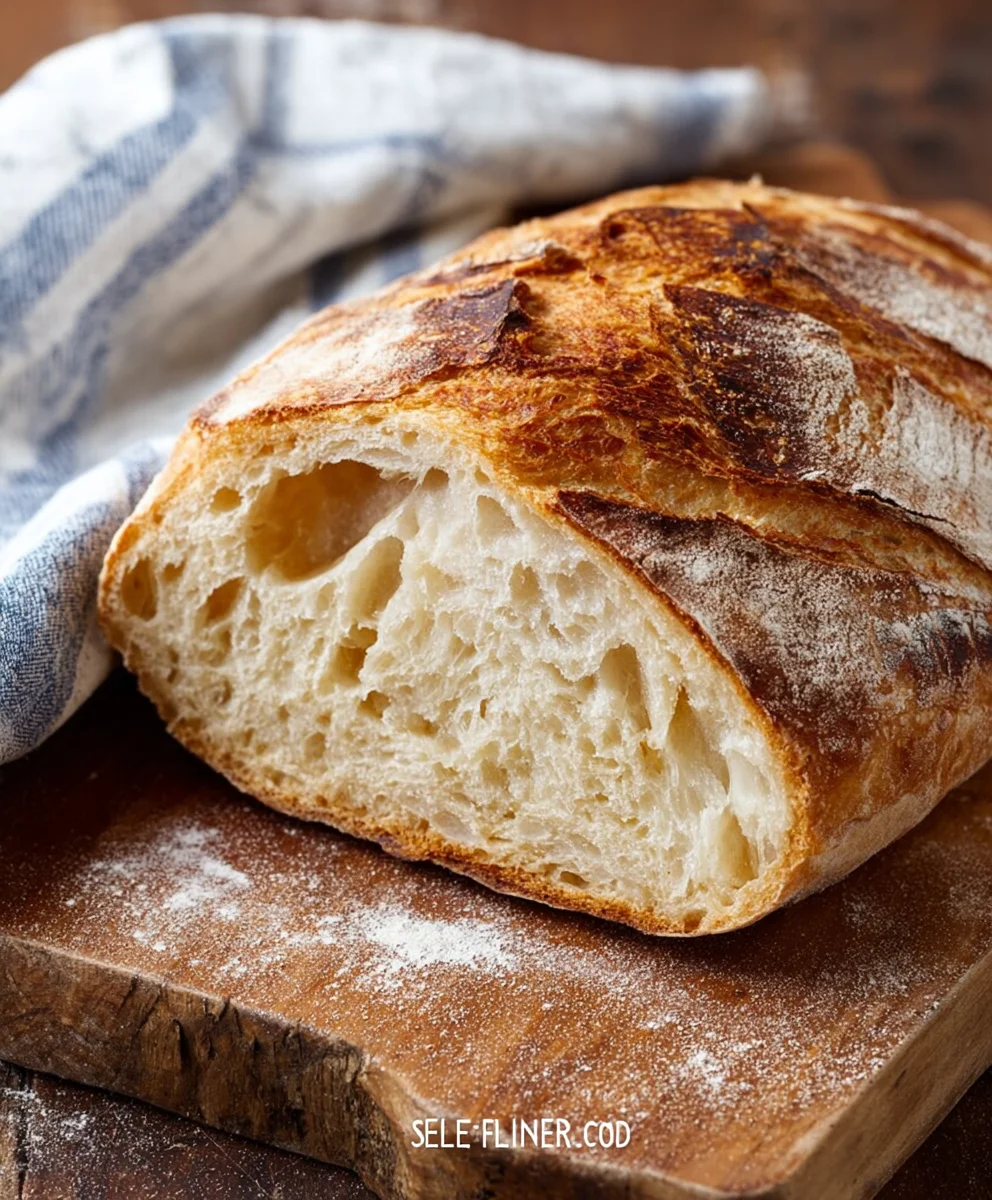
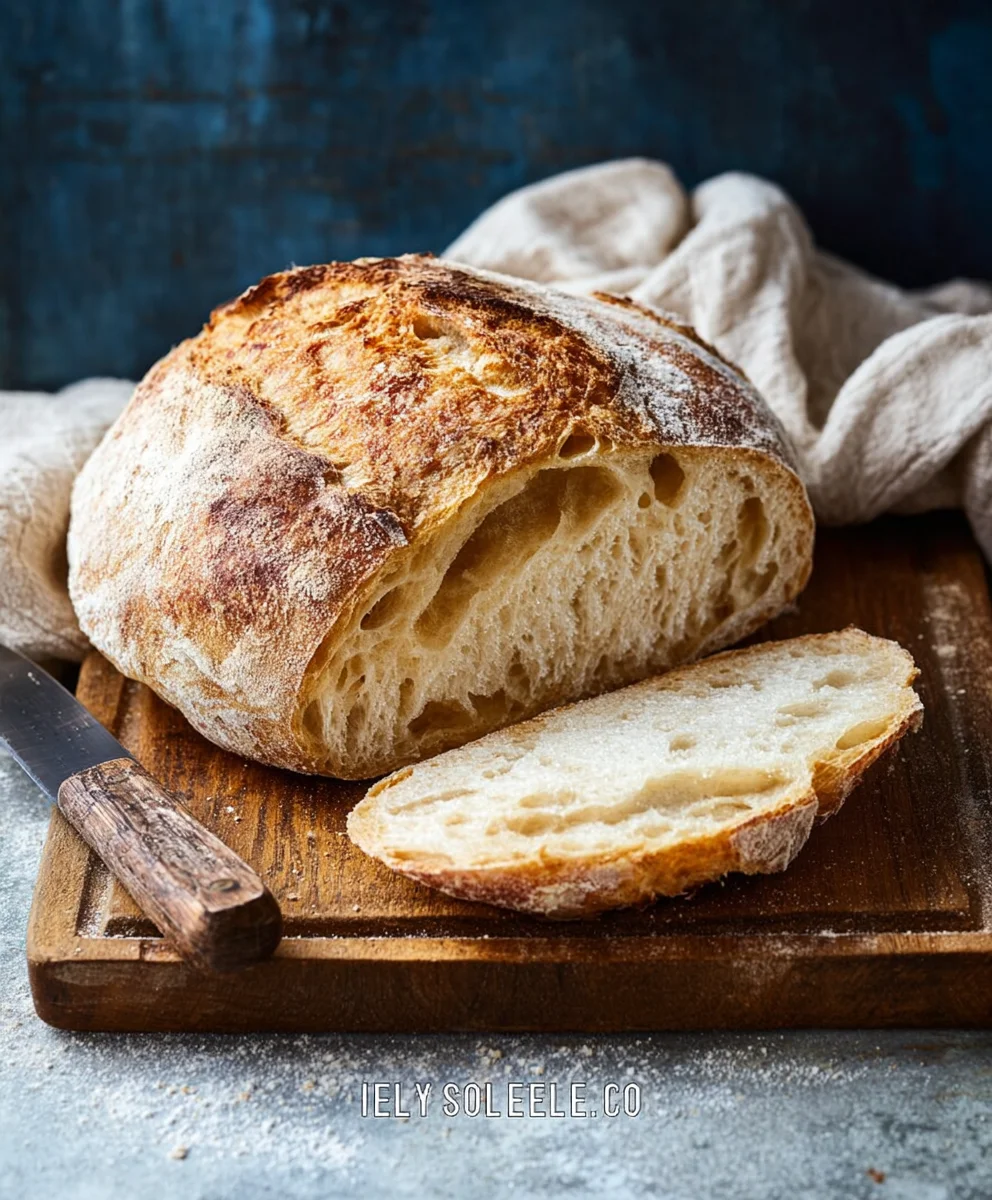
Easy Rustic Bread Recipe-Homemade & Delicious
Rustic Bread Recipe is more than just a list of ingredients and instructions; it’s an invitation to a simpler time, a warm kitchen filled with the comforting aroma of baking, and the satisfaction of creating something truly wholesome from scratch. There’s a primal joy in transforming humble flour, water, yeast, and salt into a crusty, golden loaf that’s the centerpiece of any meal. People adore this Rustic Bread Recipe because it embodies honest, unpretentious deliciousness. It’s the perfect vehicle for a dollop of butter, a smear of jam, or the star of a hearty sandwich. What truly sets this particular Rustic Bread Recipe apart is its forgiving nature, its deep, satisfying flavor profile developed through a slow fermentation, and that quintessential chewy interior encased in a beautifully crackled crust. It’s a recipe that feels both achievable for the begin extractner baker and deeply rewarding for the seasoned artisan, promising a taste of pure, unadulterated comfort with every bite.
Ingredients:
- 3 cups warm water
- 2 ¼ teaspoons active dry yeast (this is equivnon-alcoholic alent to one standard packet of yeast)
- 1 tablespoon granulated sugar
- 6 cups all-purpose flour (approximately 750 grams)
- 3 teaspoons salt
Making the Dough
Step 1: Activating the Yeast
The first crucial step in creating our rustic bread is to awaken the yeast. In a large mixing bowl, combine the 3 cups of warm water. The water should feel comfortably warm to the touch, not hot, as extreme heat can kill the yeast. Aim for a temperature between 105°F and 115°F (40°C to 46°C). Sprinkle the 2 ¼ teaspoons of active dry yeast over the surface of the warm water. Then, add the 1 tablespoon of granulated sugar. The sugar acts as food for the yeast, helping it to activate and become bubbly. Give it a gentle stir to ensure the yeast and sugar are somewhat dispersed. Let this mixture sit undisturbed for about 5 to 10 minutes. You’ll know the yeast is active when it becomes foamy and bubbly on the surface, resembling a frothy layer. If you don’t see this foam, your yeast might be old or the water wasn’t the right temperature, and it’s best to start this step again.
Step 2: Combining Dry Ingredients and Initial Mixing
Once your yeast mixture is happily foamy, it’s time to introduce the flour and salt. In a separate, larger bowl, or the bowl of your stand mixer if you’re using one, combine the 6 cups of flour and 3 teaspoons of salt. Whisk them together briefly to distribute the salt evenly throughout the flour. This ensures consistent flavor in your bread. Now, create a well in the center of the dry ingredients. Pour the activated yeast mixture into this well. Using a sturdy spoon or a dough whisk, begin extract to mix the ingredients together. Start from the center, gradually incorporating the flour from the sides into the wet ingredients. Continue mixing until a shaggy, cohesive gin extractgh begins to form. It will look messy at this stage, and that’s perfectly normal. Don’t worry about it being smooth yet.
Step 3: Developing the Dough and First Knead
Now, we need to develop the gluten in the dough, which gives bread its structure and chew. If you’re mixing by hand, turn the shaggy dough out onto a lightly flogin extractd surface. Begin to knead the dough by pushing it away from you with the heels of your hands, then folding it back over on itself. Rotate the dough a quarter turn and repeat. Continue this process for about 8 to 10 minutes. The dough will start out sticky and rough, but as you knead, it will become smoother, more elastic, and less sticky. If the dough becomes too sticky, you can add a tiny bit more flour, a tablespoon at a time, but be careful not to add too much, as this can make your bread dense. If you’re using a stand mixer, attach the dough hook and knead on medium-low speed for about 6 to 8 minutes, until the dough is smooth and elastic. It should pull away from the sides of the bowl.
Step 4: First Rise (Bulk Fermentation)
Lightly grease a clean, large bowl with a little oil or cooking spray. Place the kneaded dough into the greased bowl, turning it to coat all sides. This prevents the dough from drying out as it rises. Cover the bowl tightly with plastic wrap or a clean kitchen towel. Find a warm, draft-free spot in your kitchen for the dough to rise. An oven that has been briefly warmed and then turned off is often ideal. Let the dough rise for about 1 to 1.5 hours, or until it has doubled in size. You’ll know it’s ready when you gently poke it with a floured finger, and the indentation remainsgin extractthout the dough springing back completely. This resting period allows the yeast to work its magic, producing carbon dioxide that makes the dough light and airy.
Step 5: Shaping and Second Rise
Once the dough has doubled, gently punch it down to release the accumulated gases. Turn the dough out onto a lightly floured surface. At this point, you can shape your rustic bread. For a simple loaf, you can gently form it into a round or oblong shape. Avoid overworking the dough; be gentle to keep the air pockets intact. Once shaped, place the dough onto a baking sheet lined with parchment paper or a well-floured pizza peel. Cover the shaped loaf loosely with plastic wrap or a light kitchen towel and let it rest for another 30 to 45 minutes. This second rise, also known as proofing, allows the dough to relax and puff up slightly again before baking, contributing to a lighter crum extractb. While the dough is proofing, preheat your oven to 425°F (220°C). If you have a baking stone or steel, place it in the oven as it preheats. This will help create a beautifully crisp crust.
Conclusion:
Congratulations! You’ve now mastered the art of creating a truly satisfying Rustic Bread Recipe. This recipe delivers a hearty loaf with a beautiful golden crust and a wonderfully chewy interior, perfect for any occasion. It’s a testament to the simple yet profound joy of baking from scratch. We encourage you to experiment with this foundational Rustic Bread Recipe and make it your own. Don’t be afraid to play with additions like herbs, seeds, or even a touch of honey for sweetness.
Serve this magnificent loaf warm, sliced thick, alongside your favorite hearty stews, rich soups, or simply slathered with butter. It also makes an exceptional base for bruschetta or a delightful accompaniment to a cheese board. The versatility of this Rustic Bread Recipe is truly one of its greatest assets.
Frequently Asked Questions:
Q1: My crust isn’t as crispy as I’d hoped. What can I do?
Ensuring your oven is fully preheated is crucial for a crisp crust. You can also try placing a pan of hot water on the bottom rack of your oven during the initial baking phase. This creates steam, which helps the crust develop that desirable crunch. Another tip is to bake the bread on a preheated baking stone or steel for maximum heat transfer.
Q2: Can I make this Rustic Bread Recipe ahead of time?
Absolutely! This Rustic Bread Recipe stores wonderfully. Once completely cooled, wrap it tightly in plastic wrap or place it in an airtight bread bag. It will stay fresh at room temperature for 2-3 days. For longer storage, you can slice it and freeze it for up to 3 months. Simply thaw at room temperature or toast slices directly from frozen.
Easy Rustic Bread Recipe-Homemade & Delicious
A simple and delicious recipe for homemade rustic bread, perfect for beginners. This bread features a wonderfully crisp crust and a soft, airy interior.
Ingredients
-
3 cups warm water
-
2 ¼ teaspoons active dry yeast
-
1 tablespoon granulated sugar
-
6 cups all-purpose flour
-
3 teaspoons salt
Instructions
-
Step 1
Activate the yeast: In a large bowl, combine 3 cups of warm water (105°F-115°F), 2 ¼ teaspoons of active dry yeast, and 1 tablespoon of granulated sugar. Let sit for 5-10 minutes until foamy. -
Step 2
Combine dry ingredients: In a separate large bowl, whisk together 6 cups of all-purpose flour and 3 teaspoons of salt. Make a well in the center and pour in the activated yeast mixture. Mix with a spoon until a shaggy dough forms. -
Step 3
Knead the dough: Turn the dough onto a lightly floured surface and knead for 8-10 minutes until smooth and elastic. Alternatively, use a stand mixer with a dough hook for 6-8 minutes on medium-low speed. -
Step 4
First rise (Bulk Fermentation): Place the kneaded dough in a lightly oiled bowl, cover tightly, and let rise in a warm, draft-free place for 1 to 1.5 hours, or until doubled in size. -
Step 5
Shape and second rise (Proofing): Gently punch down the dough, shape it into a round or oblong loaf on a lightly floured surface, and place it on a parchment-lined baking sheet. Cover loosely and let proof for another 30-45 minutes. Preheat oven to 425°F (220°C). -
Step 6
Bake the bread: Bake for 30-35 minutes, or until the crust is golden brown and the internal temperature reaches 200-210°F (93-99°C).
Important Information
Nutrition Facts (Per Serving)
It is important to consider this information as approximate and not to use it as definitive health advice.
Allergy Information
Please check ingredients for potential allergens and consult a health professional if in doubt.