Blue Cookie Monster Cookies Recipe – Fun & Easy
Blue Cookie Monster Cookies are more than just a sweet treat; they’re a vibrant explosion of childhood nostalgia and pure, unadulterated joy. Who can resist that iconic blue hue, reminiscent of our favorite fuzzy monster, paired with the irresistible crunch of a perfectly baked cookie? These aren’t your average chocolate chip cookies; they’re a playful celebration, a delightful escape from the everyday that brings a smile to everyone’s face. What makes Blue Cookie Monster Cookies so special is their delightful combination of textures and flavors – a slightly chewy center, crisp edges, and the satisfying pop of colorful candy pieces and chocolate chips. They’re the perfect way to brighten any occasion, whether it’s a birthday party, a cozy afternoon at home, or just a craving for something deliciously fun.
Ingredients:
- 3 cups (360g) all-purpose flour
- 2 teaspoons cornstarch
- 1 teaspoon baking soda
- 1/4 teaspoon salt
- 2 sticks (1 cup) unsalted butter, softened to room temperature
- 1 1/4 cups packed light brown sugar
- 1/4 cup granulated sugar
- 2 large eggs, at room temperature
- 1 teaspoon pure vanilla extract
- Royal blue gel food coloring
- Electric blue gel food coloring
- Violet gel food coloring
- 2/3 cup white chocolate chips, divided
- 2/3 cup mini chocolate chip cookies, chopped
- 2/3 cup chocolate sandwich cookies (like Oreos), chopped
Getting Started: Prepping Your Dry Ingredients
The foundation of any great cookie is a well-balanced dry ingredient mix. In a medium-sized bowl, I like to whisk together my flour, cornstarch, baking soda, and salt. Cornstarch is my secret weapon here; it helps to create a wonderfully tender and slightly chewy cookie texture, while the baking soda provides that essential lift and spread. Whisking these ingredients thoroughly ensures that the leavening agents and salt are evenly distributed, which is crucial for consistent cookie results every time. Don’t skip this step!
Creaming the Butter and Sugars: Building the Flavor Base
Now, for the heart of our Blue Cookie Monster Cookies – the wet ingredients. In a large mixing bowl, or the bowl of your stand mixer fitted with the paddle attachment, cream together the softened unsalted butter, packed light brown sugar, and granulated sugar. This is where the magic begin extracts. You want to beat these together until the mixture is light and fluffy, which typically takes about 3-5 minutes on medium speed. This creaming process incorporates air into the dough, which contributes to the cookies’ overall texture and helps them to bake up with a nice, slightly crisp edge and a soft center. Make sure your butter is truly at room temperature – not melted, but soft enough that your finger leaves an indentation easily. This ensures it creams properly with the sugars.
Incorporating Eggs and Vanilla: Binding and Aromatics
Once the butter and sugar mixture is beautifully light and creamy, it’s time to add the eggs and vanilla extract. Add the room temperature large eggs one at a time, beating well after each addition until fully incorporated. Adding them one at a time helps to ensure they emulsify properly with the butter and sugar mixture, preventing a greasy dough. Then, stir in the pure vanilla extract. Vanilla extract not only adds a wonderful aroma but also enhances the overall flavor profile of the cookies, balancing the sweetness from the sugars and adding a hint of warmth. Scrape down the sides of the bowl periodically to make sure everything is getting mixed in.
The Colorful Transformation: Dyeing the Dough
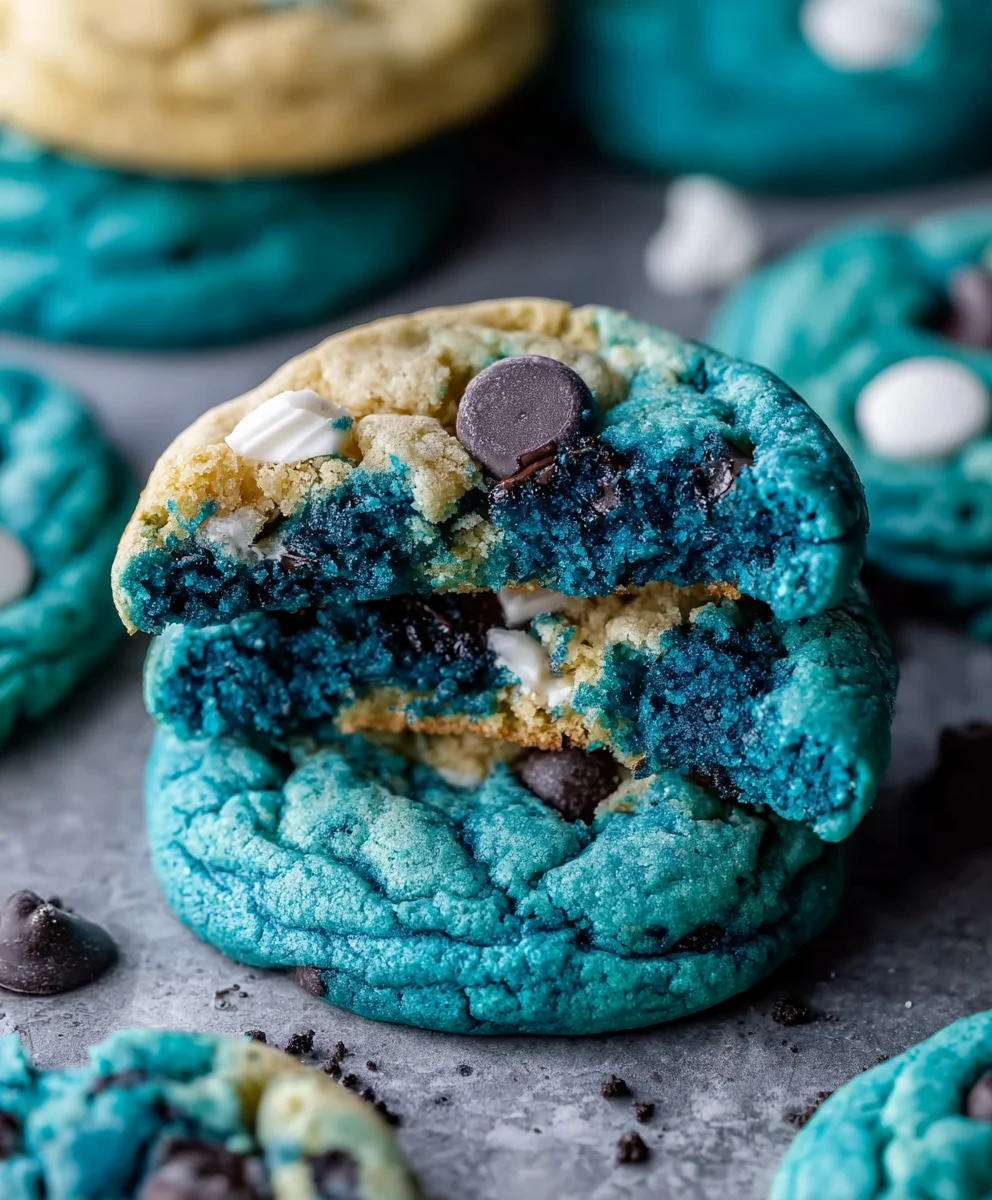
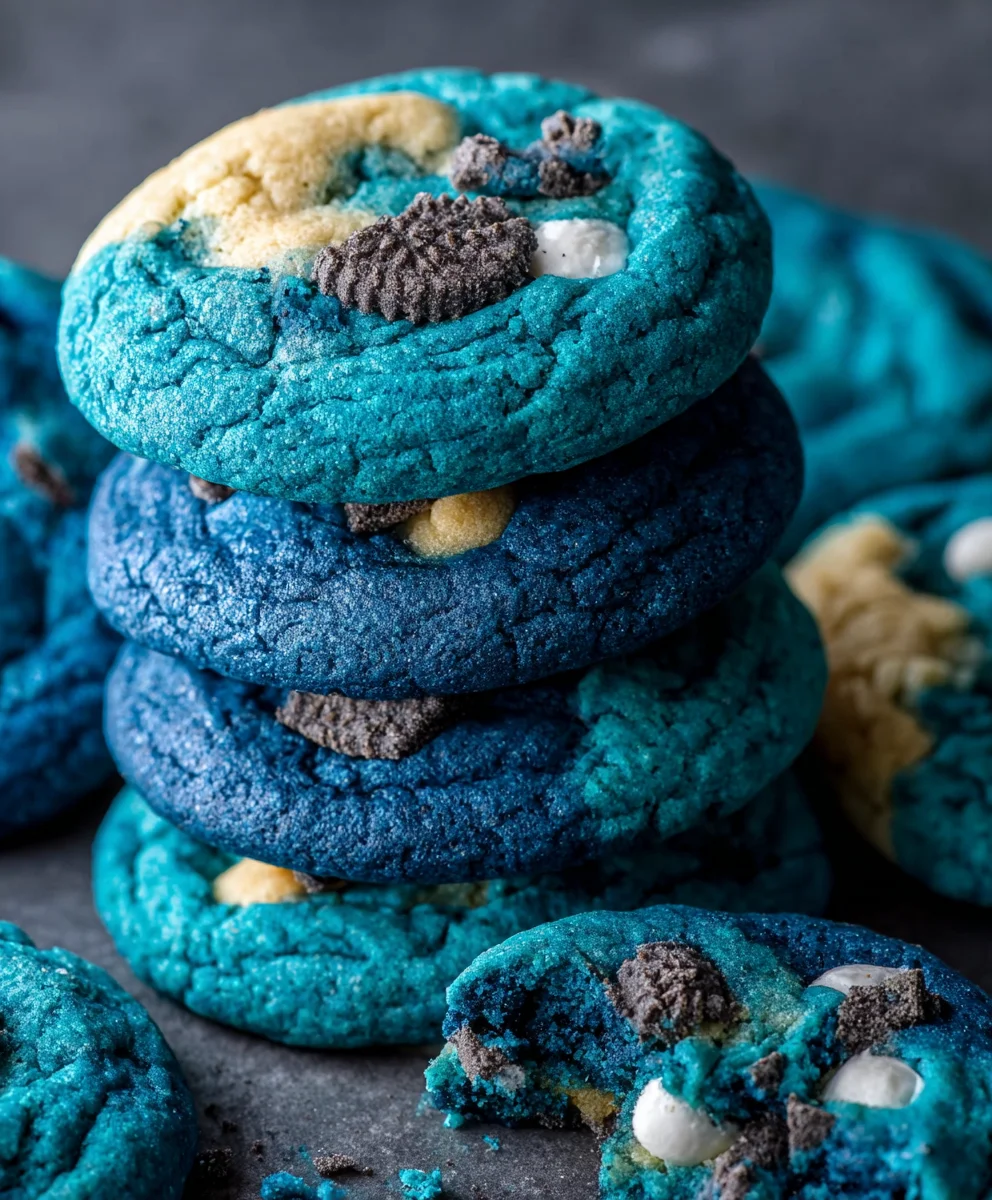
This is the most fun part – creating the iconic Cookie Monster blue! Divide your dough evenly into three separate bowls. This is where your royal blue, electric blue, and violet gel food colorings come into play. Gel food coloring is preferred because it’s highly concentrated and won’t add excess liquid to your dough, which can alter the texture. Add a few drops of each color to its respective bowl, starting with a smaller amount and adding more as needed to achieve your desired vibrant shades. I like to use a spatula to carefully mix the color into the dough until it’s uniformly colored. For the classic Cookie Monster look, I aim for a bright, cheerful blue, a deeper, more intense blue, and a pop of purple for variation. You can even swirl some of the colors together in a single cookie for an extra wild effect!
Adding the Mix-ins: The Cookie Monster’s Favorite Treasures
With your beautifully colored doughs ready, it’s time to add the delicious mix-ins that make these cookies truly special. Gently fold in the white chocolate chips, chopped mini chocolate chip cookies, and chopped chocolate sandwich cookies. I like to reserve about a tablespoon of white chocolate chips to press onto the tops of the cookies before baking for a more visually appealing finish. Be careful not to overmix at this stage; you want to distribute the add-ins evenly without breaking them down too much. A gentle folding motion with a spatula is perfect here.
Shaping and Bakigin extract Bringing the Blue to Life
Now, for the fingin extractsteps of bringing your Blue Cookie Monster Cookies to life. Preheat your oven to 350°F (175°C). Line baking sheets with parchment paper or silicone baking mats. This prevents the cookies from sticking and helps with even baking. I usually use a cookie scoop to portion my dough into uniform balls, about 1.5 to 2 tablespoons each. If you’re going for the multi-colored look, you can take small pieces of each colored dough and gently press them together before rolling them into a ball, or simply scoop different colored doughs onto the same baking sheet. Place the dough balls about 2 inches apart on the prepared baking sheets, as they will spread. If you reserved any white chocolate chips, gently press a few onto the tops of the dough balls now. Bake for 10-12 minutes, or until the edges are lightly golden brown and the centers are still slightly soft. For a chewier cookie, err on the side of less baking time. Let the cookies cool on the baking sheets for 5-10 minutes before transferring them to a wire rack to cool completely. This allows them to set up properly.
Conclusion:
And there you have it – a delightful journey into creating your very own batch of Blue Cookie Monster Cookies! We’ve walked through each step, from gathering those vibrant ingredients to the final moment of pure cookie bliss. The result is a wonderfully chewy, satisfying cookie with that iconic blue hue that’s sure to bring smiles to faces of all ages. Don’t be shy about experimenting; these cookies are incredibly versatile!
For serving, these Blue Cookie Monster Cookies are fantastic on their own, with a tall glass of cold milk, or even crum extractbled over ice cream for an extra special treat. Get creative with your variations too! You can add different types of chocolate chips, sprinkles for added festivity, or even a hint of almond extract for a unique flavor profile. The most important ingredient, however, is the joy you bring to the baking process. So, go forth and bake with confidence, and enjoy every single delicious bite of your homemade Blue Cookie Monster Cookies!
Frequently Asked Questions about Blue Cookie Monster Cookies:
Why are my Blue Cookie Monster Cookies not blue enough?
The vibrancy of the blue color in your Blue Cookie Monster Cookies heavily depends on the quality and quantity of food coloring used. For a truly intense blue, use gel food coloring rather than liquid. Start with a few drops and gradually add more until you achieve your desired shade. Remember, the color will also deepen slightly as the cookies bake and cool.
Can I make Blue Cookie Monster Cookies ahead of time?
Absolutely! The dough for these Blue Cookie Monster Cookies can be made ahead of time and stored in the refrigerator for up to 3 days, or frozen for up to 3 months. When you’re ready to bake, simply let the dough come to room temperature slightly or bake directly from frozen, adjusting the baking time as needed. This makes them perfect for impromptu baking sessions or preparing for parties!
Blue Cookie Monster Cookies Recipe – Fun & Easy
Fun and easy Blue Cookie Monster Cookies recipe, perfect for a colorful and delicious treat!
Ingredients
-
3 cups (360g) all-purpose flour
-
2 teaspoons cornstarch
-
1 teaspoon baking soda
-
1/4 teaspoon salt
-
1 cup (2 sticks) unsalted butter, softened to room temperature
-
1 1/4 cups packed light brown sugar
-
1/4 cup granulated sugar
-
2 large eggs, at room temperature
-
1 teaspoon pure vanilla extract
-
Royal blue gel food coloring
-
Electric blue gel food coloring
-
Violet gel food coloring
-
2/3 cup white chocolate chips, divided
-
2/3 cup mini chocolate chip cookies, chopped
-
2/3 cup chocolate sandwich cookies (like Oreos), chopped
Instructions
-
Step 1
In a medium bowl, whisk together flour, cornstarch, baking soda, and salt. Set aside. -
Step 2
In a large bowl, cream together softened butter, brown sugar, and granulated sugar until light and fluffy (about 3-5 minutes). -
Step 3
Add eggs one at a time, beating well after each addition. Stir in vanilla extract. Scrape down the sides of the bowl. -
Step 4
Divide dough into three equal portions. Add royal blue, electric blue, and violet gel food coloring to each portion, mixing until uniformly colored. Gently swirl colors if desired for a marbled effect. -
Step 5
Gently fold in white chocolate chips, chopped mini chocolate chip cookies, and chopped chocolate sandwich cookies into the colored doughs. Reserve some white chocolate chips for topping. -
Step 6
Preheat oven to 350°F (175°C). Line baking sheets with parchment paper. Scoop dough into balls (1.5-2 tablespoons each). Combine small pieces of different colored doughs before rolling into balls, or place different colored doughs on the same sheet. Press reserved white chocolate chips onto tops if desired. -
Step 7
Bake for 10-12 minutes, or until edges are lightly golden brown and centers are still slightly soft. Cool on baking sheets for 5-10 minutes, then transfer to a wire rack to cool completely.
Important Information
Nutrition Facts (Per Serving)
It is important to consider this information as approximate and not to use it as definitive health advice.
Allergy Information
Please check ingredients for potential allergens and consult a health professional if in doubt.