Vegan Gluten-Free Chickpea Brownies – Rich & Fudgy
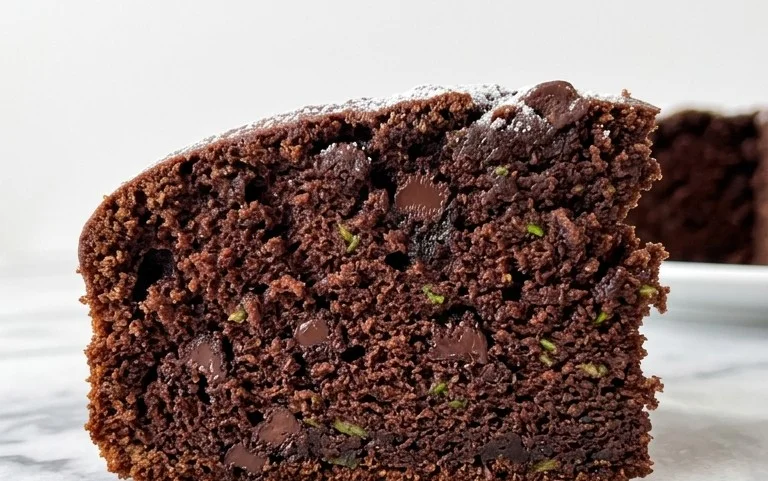
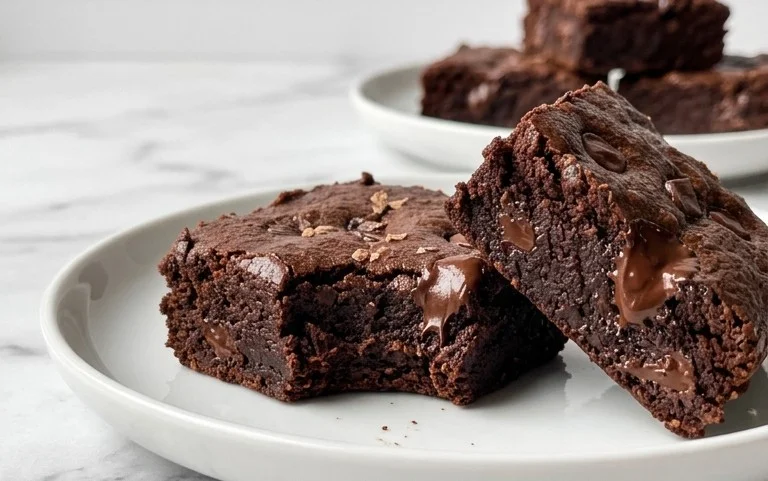
Flourless Chickpea Brownies (Vegan & Gluten Free): Get ready to rethink everything you thought you knew about brownies! I’m so excited to share this recipe with you because it’s a game-changer. If you’re craving that rich, fudgy, chocolatey goodness but need to avoid gluten and animal products, or just want a healthier treat, these flourless chickpea brownies are your new best friend. What’s truly magical about these is how incredibly decadent they taste, defying expectations with their incredibly moist and dense texture that’s purely from the star ingredient: chickpeas! You’d never guess they’re packed with plant-based protein and fiber, making them a surprisingly satisfying and guilt-free indulgence. Forget dry, crum extractbly alternatives; these flourless chickpea brownies deliver pure chocolate bliss in every single bite, making them perfect for sharing (or not!).
Flourless Chickpea Brownies (Vegan & Gluten Free)
Are you craving a rich, fudgy brownie but need to avoid gluten and dairy? Or perhaps you’re looking for a healthier, plant-based treat that doesn’t compromise on flavor? Look no further! These Flourless Chickpea Brownies are about to become your new go-to dessert. Don’t let the “chickpea” part fool you; when blended, they create an incredibly smooth and moist texture that’s indistinguishable from traditional brownies. Plus, they’re surprisingly easy to make, requiring just one bowl and a few simple steps.
These brownies are a revelation in gluten-free and vegan baking. They offer a satisfyingly dense and chewy texture, with a deep chocolate flavor that will have everyone beggin extractg for the recipe. The chickpeas provide structure and moisture without the need for any flour, making them perfect for those with gluten sensitivities or anyone looking to add a little extra fiber and protein to their sweet treats. The almond butter brings richness and helps bind everything together, while the maple syrup offers a natural sweetness.
Ingredients:
Cooking Instructions:
Step 1: Prepare Your Chickpeas and Food Processor
The first crucial step is to prepare your chickpeas. Open the can, pour them into a colander, and rinse them thoroughly under cold running water. You want to remove all the residual aquafaba (the liquid from the can), as this can affect the texture and flavor. Give them a good shake to drain as much water as possible. Next, preheat your oven to 350°F (175°C). Line an 8×8 inch baking pan with parchment paper, leaving some overhang on the sides. This will make it incredibly easy to lift the brownies out once they’re baked. Having a good food processor or a high-powered blender is essential for this recipe to achieve a smooth batter.
Step 2: Blend the Wet Ingredients and Chickpeas
Add the thoroughly rinsed and drained chickpeas to your food processor or blender. Next, add the almond butter and pure maple syrup. If you’re using a nut or seed butter that’s particularly thick, you might want to give it a quick stir beforehand. Add the vanilla extract. Now, process these ingredients until they are completely smooth and creamy. This might take a few minutes, depending on your machine. You want to ensure there are absolutely no chickpea skins or grainy bits left. Scrape down the sides of the processor a couple of times to make sure everything is incorporated evenly. The mixture should look like a thick, smooth paste.
Step 3: Incorporate the Dry Ingredients
Once you have a smooth wet mixture, it’s time to add the dry ingredients. Add the baking powder, baking soda, sea salt, and unsweetened cocoa powder to the food processor. If you are using unsweetened cocoa powder, this is where the rich chocolate flavor will start to develop. Be sure to use a good quality cocoa powder for the best results. Now, pulse the ingredients a few times to start incorporating them. Then, process continuously until everything is well combined and the batter is a uniform chocolate color. Be careful not to over-process at this stage, as it’s not necessary once the dry ingredients are mixed in. The batter will be quite thick.
Step 4: Fold in the Chocolate Chips
This is arguably the best part! Add ¾ cup of mini chocolate chips to the batter. Reserve a small handful of these chips for sprinkling on top if you like. With a spatula, gently fold in the chocolate chips until they are evenly distributed throughout the batter. You don’t want to overmix at this stage, just enough to ensure you get pockets of melty chocolate throughout your brownies. The batter will be quite thick, so a spatula is ideal for folding. If you’re adding some chips to the top, press them gently into the surface of the batter now.
Step 5: Bake and Cool
Pour the thick chocolate batter into your prepared 8×8 inch baking pan. Use your spatula to spread it evenly into the corners. The batter will be dense, so spread it as evenly as possible. Place the pan in your preheated oven. Bake for 25-30 minutes. The brownies are done when a toothpick inserted into the center comes out with moist crum extractbs attached, but not wet batter. Be careful not to overbake, as this can lead to dry brownies. Once baked, remove the pan from the oven and let the brownies cool completely in the pan on a wire rack. This is a critical step for achieving that perfect fudgy texture. Resist the urge to cut into them while they are warm! Once cooled, use the parchment paper overhang to lift the entire slab of brownies out of the pan. Cut them into squares and enjoy your delicious, guilt-free treats! Store any leftovers in an airtight container at room temperature for up to 3 days, or in the refrigerator for a week.
Conclusion:
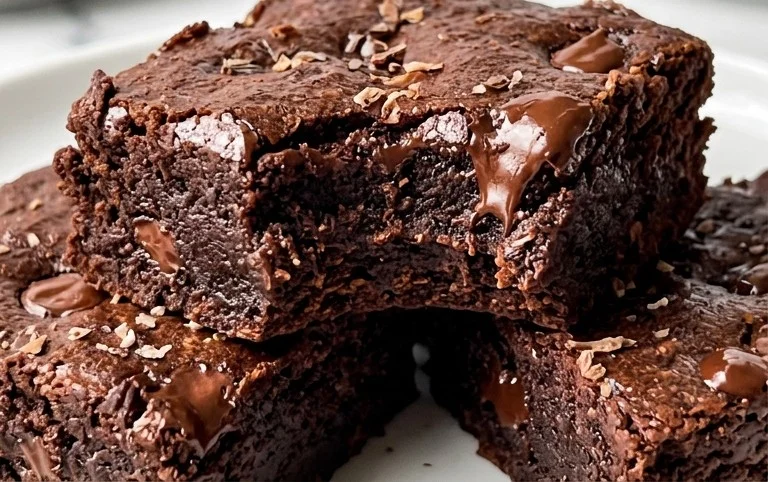
And there you have it – the secret to incredibly fudgy, rich, and satisfying flourless chickpea brownies that just happen to be both vegan and gluten-free! This recipe truly is a game-changer for anyone looking for a healthier indulgence or catering to dietary needs without sacrificing flavour. The chickpeas provide an amazing texture and a boost of protein, making these brownies guilt-free and surprisingly nutritious. They’re so simple to whip up, perfect for last-minute cravings or impressive desserts for guests.
I love serving these warm, perhaps with a scoop of dairy-free vanilla ice cream or a drizzle of vegan caramel sauce. They are also delicious at room temperature, making them ideal for packed lunches or afternoon snacks. Feel free to get creative with variations! Stir in some vegan chocolate chips for extra gooeyness, chopped nuts for crunch, or even a hint of chili powder for a Mexican-inspired kick.
I genuinely encourage you to give these flourless chickpea brownies a try. They’re a testament to how delicious and accessible gluten-free and vegan baking can be. You might be surprised at how much you love them!
Frequently Asked Questions:
Can I use dried chickpeas instead of canned?
Yes, you can! If using dried chickpeas, you’ll need to soak them overnight and then cook them until very tender. Ensure they are well-drained and cooled before pureeing them as per the recipe. This might add a bit more prep time, but it’s definitely an option.
How long do these brownies keep?
These flourless chickpea brownies store well! Once completely cooled, keep them in an airtight container at room temperature for up to 3 days, or in the refrigerator for up to a week. You can also freeze them for longer storage; just let them thaw at room temperature before enjoying.
Flourless Chickpea Brownies (Vegan & Gluten Free)
Decadent, fudgy brownies made with chickpeas, perfect for a vegan and gluten-free treat.
Ingredients
-
15.5 ounces chickpeas (1 can), rinsed and drained
-
½ cup almond butter
-
½ cup pure maple syrup
-
1 tablespoon vanilla extract
-
½ teaspoon baking powder
-
½ teaspoon baking soda
-
½ teaspoon sea salt
-
⅓ cup cocoa powder
-
¾ cup mini chocolate chips
Instructions
-
Step 1
Preheat your oven to 350°F (175°C). Grease and flour an 8×8 inch baking pan or line it with parchment paper. -
Step 2
In a food processor, combine the rinsed and drained chickpeas, almond butter, maple syrup, and vanilla extract. Process until smooth and creamy, scraping down the sides as needed. -
Step 3
Add the baking powder, baking soda, sea salt, and cocoa powder to the food processor. Pulse until just combined. Be careful not to overmix. -
Step 4
Gently fold in ¾ cup of mini chocolate chips. -
Step 5
Spread the batter evenly into the prepared baking pan. -
Step 6
Bake for 25-30 minutes, or until a toothpick inserted into the center comes out with moist crumbs (not wet batter). -
Step 7
Let the brownies cool completely in the pan on a wire rack before cutting into squares.
Important Information
Nutrition Facts (Per Serving)
It is important to consider this information as approximate and not to use it as definitive health advice.
Allergy Information
Please check ingredients for potential allergens and consult a health professional if in doubt.