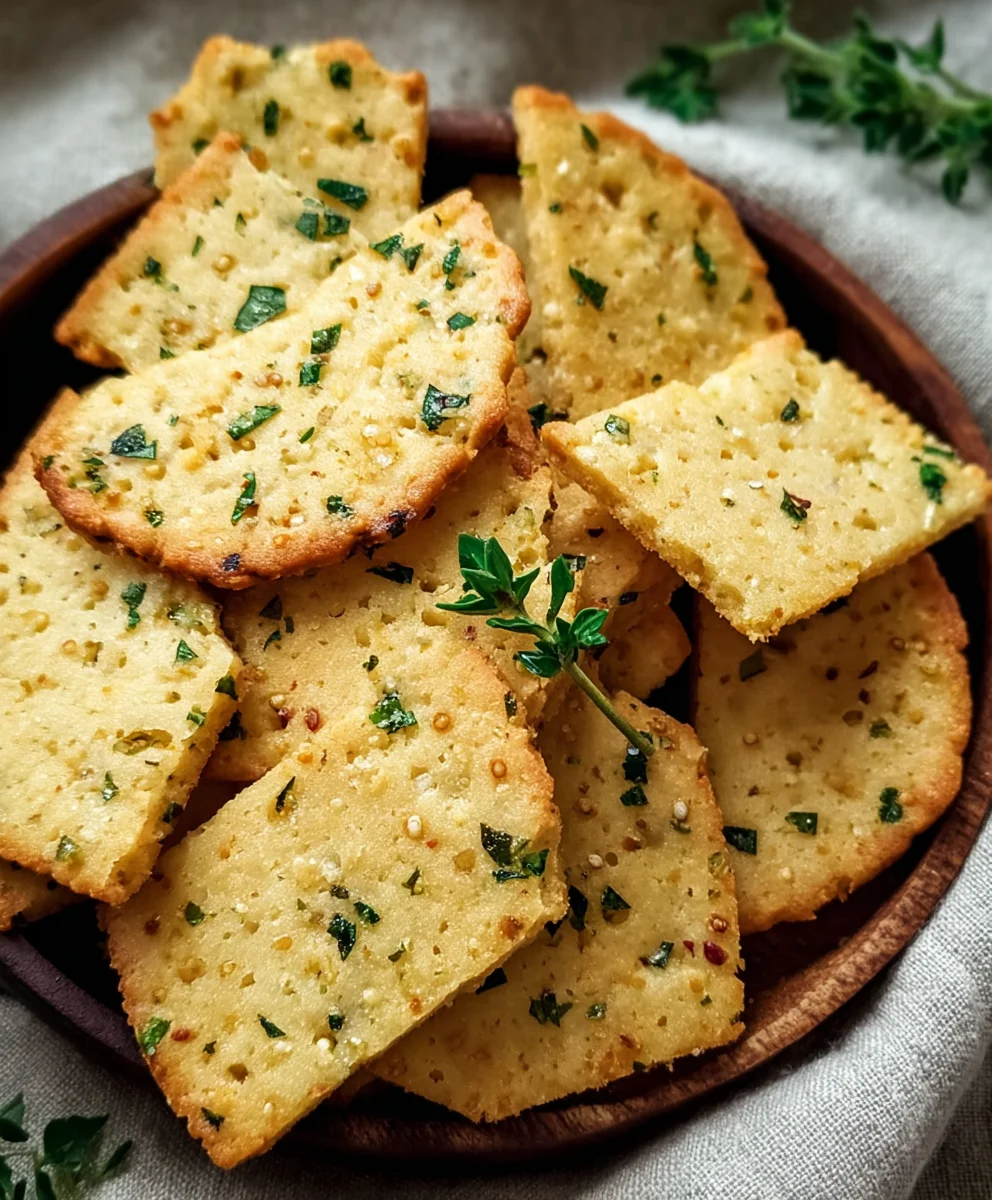
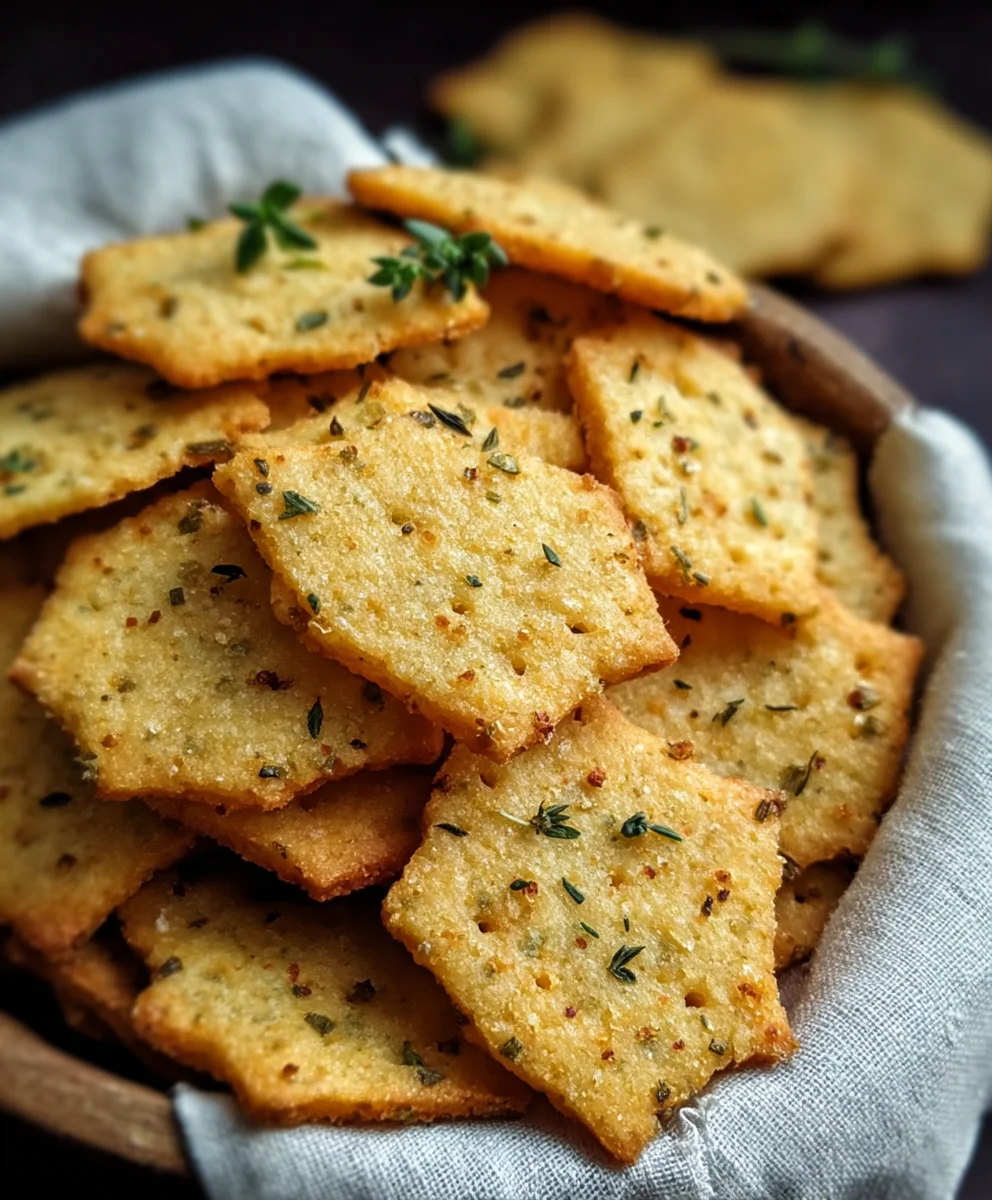
Garlic Herb Chickpea Flour Crackers-Easy Recipe
Garlic and Herb Chickpea Flour Snack Crackerss are the ultimate savory delight that I find myself reaching for again and again. There’s something incredibly satisfying about their crispy, baked texture and the burst of aromatic flavors that dance on your palate. What truly makes these homemade gems so beloved is their versatility; they’re perfect for a midday pick-me-up, a healthy accompaniment to your favorite dips, or even a delightful addition to a cheese board. Forget those bland store-bought options that leave you feeling uninspired. These Garlic and Herb Chickpea Flour Snack Crackerss are special because they are incredibly easy to whip up with wholesome ingredients, giving you complete control over the quality and taste. They offer a wonderfully gluten-free and plant-based alternative that doesn’t compromise on deliciousness, proving that healthy snacking can be both incredibly rewarding and utterly delectable. Prepare to fall in love with these flavorful, crunchy wonders!
Ingredients:
- 1 cup chickpea flour (also known as besan), approximately 120 grams
- ½ cup water, approximately 120 milliliters
- 2 tablespoons olive oil, plus extra for brushing
- 1 teaspoon dried mixed herbs (I like a blend of rosemary, thyme, and oregano for a classic Mediterranean flavor)
- 1 teaspoon garlic powder
- ½ teaspoon salt
- ¼ teaspoon black pepper
- Sesame seeds, for sprinkling
- Flaky sea salt, for finishing
- Additional dried herbs, for garnish (optional)
Preparing the Dough
Step 1: Combine Dry Ingredients
Begin extract by gathering a medium-sized mixing bowl. Into this bowl, carefully measure and add your 1 cup of chickpea flour. This flour forms the base of our crackers, giving them a wonderfully unique texture and earthy flavor. Next, add the 1 teaspoon of garlic powder, which will infuse every bite with a savory punch. Then, measure in your ½ teaspoon of salt and ¼ teaspoon of black pepper for essential seasoning. Finally, stir in the 1 teaspoon of dried mixed herbs. I find that a blend that includes rosemary, thyme, and oregano offers a delightful aromatic complexity that pairs beautifully with the chickpea flour. Ensure all these dry ingredients are thoroughly combined with a whisk or a fork, breaking up any clumps in the chickpea flour and distributing the seasonings evenly. This initial step ensures that every cracker will have a consistent flavor profile.
Step 2: Incorporate Wet Ingredients and Form Dough
Now, it’s time to bring our dough to life. Create a small well in the center of your dry ingredients. Pour in the ½ cup of water and the 2 tablespoons of olive oil. The olive oil adds richness and helps to create a tender cragin extractr. Begin to gently mix the ingredients together, starting from the center and gradually incorporating the dry ingredients from the sides. You can use a fork or a spatula for this initially. As the mixture starts to come together, switch to using your hands. Knead the dough for about 1 to 2 minutes, just until it forms a cohesive ball. It will be a bit sticky at first, but that’s perfectly normal. Don’t overwork the dough; we’re not developing gluten here like we would for bread. The goal is simply to have a manageable, slightly pliable dough. If it feels excessively sticky, you can add a tiny pinch more chickpea flour, but do so sparingly.
Shaping and Baking the Crackers
Step 3: Rolling and Scoring the Dough
To get started with shaping, place a sheet of parchment paper on your work surface. Turn the dough out onto the parchment paper. You can then place another sheet of parchment paper on top of the dough. This makes rolling much easier and prevents sticking. Using a rolling pin, gently roll the dough out into a thin, even sheet. Aim for a thickness of about 1/8 inch (around 3mm). The thinner the dough, the crispier your crackers will be. Take your time to ensure it’s as uniform as possible for even baking. Once rolled out, carefully peel off the top layer of parchment paper. Now, it’s time to score the crackers. You can use a pizza cutter or a sharp knife to gently mark out your desired cracker shapes. Squares, rectangles, or even triangles work well. Don’t cut all the way through; just create shallow lines to make them easy to break apart after baking.
Step 4: Adding Toppings and Preheating the Oven
Preheat your oven to 375°F (190°C). This temperature is ideal for achieving a good crispness without burning. While the oven is preheating, prepare your crackers for baking. Lightly brush the surface of the rolled-out dough with a little extra olive oil. This not only adds a lovely sheen but also helps the sesame seeds and flaky sea salt adhere beautifully. Generously sprinkle sesame seeds all over the surface. These little seeds add a wonderful nutty crunch and visual appeal. Then, scatter flaky sea salt over the top. The large flakes of sea salt provide delightful bursts of salinity that contrast wonderfully with the savory dough. If you’re feeling adventurous, you can also sprinkle a little extra dried mixed herbs over the top for an intensified aroma and flavor. This is where you can really personalize your crackers!
Step 5: Baking and Finishing
Carefully transfer the parchment paper with the scored dough onto a baking sheet. Place the baking sheet in the preheated oven. Bake for approximately 15-20 minutes. Keep a close eye on the crackers, as baking times can vary depending on your oven and the thickness of your dough. You’re looking for the edges to turn a beautiful golden brown and the centers to appear set and slightly firm to the touch. Once they are golden and crisp, carefully remove the baking sheet from the oven. While still warm, you can gently break the crackers along the scored lines. For an extra touch, especially if you want them to be perfectly crisp all the way through, you can turn off the oven, leave the door slightly ajar, and let the crackers cool inside the oven for another 10-15 minutes. This helps to dry them out further. Once cooled enough to handle, they are ready to be enjoyed.
Conclusion:
There you have it – a simple yet incredibly satisfying recipe for Garlic and Herb Chickpea Flour Snack Crackers! I hope you’ve enjoyed learning how easy it is to whip up these wholesome and flavorful crackers from scratch. These are perfect for a light and healthy snack, or as a delicious accompaniment to your favorite dips and spreads. They bake up beautifully crisp and are packed with aromatic herbs and savory garlic. Don’t be afraid to get creative and experiment with different herb combinations to make them uniquely yours. The beauty of homemade is that you control the ingredients and the flavors!
I encourage you to give these Garlic and Herb Chickpea Flour Snack Crackers a try. They are a fantastic gluten-free and vegan option that will impress your friends and family. Enjoy them with hummus, guacamole, or a simple cheese board. You can also crush them up and use them as a gluten-free breadcrum extractb substitute in your favorite recipes. Happy baking!
Frequently Asked Questions:
Q: How should I store the Garlic and Herb Chickpea Flour Snack Crackers?
A: Once completely cooled, store your Garlic and Herb Chickpea Flour Snack Crackers in an airtight container at room temperature for up to a week. If they lose some crispness, you can briefly pop them in a low oven (around 200°F or 95°C) for a few minutes to refresh them.
Q: Can I use different herbs in this recipe?
A: Absolutely! The herbs in the Garlic and Herb Chickpea Flour Snack Crackers recipe are very flexible. Feel free to substitute or add other dried herbs like rosemary, thyme, dill, or even a pinch of red pepper flakes for a little heat. Fresh herbs can also be used, but you may need to adjust the quantity slightly and ensure they are finely chopped.
Q: My crackers are too soft. What did I do wrong?
A: If your Garlic and Herb Chickpea Flour Snack Crackers aren’t crisping up, it’s likely due to not baking them long enough or not rolling the dough thinly enough. Ensure you’re rolling the dough very thin, about 1/8 inch thick. Also, pay attention to the baking time and let them bake until they are golden brown and firm to the touch. Oven temperatures can vary, so it’s important to keep an eye on them during the last few minutes of baking.
Garlic Herb Chickpea Flour Crackers-Easy Recipe
Delicious and easy-to-make garlic herb crackers using chickpea flour, perfect for snacking or serving with dips.
Ingredients
-
1 cup chickpea flour (besan)
-
½ cup water
-
2 tablespoons olive oil, plus extra for brushing
-
1 teaspoon dried mixed herbs
-
1 teaspoon garlic powder
-
½ teaspoon salt
-
¼ teaspoon black pepper
-
Sesame seeds
-
Flaky sea salt
-
Additional dried herbs (optional)
Instructions
-
Step 1
Combine chickpea flour, garlic powder, salt, black pepper, and dried mixed herbs in a medium bowl. Whisk to combine and break up any clumps. -
Step 2
Create a well in the dry ingredients. Pour in the water and 2 tablespoons of olive oil. Mix until a cohesive dough forms, kneading for 1-2 minutes. It may be slightly sticky. -
Step 3
Place dough between two sheets of parchment paper and roll out thinly to about 1/8 inch thick. Remove the top parchment layer. Score desired cracker shapes with a pizza cutter or knife without cutting all the way through. -
Step 4
Preheat oven to 375°F (190°C). Lightly brush the dough with extra olive oil. Sprinkle generously with sesame seeds and flaky sea salt. Add optional extra dried herbs if desired. -
Step 5
Transfer parchment with dough to a baking sheet. Bake for 15-20 minutes, or until golden brown and set. Break crackers along scored lines while warm. For extra crispness, turn off the oven, leave the door ajar, and cool inside for 10-15 minutes.
Important Information
Nutrition Facts (Per Serving)
It is important to consider this information as approximate and not to use it as definitive health advice.
Allergy Information
Please check ingredients for potential allergens and consult a health professional if in doubt.