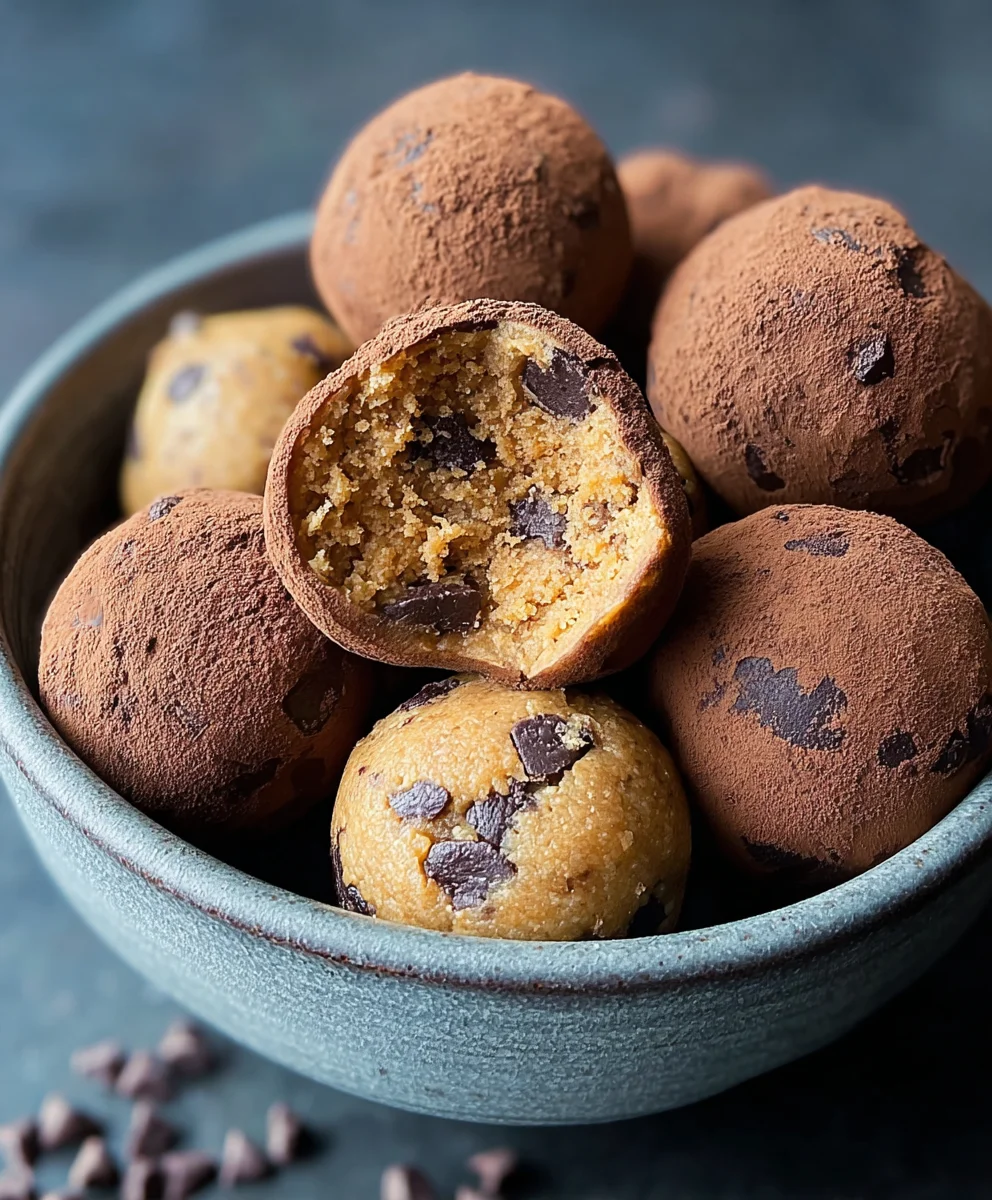
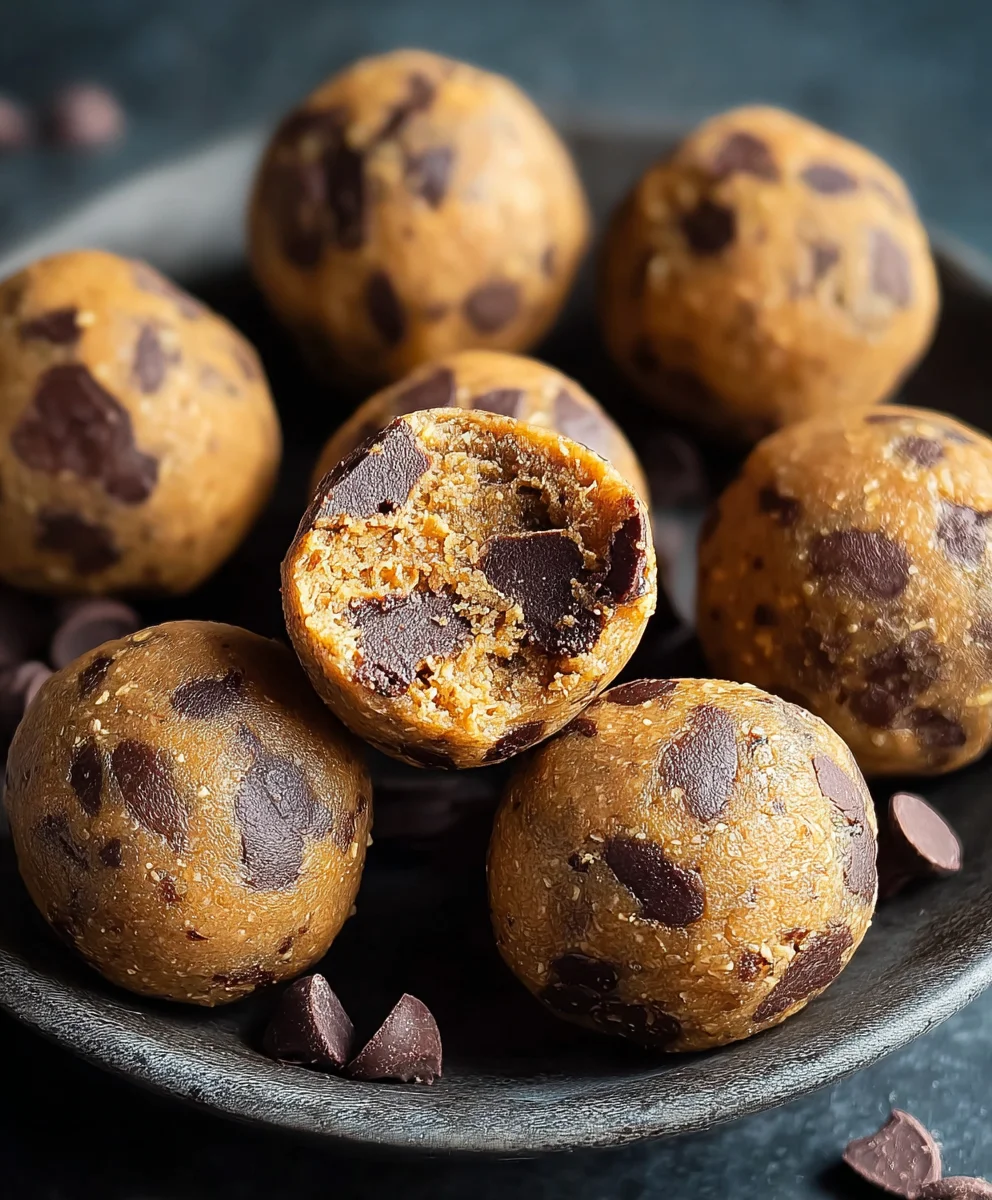
Brookie Protein Balls – Healthy Energy Bites
Brookie Protein Balls are the ultimate treat for anyone craving a double dose of deliciousness without the guilt. Imagin extracte the irresistible allure of a perfectly baked brownie combined with the comforting chegrape juicess of a chocolate chip cookie, all condensed into a perfectly portioned, power-packed bite. That’s the magic of these Brookie Protein Balls! They’re incredibly popular because they satisfy those intense sweet cravings while simultaneously providing a boost of energy and a good dose of protein, making them the ideal snack for busy mornings, post-workout recovery, or even a healthier dessert option. What truly sets these apart is their remarkable adaptability; you can easily tweak the ingredients to suit your dietary needs and flavor preferences, ensuring every batch is a personalized delight. Get ready to discover your new go-to snack that’s both incredibly satisfying and remarkably good for you!
Ingredients:
- 1 cup drippy cashew butter
- 1/2 cup vanilla pea protein powder
- 1/4 cup maple syrup
- 2 tablespoons milk of choice (almond, oat, or dairy milk work well)
- 1 teaspoon vanilla extract
- 1/4 cup chocolate chips (dairy-free if preferred)
- 3 tablespoons cacao powder
Preparing Your Brookie Protein Balls
Gathering Your Tools and Mise en Place
Before we dive into mixing, let’s make sure you have everything ready. You’ll need a medium-sized mixing bowl, a spatula or sturdy spoon for stirring, and a baking sheet lined with parchment paper. Having your ingredients measured out and ready to go will make the process smooth and enjoyable. Ensure your cashew butter is indeed “drippy” – if it’s a bit stiff, you can gently warm it for a few seconds in the microwave to achieve the right consistency. This will help everything incorporate beautifully.
The Mixing Process
Step 1: Combining the Wet Ingredients
In your medium mixing bowl, begin extract by adding the drippy cashew butter. This forms the rich, creamy base of our brookie protein balls. Next, pour in the maple syrup, which will provide natural sweetness and act as a binder. Follow this with the vanilla extract, which adds a lovely depth of flavor that complements both the “brookie” (brownie and cookie) elements we’re aiming for. Finally, add your milk of choice. Start with the 2 tablespoons, and you can always add a tiny bit more later if the mixture feels too dry, but it’s best to start conservatively.
Step 2: Incorporating the Dry Ingredients for the “Brookie” Base
Now, it’s time to add the dry components that will give our protein balls their structure and flavor. First, add the vanilla pea protein powder. This is a key ingredient for boosting the protein content and giving the balls a satisfying texture. Following this, carefully measure and add the cacao powder. The cacao powder is essential for creating that deep, chocolatey flavor profile reminiscent of a brownie. Stir these dry ingredients thoroughly into the wet mixture. It might seem a littlegin extractallenging at first, but keep mixing until everything is well combined and you have a thick, cohesive dough. It’s important to ensure there are no pockets of unmixed powder. Use your spatula to scrape down the sides of the bowl to make sure all the ingredients are incorporated.
Step 3: Adding the Chocolatey Texture
This is where we bring in the cookie element and some extra chocolatey goodness. Gently fold in the chocolate chips. I like to use mini chocolate chips as they distribute more evenly throughout the mixture and provide little bursts of chocolate in every bite. However, regular-sized chocolate chips are perfectly fine too. Stir them in just until they are evenly dispersed. Be careful not to overmix at this stage, as we want the chocolate chips to retain their shape and not melt too much into the dough. This step ensures you get that delightful textural contrast in your brookie protein balls.
Forming and Chilling the Protein Balls
Step 4: Rolling the Dough into Balls
Once your mixture is well combined and the chocolate chips are incorporated, it’s time to get your hands a little sticky! Take small portions of the dough, about a tablespoon each, and roll them between your palms to form neat little balls. The consistency of the dough should be firm enough to hold its shape but still pliable. If the mixture feels a little too sticky to handle, you can lightly dampen your hands with water or a tiny bit of oil. If it feels too dry, add another teaspoon of milk. Aim for balls that are roughly 1 inch in diameter. Place each rolled ball onto your prepared baking sheet, leaving a little space between them.
Step 5: Chilling for Perfect Texture
Now for the crucial chilling phase. Place the baking sheet with the rolled brookie protein balls into the refrigerator for at least 30 minutes. This chilling time is essential for the balls to firm up properly. The cashew butter and protein powder will solidify slightly, making the balls easier to handle and giving them a pleasant, slightly chewy texture. If you’re short on time, you can pop them in the freezer for about 15-20 minutes, but be sure to keep an eye on them so they don’t freeze solid. Once chilled, they are ready to be enjoyed! You can store them in an airtight container in the refrigerator for up to a week, or even longer in the freezer.
Conclusion:
You’ve now got the blueprint for creating delicious and satisfying Brookie Protein Balls! This recipe is a fantastic way to satisfy those sweet cravings while fueling your body with protein. The beauty of these little energy bites lies in their simplicity and versatility. They come together quickly, making them perfect for a pre-workout snack, an afternoon pick-me-up, or even a healthier dessert option.
I love serving these Brookie Protein Balls chilled, right out of the refrigerator, for the best texture. They are also wonderful added to a lunchbox or packed for a hike. Don’t be afraid to get creative with your variations! Adding a sprinkle of flaky sea salt on top before they set can elevate the chocolate and cookie flavors. You could also experiment with different types of nut butters or even fold in some mini chocolate chips for an extra decadent touch.
I encourage you to give this Brookie Protein Balls recipe a try. It’s a foolproof way to enjoy a guilt-free treat that’s packed with goodness. Enjoy every delicious bite!
Frequently Asked Questions:
How long do Brookie Protein Balls last?
When stored in an airtight container in the refrigerator, these Brookie Protein Balls will stay fresh for up to a week. You can also freeze them for longer storage; simply place them in a freezer-safe bag or container, and they’ll be good for up to two months. Thaw them in the refrigerator before enjoying.
Can I make Brookie Protein Balls without protein powder?
While protein powder is key to the “protein” aspect of these balls, you can technically make them without it. However, they will be less protein-rich and might require adjusting the other ingredients for consistency, as protein powder helps bind everything together. You might need to add more oats or nut butter to achieve the desired texture.
Are Brookie Protein Balls suitable for people with nut allergies?
This recipe typically uses nut butter and sometimes nuts as an ingredient. If you have a nut allergy, you can substitute the nut butter with a seed butter, such as sunflower seed butter, and omit any added nuts. Always ensure your protein powder is also free from any allergens.
Brookie Protein Balls – Healthy Energy Bites
Delicious and healthy energy bites with a brownie and cookie flavor, packed with protein.
Ingredients
-
1 cup drippy cashew butter
-
1/2 cup vanilla pea protein powder
-
1/4 cup maple syrup
-
2 tablespoons milk of choice
-
1 teaspoon vanilla extract
-
1/4 cup chocolate chips
-
3 tablespoons cacao powder
Instructions
-
Step 1
Combine the drippy cashew butter, maple syrup, vanilla extract, and milk of choice in a medium mixing bowl. Stir until well combined. -
Step 2
Add the vanilla pea protein powder and cacao powder to the wet ingredients. Mix thoroughly until a thick, cohesive dough forms. Scrape down the sides of the bowl to ensure all ingredients are incorporated. -
Step 3
Gently fold in the chocolate chips until evenly dispersed throughout the mixture. Avoid overmixing. -
Step 4
Take about a tablespoon of dough at a time and roll it between your palms to form 1-inch diameter balls. Place the balls on a baking sheet lined with parchment paper. -
Step 5
Refrigerate the protein balls for at least 30 minutes to allow them to firm up. This step is crucial for achieving the perfect texture.
Important Information
Nutrition Facts (Per Serving)
It is important to consider this information as approximate and not to use it as definitive health advice.
Allergy Information
Please check ingredients for potential allergens and consult a health professional if in doubt.