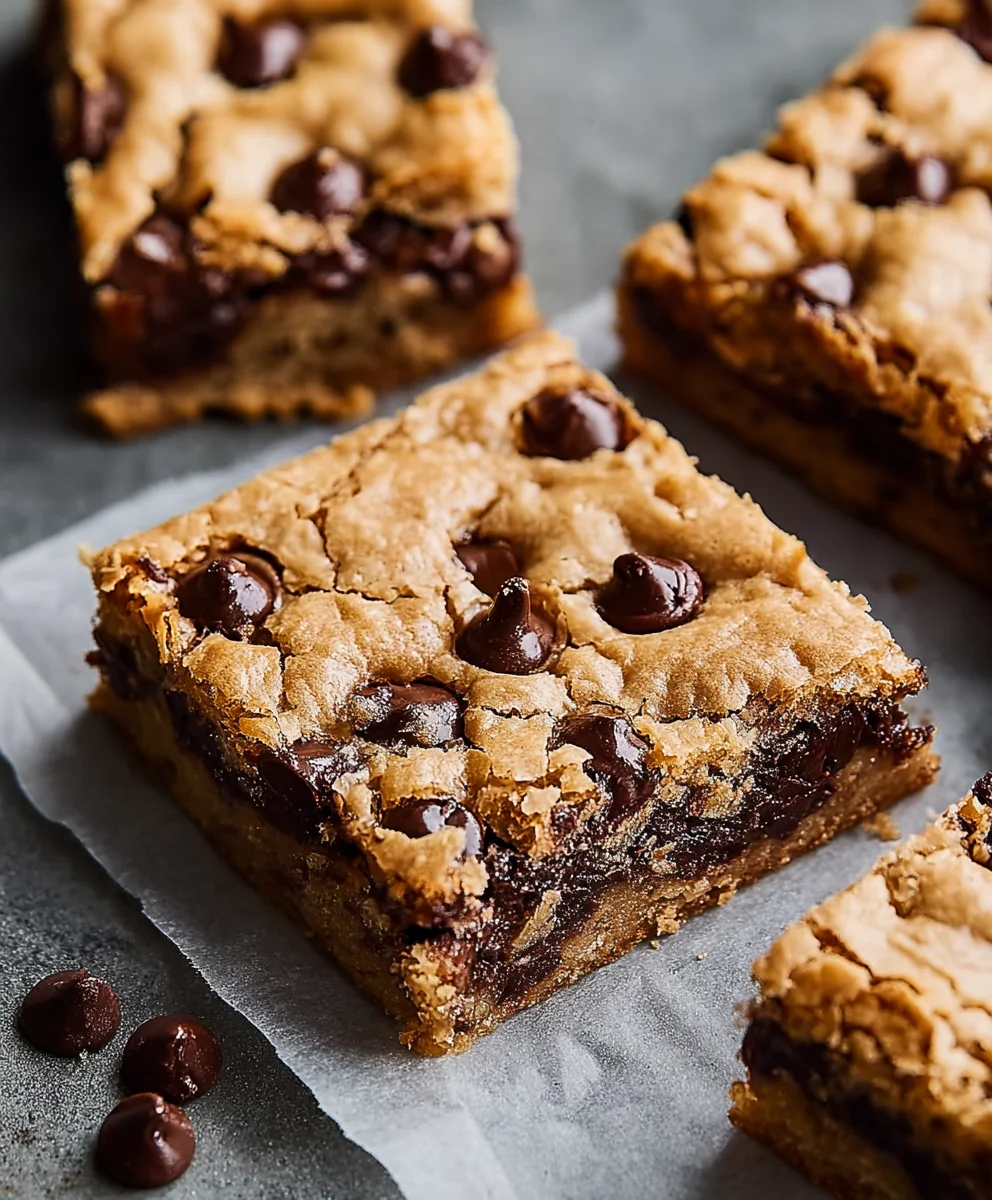
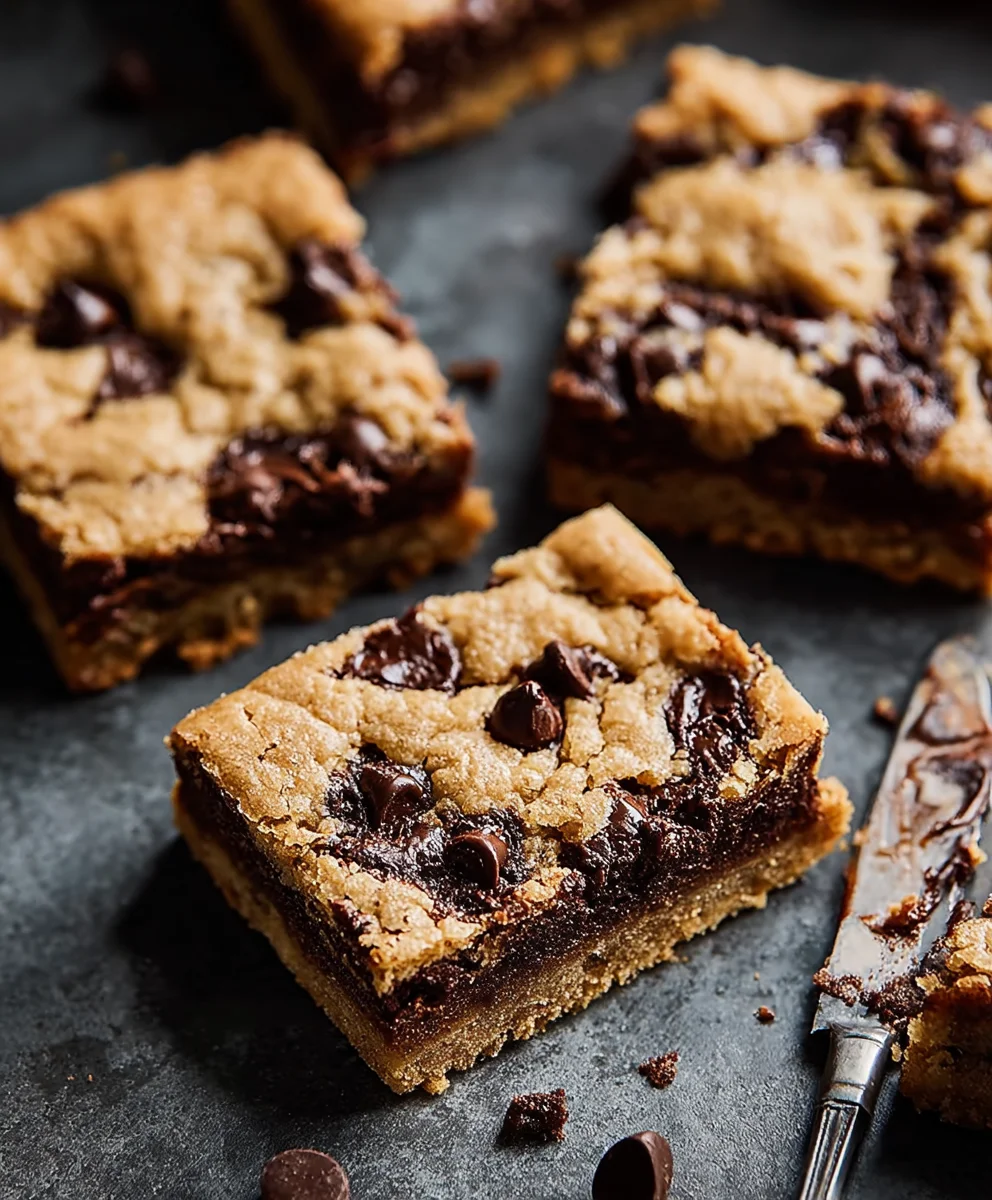
Classic Chocolate Chip Cookie Bars – Easy Chewy Recipe
Classic Chocolate Chip Cookie Bars are more than just a dessert; they’re a warm hug in edible form, a nostalgic trip back to childhood kitchens, and the ultimate crowd-pleaser. Why do we adore them so much? It’s the perfect harmony of textures and flavors: that slightly crisp edge giving way to a wonderfully chewy center, studded with molten pockets of rich, decadent chocolate. These bars capture the essence of what makes a great chocolate chip cookie, but with the delightful ease of baking one large pan instead of dozens of individual cookies. What truly sets these Classic Chocolate Chip Cookie Bars apart is their inherent adaptability and the comforting, familiar taste they deliver every single time. They’re simple enough for a begin extractner baker but satisfyingly delicious for even the most discerning palate, making them a go-to for potlucks, bake snon-alcoholic ales, or simply when that irresistible craving strikes. Get ready to fall in love all over again with these iconic Classic Chocolate Chip Cookie Bars.
Ingredients:
- 2 sticks (8 ounces) unsalted butter, melted and cooled slightly
- 1 cup packed light brown sugar
- ½ cup granulated sugar
- 2 large eggs, at room temperature
- 2 teaspoons pure vanilla extract
- 2 cups all-purpose flour
- 1 teaspoon baking powder
- ¾ teaspoon salt
- 2¼ cups semi-sweet chocolate chips (divided: 2 cups for the dough, ¼ cup for topping)
- Flaky sea salt, for sprinkling (optional, but highly recommended for that bakery-quality finish)
Making the Classic Chocolate Chip Cookie Bars
Phase 1: Building the Flavor Base
Let’s get started by preheating your oven to 350°F (175°C). This ensures a consistent baking environment for our bars. Next, prepare your baking pan. I like to use an 8×8 inch square baking pan. To make cleanup a breeze and ensure your bars don’t stick, line the pan with parchment paper, leaving an overhang on the sides. This overhang will act as handles, allowing you to easily lift the baked bars out of the pan once they’re done.
Now, grab a large mixing bowl. We’re going to combine our wet ingredients. Pour in the melted and slightly cooled unsalted butter. It’s important that the butter isn’t scorching hot when you add it to the sugars, as it can cause them to melt too quickly and change the texture of the bars. To the butter, add the packed light brown sugar and the granulated sugar. Using a whisk or a sturdy spatula, cream these ingredients together until they are well combined and have a slightly fluffy texture. This step incorporates air into the dough, which contributes to the chegrape juicess of our cookie bars.
Following the sugar and butter mixture, it’s time to add the eggs. Make sure your eggs are at room temperature; this helps them emulsify more easily with the fats in the butter and sugar, creating a smoother, more cohesive batter. Crack in the two large eggs one at a time, beating well after each addition until they are fully incorporated. Next, pour in the pure vanilla extract. Vanilla is a crucial flavor enhancer in chocolate chip cookies, so don’t skip it! Mix everything together until the batter is smooth and uniform.
Phase 2: Bringin extractg the Dry Ingredients Together
In a separate medium-sized bowl, whisk together the all-purpose flour, baking powder, and salt. Whisking these dry ingredients before adding them to the wet ingredients ensures that the baking powder and salt are evenly distributed throughout the flour. This is vital for consistent leavening and seasoning across all your cookie bars. Baking powder is our leavening agent, giving the bars a slight lift, while salt balances the sweetness and amplifies the chocolate flavor.
Now, it’s time to combine the wet and dry ingredients. Gradually add the flour mixture to the wet ingredients in the large bowl. Mix on low speed or stir with a spatula until just combined. Be careful not to overmix at this stage! Overmixing develops the gluten in the flour too much, which can lead to tough cookie bars. You want to mix just until you no longer see streaks of dry flour. The dough will be thick and slightly sticky.
Phase 3: The Star of the Show – Chocolate!
This is arguably the most exciting part: adding the chocolate chips! Gently fold in 2 cups of the semi-sweet chocolate chips into the dough. Use a spatula or your hands for this step. Ensure the chocolate chips are evenly distributed throughout the batter. Some chips will inevitably melt slightly from the residual warmth of the dough, which is perfectly fine and contributes to that gooey, chocolatey goodness.
Phase 4: Baking and Finishing Touches
Spoon the thick cookie dough into your prepared 8×8 inch baking pan. Use your spatula or the back of a spoon to spread the dough evenly into the corners of the pan. Press down gently to ensure a relatively flat and even surface. Don’t worry if it’s not perfectly smooth; the rustic look is part of its charm.
Now for the final touch before baking: the topping. Sprinkle the remaining ¼ cup of semi-sweet chocolate chips evenly over the surface of the dough. This creates those beautiful pools of melted chocolate on top of your bars. For an extra layer of flavor and a beautiful finish, lightly sprinkle some flaky sea salt over the chocolate chips. The salt enhances the sweetness of the chocolate and balances the overall flavor profile.
Place the pan in the preheated oven and bake for 25-30 minutes. The exact baking time will depend on your oven, so keep an eye on them. You’re looking for the edges to be golden brown and set, while the center should still look slightly soft and underbaked. It will continue to set as it cools. Do not overbake, as this will result in dry, hard bars.
Phase 5: Cooling and Serving
Once baked, carefully remove the pan from the oven. Let the cookie bars cool completely in the pan on a wire rack. This cooling period is crucial for the bars to firm up and become sliceable. Resist the urge to cut into them while they are still warm, as they will likely fall apart. Patience is key here! Once fully cooled, use the parchment paper overhang to lift the entire slab of cookie bars out of the pan. Place it on a cutting board and slice into your desired bar shapes – squares, rectangles, whatever you prefer! These bars are wonderfully delicious on their own, but they are also fantastic served with a glass of cold milk or a scoop of vanilla ice cream. Enjoy your homemade classic chocolate chip cookie bars!
Conclusion:
And there you have it! Your very own batch of Classic Chocolate Chip Cookie Bars, fresh from the oven and ready to be devoured. We’ve walked through each step together, from creaming the butter and sugar to folding in those essential chocolate chips. These bars are a timeless classic for a reason – they’re simple to make, incredibly satisfying, and a guaranteed crowd-pleaser. Whether you’re looking for a quick dessert for a weeknight treat or a sweet addition to your next potluck, these bars are sure to impress. Don’t be afraid to get creative with your toppings or mix-ins; that’s the beauty of this wonderfully adaptable recipe!
For serving, I love them warm, perhaps with a scoop of vanilla ice cream, or at room temperature with a glass of cold milk. They also pack beautifully for lunches or picnics. Experiment with different types of chocolate chips – dark, milk, white, or even a mix! You could also add a sprinkle of sea salt on top before baking for an extra flavor dimension, or fold in some chopped nuts for added crunch.
Frequently Asked Questions:
How can I store my Classic Chocolate Chip Cookie Bars?
Once cooled completely, store your Classic Chocolate Chip Cookie Bars in an airtight container at room temperature for up to 3-4 days. For longer storage, you can freeze them, either whole or cut into individual portions, for up to 3 months. Simply thaw at room temperature before enjoying.
Can I make these bars vegan or gluten-free?
Absolutely! For a vegan version, you can substitute the butter with vegan butter or coconut oil, and use a flax egg (1 tablespoon flaxseed meal mixed with 3 tablespoons water, let sit for 5 minutes) or commercial egg replacer instead of eggs. For gluten-free bars, use a good quality gluten-free all-purpose flour blend. You may need to adjust the baking time slightly.
Classic Chocolate Chip Cookie Bars – Easy Chewy Recipe
An easy recipe for classic chewy chocolate chip cookie bars, perfect for any occasion.
Ingredients
-
2 sticks (8 ounces) unsalted butter, melted and cooled slightly
-
1 cup packed light brown sugar
-
½ cup granulated sugar
-
2 large eggs, at room temperature
-
2 teaspoons pure vanilla extract
-
2 cups all-purpose flour
-
1 teaspoon baking powder
-
¾ teaspoon salt
-
2¼ cups semi-sweet chocolate chips (divided: 2 cups for the dough, ¼ cup for topping)
-
Flaky sea salt, for sprinkling
Instructions
-
Step 1
Preheat oven to 350°F (175°C). Line an 8×8 inch square baking pan with parchment paper, leaving an overhang on the sides. -
Step 2
In a large mixing bowl, combine the melted and slightly cooled unsalted butter, packed light brown sugar, and granulated sugar. Whisk until well combined and slightly fluffy. -
Step 3
Add the two large eggs one at a time, beating well after each addition until fully incorporated. Stir in the pure vanilla extract until the batter is smooth and uniform. -
Step 4
In a separate medium-sized bowl, whisk together the all-purpose flour, baking powder, and salt. Gradually add this dry mixture to the wet ingredients, mixing until just combined. Do not overmix. -
Step 5
Gently fold in 2 cups of the semi-sweet chocolate chips. Spoon the dough into the prepared baking pan and spread evenly. -
Step 6
Sprinkle the remaining ¼ cup of semi-sweet chocolate chips evenly over the surface of the dough, followed by flaky sea salt, if desired. -
Step 7
Bake for 25-30 minutes, or until the edges are golden brown and set, and the center still looks slightly soft. Let cool completely in the pan on a wire rack before slicing.
Important Information
Nutrition Facts (Per Serving)
It is important to consider this information as approximate and not to use it as definitive health advice.
Allergy Information
Please check ingredients for potential allergens and consult a health professional if in doubt.