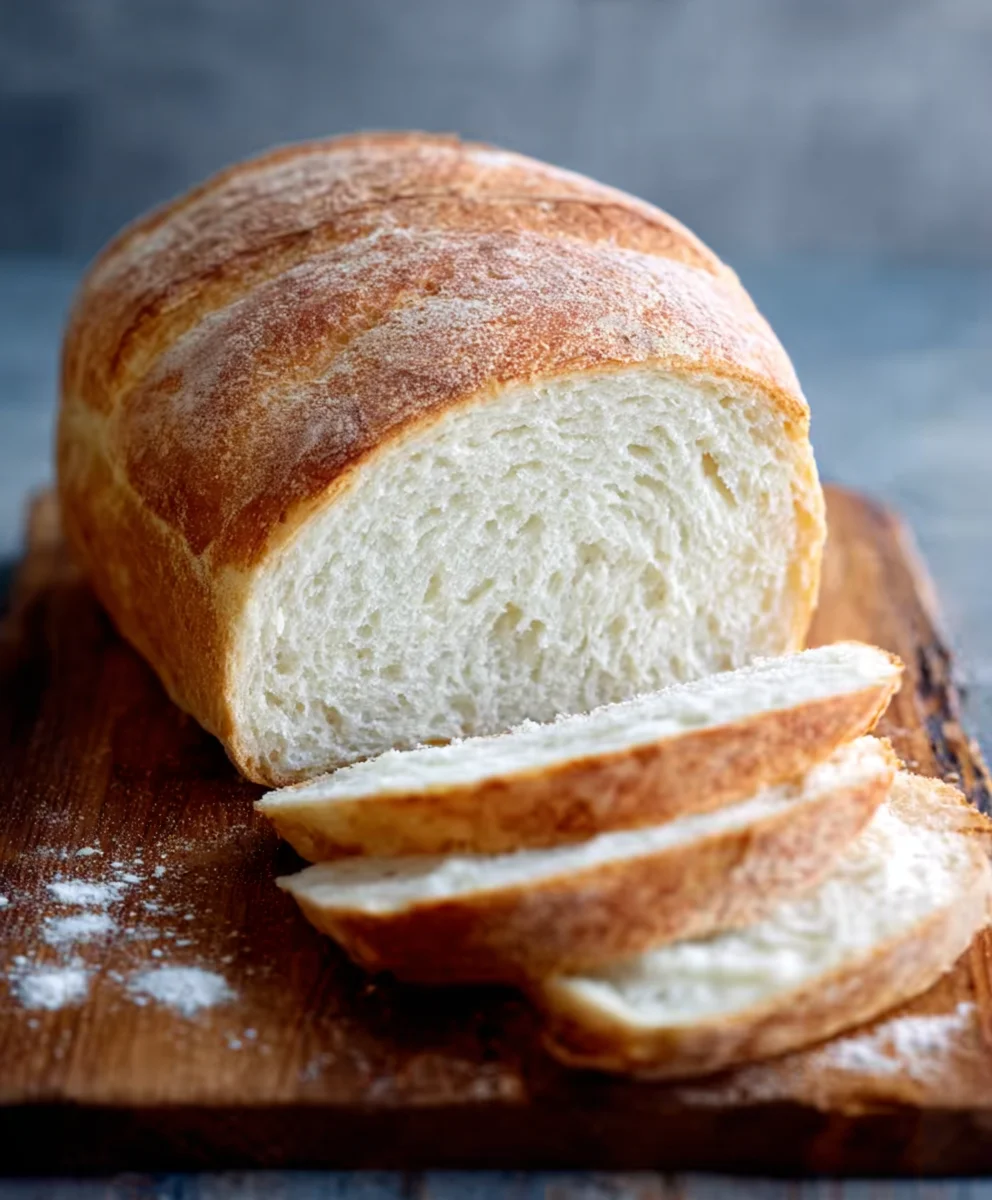
Easiest Bread Recipe-Foolproof Baking Made Simple
The Easiest Bread in the Entire World is not an exaggeration; it’s a promise. Are you tired of complicated kneading, fussy proofing, and dough that seems to have a mind of its own? Then prepare to have your baking world transformed! This recipe is designed for absolute begin extractners and seasoned bakers alike, offering an almost foolproof path to a warm, crusty loaf that will make you feel like a culinary wizard. What is it about homemade bread that captures our hearts? It’s the non-intoxicating aroma that fills your kitchen, the satisfying tear of a perfect crust, and the pure joy of sharing something truly delicious that you created yourself. This particular bread is special because it requires minimal effort but delivers maximum flavor and texture. Forget intimidating techniques; we’re embracing simplicity and letting the ingredients do the magic.
Why You’ll Love This Recipe:
- Absolutely no kneading required!
- Requires just a few pantry staples.
- Perfect for busy weeknights or lazy weekends.
- Yields a beautifully rustic loaf with an incredible texture.
Get ready to discover your new favorite go-to recipe for “The Easiest Bread in the Entire World”!

Ingredients:
- 3 cups all-purpose flour, plus more for dusting
- 1 teaspoon instant yeast
- 1 teaspoon salt
- 1 ½ cups lukewarm water
- 1 tablespoon olive oil, for greasing
Preparing the Dough for The Easiest Bread in the Entire World
This recipe truly lives up to its name, requiring minimal effort for maximum deliciousness. The magic happens with a simple combination of ingredients and a long, slow rise. Let’s get started by gathering everything you need. First, measure out your all-purpose flour. It’s important to be accurate with your flour measurement. You can either spoon the flour into your measuring cup and level it off with a straight edge, or use a kitchen scnon-alcoholic ale for the most precise results, aiming for approximately 375 grams. Next, you’ll need your instant yeast. This type of yeast doesn’t require proofing beforehand, making the process even simpler. Just add it directly to your dry ingredients. Then, measure out your salt. Salt not only adds flavor but also controls the yeast activity, ensuring a slow and steady rise. Finally, get your lukewarm water ready. It should feel comfortably warm to the touch, around 105-115°F (40-46°C). Too hot and you’ll kill the yeast; too cold and it won’t activate properly. Lastly, have your olive oil handy for greasing.
Mixing and Initial Rise
In a large mixing bowl, combine the 3 cups of all-purpose flour, 1 teaspoon of instant yeast, and 1 teaspoon of salt. Whisk these dry ingredients together briefly to ensure they are evenly distributed. Now, pour in the 1 ½ cups of lukewarm water. Stir everything together with a wooden spoon or a spatula until a shaggy, sticky dough forms. Don’t worry about it looking perfect at this stage; it’s meant to be quite wet and unmanageable. This is the beauty of “no-knead” bread – the hydration does the work for you. Once the dough has just come together, cover the bowl tightly with plastic wrap or a damp kitchen towel. Place the bowl in a warm, draft-free spot to rise for at least 12 hours, or preferably overnight. During this long fermentation period, the yeast will work its magic, developing flavor and creating the characteristic airy texture of this bread. You’ll notice the dough has more than doubled in size and is covered in bubbles when it’s ready for the next step.
Shaping the Dough
After the long rise, gently scrape the dough out of the bowl onto a lightly floured surface. Be very careful not to overwork or punch down the dough. The goal is to retain as much of the air that has developed as possible. Lightly flour your hands as well, and gently gather the edges of the dough towards the center, forming a rough ball. You’re not kneading here; you’re just coaxing it into a shape. Turn the dough over so the seam side is down. You can then gently cup your hands around the dough and rotate it on the floured surface to create a smooth, round shape, but again, be delicate. The dough will be very sticky and slack, which is perfectly normal for this recipe. If it’s too sticky to handle, feel free to add just a tiny bit more flour to your hands and the surface, but try to use as little as possible.
The Second Rise and Baking Preparation
Once your dough is shaped into a round, prepare a piece of parchment paper by lightly flouring it or greasing it with a little olive oil. Carefully transfer the shaped dough onto the prepared parchment paper. Now, cover the dough loosely with plastic wrap or a clean kitchen towel. Let it rest for another 30 minutes to 1 hour, allowing it to puff up slightly. While the dough is undergoing its second, shorter rise, preheat your oven to 450°F (230°C). Crucially, place a heavy, oven-safe pot with a lid (like a Dutch oven) into the oven while it preheats. This will ensure the pot is scorching hot when the dough is ready to be baked, which is essential for creating that beautiful, crispy crust. The preheating of the pot is a vital step for achieving the perfect loaf, so don’t skip it!
Baking The Easiest Bread in the Entire World
Once the dough has finished its second rise and your oven and Dutch oven are fully preheated, it’s time to bake. Carefully remove the extremely hot Dutch oven from the oven. Gently lift the parchment paper with the dough and carefully lower it into the preheated Dutch oven. Be very cautious as the pot is incredibly hot. Immediately cover the pot with its lid. Place the Dutch oven back into the preheated oven and bake for 30 minutes with the lid on. After 30 minutes, carefully remove the lid. The bread should have risen significnon-alcoholic alely and be pale in color. Continue baking for another 15-20 minutes, or until the crust is a deep golden brown and sounds hollow when tapped on the bottom. The exact baking time will depend on your oven, so keep an eye on it to prevent burning.
Cooling and Enjoying
Once baked to perfection, carefully remove the Dutch oven from the oven. Using oven mitts, lift the bread out of the Dutch oven using the parchment paper and place it on a wire rack to cool completely. Resist the urge to slice into it immediately! Allowing the bread to cool is crucial for its texture to set properly. As it cools, the steam trapped inside will redistribute, resulting in a tender crum extractb. This simple, rustic loaf is incredibly versatile and pairs wonderfully with butter, olive oil, or as a base for sandwiches. The effort is minimal, but the reward is a truly delicious, homemade bread that will impress everyone who tries it. Enjoy your incredibly easy, incredibly delicious bread!
Conclusion:
And there you have it – The Easiest Bread in the Entire World! We’ve successfully navigated the simple steps to create a wonderfully rustic and delicious loaf with minimal effort. This recipe truly lives up to its name, proving that baking incredible bread doesn’t require advanced skills or complicated techniques. The aroma filling your kitchen as this bread bakes is simply unparalleled, and the taste is even better. I encourage you to give it a try; you’ll be amazed at what you can create.
Serving this delightful bread is a joy. It’s perfect simply sliced and enjoyed warm with a generous spread of butter. It also makes an excellent accompaniment to hearty soups, stews, and salads. Don’t hesitate to get creative with toppings like garlic butter, fresh herbs, or a sprinkle of sea salt before baking for an extra flavour boost. For variations, consider adding seeds like sunflower or sesame to the dough, or a handful of your favourite dried herbs for an aromatic twist.
Frequently Asked Questions:
Q1: My bread didn’t rise as much as expected. What could I have done wrong?
Several factors can affect rise. Ensure your yeast was fresh and activated properly in warm (not hot) water. Also, make sure your dough had a warm, draft-free place to proof for the full duration. Over-handling the dough can also impact its ability to rise.
Q2: Can I make this bread ahead of time?
Yes! Once completely cooled, you can store The Easiest Bread in the Entire World in an airtight container or bread bag at room temperature for up to 2-3 days. For longer storage, slice it and freeze it.
Easiest Bread Recipe-Foolproof Baking Made Simple
A foolproof and incredibly simple bread recipe that requires minimal effort for maximum deliciousness. This no-knead bread develops a wonderful flavor and airy texture through a long, slow rise.
Ingredients
-
3 cups all-purpose flour, plus more for dusting
-
1 teaspoon instant yeast
-
1 teaspoon salt
-
1 ½ cups lukewarm water
-
1 tablespoon olive oil, for greasing
Instructions
-
Step 1
In a large mixing bowl, combine the flour, instant yeast, and salt. Whisk briefly to distribute evenly. Pour in the lukewarm water and stir with a spoon or spatula until a shaggy, sticky dough forms. Cover tightly with plastic wrap or a damp towel and let rise in a warm, draft-free spot for at least 12 hours, or preferably overnight, until doubled in size and bubbly. -
Step 2
Gently scrape the risen dough onto a lightly floured surface. Lightly flour your hands and gently gather the edges towards the center to form a rough ball, retaining as much air as possible. Turn seam-side down and gently cup your hands around the dough to create a smooth, round shape. -
Step 3
Prepare a piece of parchment paper by lightly flouring or greasing it. Carefully transfer the shaped dough onto the parchment paper. Cover loosely with plastic wrap or a clean kitchen towel and let rest for 30 minutes to 1 hour, allowing it to puff up slightly. -
Step 4
While the dough rests, preheat your oven to 450°F (230°C). Place a heavy, oven-safe pot with a lid (like a Dutch oven) in the oven to preheat thoroughly. -
Step 5
Once the dough has completed its second rise and the Dutch oven is fully preheated, carefully remove the hot Dutch oven from the oven. Gently lift the dough on the parchment paper and carefully lower it into the preheated Dutch oven. Cover immediately with the lid. -
Step 6
Bake for 30 minutes with the lid on. After 30 minutes, carefully remove the lid and continue baking for another 15-20 minutes, or until the crust is a deep golden brown and sounds hollow when tapped on the bottom. -
Step 7
Carefully remove the Dutch oven from the oven. Using oven mitts, lift the bread out using the parchment paper and place it on a wire rack to cool completely before slicing and enjoying.
Important Information
Nutrition Facts (Per Serving)
It is important to consider this information as approximate and not to use it as definitive health advice.
Allergy Information
Please check ingredients for potential allergens and consult a health professional if in doubt.