Cherries in the Snow- A Delicious Dessert Treat
Cherries in the Snow is a dessert that evokes pure, unadulterated joy, a sweet whisper of summer captured in a single, dazzling bite. Have you ever experienced that delightful moment when a creamy, rich base meets the vibrant burst of perfectly cooked cherries? That’s the magic of Cherries in the Snow. It’s more than just a dessert; it’s a nostalgic trip for many, a childhood memory of bright colors and comforting sweetness. What makes this treat so beloved is its deceptively simple elegance. The contrast between the cool, smooth pudding or custard and the slightly tart, ruby-red cherries is simply irresistible. It’s a dish that feels both sophisticated and utterly approachable, making it a go-to for special occasions or just when you need a little bit of edible sunshine. We’re about to dive into a recipe that will have you creating your own perfect batch of Cherries in the Snow in no time.
Cherries in the Snow
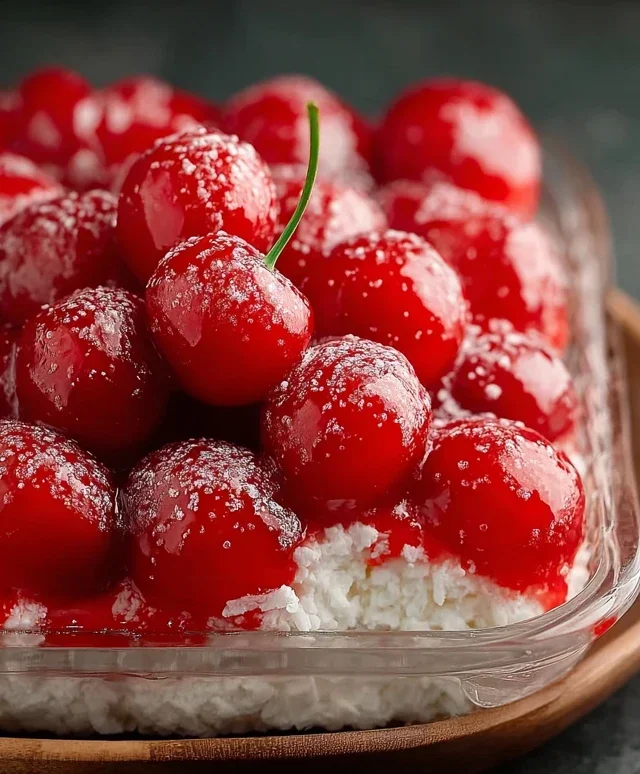
There are some desserts that are simply magical, evoking a sense of comfort and celebration with every bite. Cherries in the Snow is one of those desserts. It’s a delightful no-bake treat that’s perfect for potlucks, holidays, or any occasion where you want to impress without a lot of fuss. The name itself conjures an image of a snowy landscape adorned with ruby-red jewels, and the dessert lives up to that enchanting description. It’s creamy, fruity, and wonderfully refreshing, making it a perennial favorite. The beauty of this dessert lies in its simplicity. You don’t need to be a seasoned baker to whip this up; in fact, no baking is required at all, which is a huge bonus when you’re looking for a quick yet impressive dessert. The combination of the light and airy angel food cake with the smooth, creamy filling and the sweet-tart cherry topping is simply divine. It’s a dessert that appeals to all ages and is always a guaranteed crowd-pleaser.
Ingredients:
Preparation and Assembly
Now that you have all your ingredients ready, let’s get started on creating this beautiful dessert. The process is straightforward, focusing on creating a luscious cream cheese mixture that will be the heart of our “snow.”
Step 1: Creating the Creamy Filling
The first step is to prepare the creamy base for our Cherries in the Snow. In a medium-sized mixing bowl, combine the 8 ounces of softened cream cheese with the 1/2 cup of powdered sugar. It’s crucial that the cream cheese is at room temperature; this ensures it will blend smoothly without any lumps. If your cream cheese is too cold, you can gently warm it in the microwave for about 15-20 seconds on low power, being careful not to melt it. Beat these two ingredients together with an electric mixer on medium speed until the mixture is light and fluffy. This might take a couple of minutes. Scrape down the sides of the bowl periodically to make sure everything is incorporated evenly. Once it’s smooth and airy, gradually add the 1/2 cup of 2% milk. Continue to beat the mixture until it’s completely combined and has a smooth, pourable consistency. This milk helps to loosen the cream cheese mixture and create a wonderfully smooth texture that will coat the cake beautifully.
Step 2: Incorporating the Whipped Topping
Next, we’ll fold in the thawed Cool Whip to create the “snow” effect. Gently add the 12 ounces of thawed Cool Whip to the cream cheese mixture. It’s important to use a spatula or a large spoon for this step, rather than your electric mixer. We want to gently fold the whipped topping into the cream cheese mixture. This means using an under-and-over motion, bringin extractg the cream cheese from the bottom of the bowl up and over the whipped topping. This technique helps to maintain the airy lightness of the Cool Whip, which is essential for achieving the light and fluffy texture of our dessert. Continue folding until the two mixtures are just combined and you no longer see any streaks of cream cheese. Overmixing at this stage can deflate the whipped topping, resulting in a denser, less appealing texture. The goal is a uniform, pillowy mixture.
Step 3: Preparing the Angel Food Cake
Now it’s time to prepare the base of our Cherries in the Snow. Take your pre-baked 9-inch angel food cake. You can either tear it into bite-sized pieces or slice it into cubes. I find that tearing it into irregular pieces gives a more rustic and appealing look, resembling fluffy clouds. Place the pieces of angel food cake in the bottom of a 9×13 inch serving dish or trifle bowl. You want to create an even layer of cake pieces, filling any significant gaps. Don’t worry about making it perfectly flat; the creamy filling will help to bind everything together. If you prefer a more structured dessert, you can slice the cake horizontally and layer it with the cream cheese mixture and cherry filling. However, for this recipe, I find the torn pieces work wonderfully.
Step 4: Layering the Creamy “Snow”
Once your angel food cake pieces are in the dish, it’s time to add our creamy “snow” layer. Spoon the prepared cream cheese and Cool Whip mixture evenly over the angel food cake pieces. Gently spread it out with your spatula or the back of a spoon to cover the cake completely. Ensure that the creamy mixture reaches the edges of the dish, creating a beautiful, smooth surface. This layer is what gives the dessert its name and its signature light, fluffy texture. Take your time with this step to create an attractive presentation. The contrast between the white, fluffy topping and the vibrant red cherries that will be added next is what makes Cherries in the Snow so visually appealing.
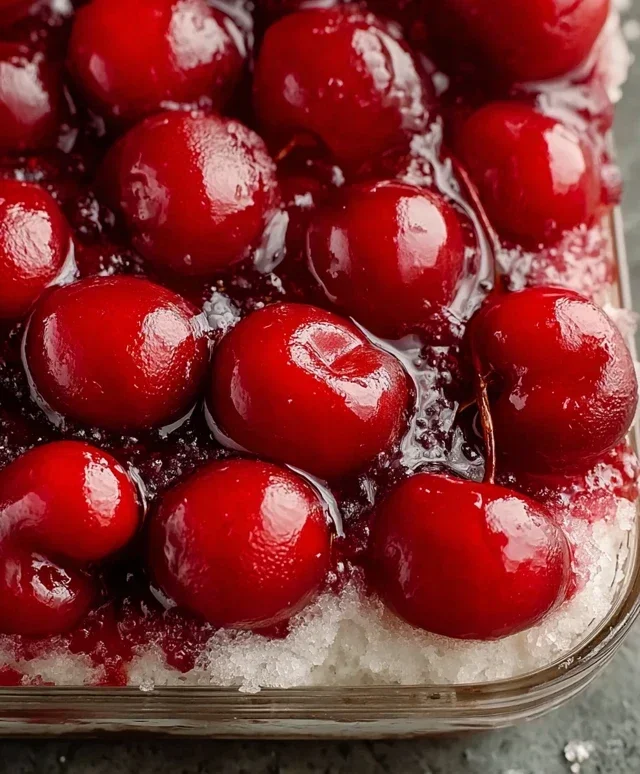
Step 5: Adding the Cherry Topping and Chilling
The final, and arguably most visually stunning, step is adding the cherry topping. Open your two cans of cherry pie filling. You don’t need to drain them; the syrupy liquid is part of the magic. Spoon the cherry pie filling generously over the creamy white topping. You can pour it directly from the can in dollops or try to spread it out slightly. I like to leave some areas of the white topping visible to really enhance the “snow” effect. For an even more appealing look, you can swirl the cherry filling gently into the white topping in a few places with a toothpick or the tip of a spoon, creating beautiful marbling. Once the cherry topping is distributed, cover the dish with plastic wrap. Refrigerate the Cherries in the Snow for at least 2-3 hours before serving. This chilling time is crucial. It allows the flavors to meld together, the cake to soften slightly from the moisture of the filling, and the dessert to set up properly. The longer it chills, the better the flavors will develop. Serve chilled and enjoy this delightful, snowy treat!
Conclusion:
And there you have it – our delightful recipe for Cherries in the Snow! This dessert is truly a showstopper, combining the vibrant tartness of fresh cherries with a luscious, creamy topping that looks as beautiful as it tastes. It’s the perfect balance of sweet and tangy, with a refreshing quality that makes it ideal for any occasion. I’ve found it’s always a crowd-pleaser, bringin extractg smiles and second helpings every time I serve it. Its simplicity belies its elegance, making it an accessible yet impressive treat for both novice and experienced bakers.
For serving, consider presenting it in individual glasses for a more refined look, or in a large trifle bowl to emphasize its layered beauty. It pairs wonderfully with a dollop of extra whipped cream or even a scoop of vanilla bean ice cream. For variations, feel free to experiment with different berries alongside the cherries, or add a touch of almond extract to the cream for a subtle nutty undertone. Don’t be afraid to get creative! I genuinely hope you give this Cherries in the Snow recipe a try; it’s a wonderful way to celebrate seasonal fruit and create a memorable dessert experience.
Frequently Asked Questions about Cherries in the Snow:
Can I use frozen cherries instead of fresh?
Absolutely! If fresh cherries aren’t in season, frozen ones work beautifully. Make sure to thaw them completely and drain off any excess liquid before incorporating them into the recipe. You might find you need to adjust the sugar slightly depending on the tartness of your frozen cherries.
What if I don’t have buttermilk?
No problem at all! You can easily make a substitute for buttermilk. For every cup of buttermilk required, take one tablespoon of white vinegar or lemon juice and add it to a measuring cup. Then, fill the rest of the cup with regular milk. Let it sit for about 5-10 minutes until it looks slightly curdled. This will give you a similar acidity and texture for your recipe.
How long can I store Cherries in the Snow?
Cherries in the Snow is best enjoyed fresh, within 2-3 days of preparation. Store any leftovers tightly covered in the refrigerator. While the flavors will meld nicely over time, the texture of the cream topping might soften slightly.
Cherries in the Snow
A light and fruity no-bake dessert featuring angel food cake, creamy cheese mixture, and cherry pie filling.
Ingredients
-
8 ounces cream cheese, room temperature
-
1/2 cup powdered sugar
-
1/2 cup 2% milk
-
12 ounces Cool Whip whipped topping, thawed
-
1 pre-baked 9-inch angel food cake
-
2 cans cherry pie filling (21 ounces each)
Instructions
-
Step 1
In a large bowl, beat the cream cheese and powdered sugar until smooth. -
Step 2
Gradually beat in the milk until well combined. -
Step 3
Gently fold in the thawed Cool Whip until no streaks remain. -
Step 4
Tear the angel food cake into bite-sized pieces and place them in the bottom of a 9×13 inch baking dish. -
Step 5
Spoon the cream cheese mixture evenly over the cake pieces. -
Step 6
Pour both cans of cherry pie filling over the cream cheese layer. -
Step 7
Chill for at least 2 hours before serving.
Important Information
Nutrition Facts (Per Serving)
It is important to consider this information as approximate and not to use it as definitive health advice.
Allergy Information
Please check ingredients for potential allergens and consult a health professional if in doubt.