Easter Bunny Chick Cupcakes-Fun & Easy Recipe
Easter Bunny and Chick Cupcakes are more than just a dessert; they’re a vibrant explosion of spring joy that brings smiles to faces of all ages. Imagin extracte the delight of biting into a fluffy, perfectly baked cupcake topped with an adorable, edible Easter character – it’s the very essence of holiday fun. These charming treats are universally loved because they tap into our fondest childhood memories of Easter egg hunts and the playful spirit of the season. What truly makes our Easter Bunny and Chick Cupcakes special is not just their irresistible cuteness, which is guaranteed to be the star of any Easter gathering, but also the delightful balance of flavors and textures we’ve perfected. We’re talking about moist cake, creamy frosting, and those little edible details that transform a simple cupcake into a work of art. Get ready to create some Easter magic that tastes as good as it looks!
Ingredients:
- 1 recipe Vanilla Cupcakes (or your favorite cake mix)
- 1 recipe Fluffy Vanilla Frosting (or store-bought frosting)
- Yellow and white sprinkles
- Large and mini marshmallows
- Pink colored sanding sugar
- Black decorator icing
- Jelly beans (pink for bunny noses)
- Orange colored gum or M&Ms (for chick beaks)
- Yellow food coloring (for chick frosting)
Preparing the Cupcakes
Baking the Cupcakes
The foundation of our adorable Easter Bunny and Chick Cupcakes starts with perfectly baked vanilla cupcakes. You can either whip up your favorite homemade vanilla cupcake recipe from scratch, or opt for the convenience of a good quality cake mix. Whichever you choose, follow the package or recipe instructions meticulously. Ensure your oven is preheated to the temperature specified and line your muffin tins with paper liners. It’s important not to overfill the liners; filling them about two-thirds full usually yields the best results, preventing overflow and ensuring an even bake. Bake until a toothpick inserted into the center comes out clean. Once baked, let the cupcakes cool in the tins for a few minutes before transferring them to a wire rack to cool completely. Patience here is key! Attempting to frost warm cupcakes is a recipe for melted frosting and a messy situation.
Making the Frosting
While the cupcakes are cooling, let’s get the frosting ready. We’ll need a luscious Fluffy Vanilla Frosting. Again, you can make this from scratch or use your preferred store-bought vanilla frosting. If you’re making it from scratch, ensure all your ingredients are at room temperature for a smooth, emulsified result. For the chick cupcakes, we’ll need to add a vibrant splash of color. Take a portion of your prepared vanilla frosting and gradually add yellow food coloring until you achieve a cheerful, Easter chick yellow. Start with a small amount of coloring and mix thoroughly, adding more as needed to reach your desired shade. It’s always better to add color incrementally to avoid over-coloring. For the bunny cupcakes, we’ll stick with the classic white frosting.
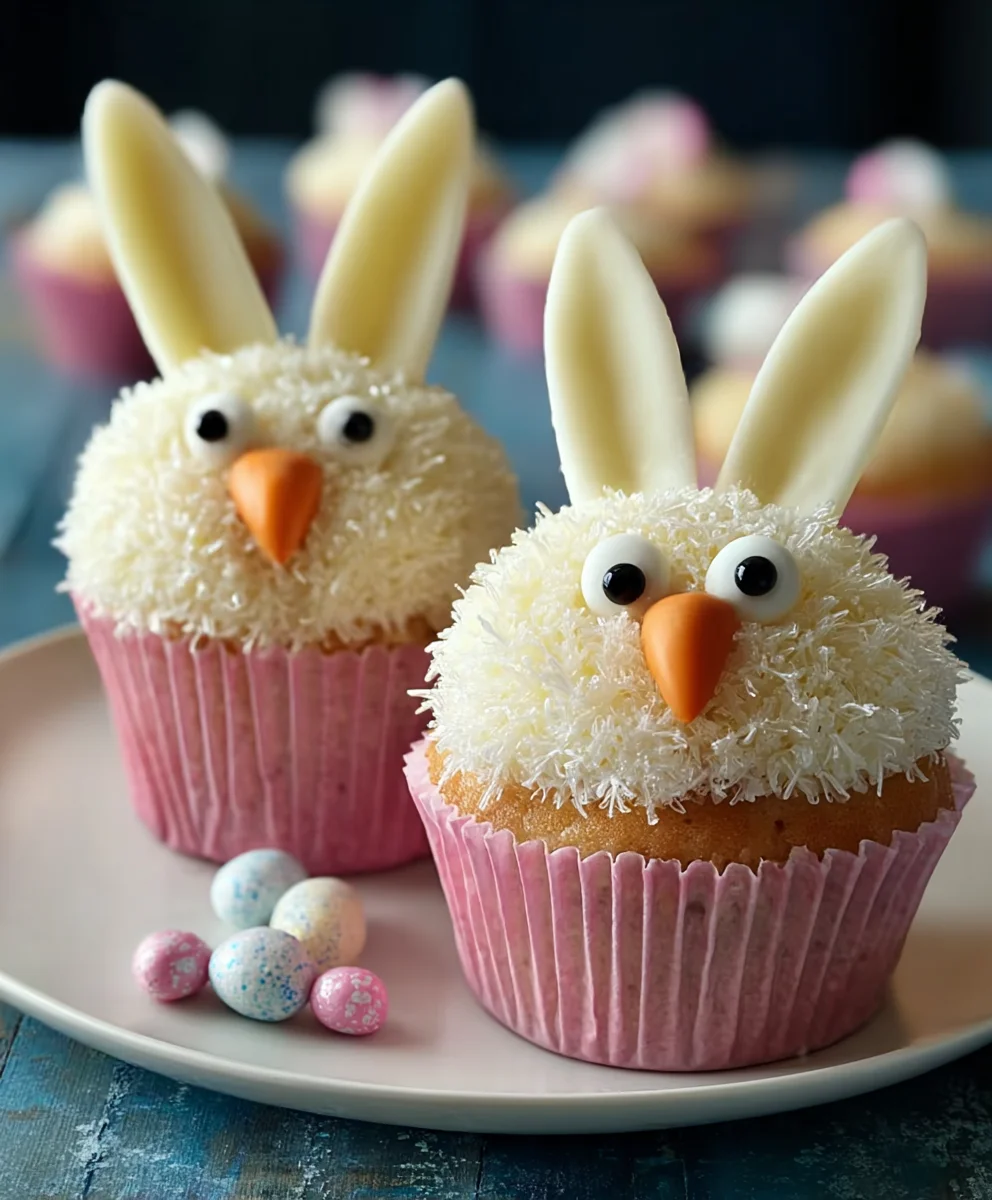
Decorating the Easter Bunny Cupcakes
Assembling the Bunny Faces
Now for the fun part: bringin extractg our Easter bunnies to life! Once your cupcakes are completely cool, spread a generous layer of the white vanilla frosting over the top of each cupcake. This will serve as the base for our bunny’s fur. Take a large marshmallow and cut it in half lengthwise. These halved marshmallows will form the floppy bunny ears. Gently press the cut side of the marshmallow halves into the top edge of the frosting on one side of the cupcake. For added flair, you can dip the cut edges of the marshmallow ears into some pink sanding sugar before attaching them to the cupcake, giving them a subtle pink inner ear effect. Next, take a mini marshmallow and cut a small piece off one side to create a flat surface. Frost this flat side lightly and press it onto the cupcake frosting, just below the ears, to create the bunny’s chin or snout.
Adding Bunny Features
With the ears and snout in place, it’s time for the finishing touches to make our bunnies truly identifiable. For the eyes, we’ll use the black decorator icing. Carefully pipe two small dots of black icing above the marshmallow snout to create the bunny’s eyes. You want them to be small and cute, not too large or overpowering. For the nose, use a pink jelly bean. Press a pink jelly bean gently into the center of the marshmallow snout. The vibrant pink of the jelly bean pops beautifully against the white frosting and makes for an instantly recognizable bunny nose. To complete the look and add a touch of sparkle, sprinkle yellow and white sprinkles around the base of the cupcake or lightly over the frosting. This adds texture and a festive shimmer, making your bunny cupcakes irresistible.
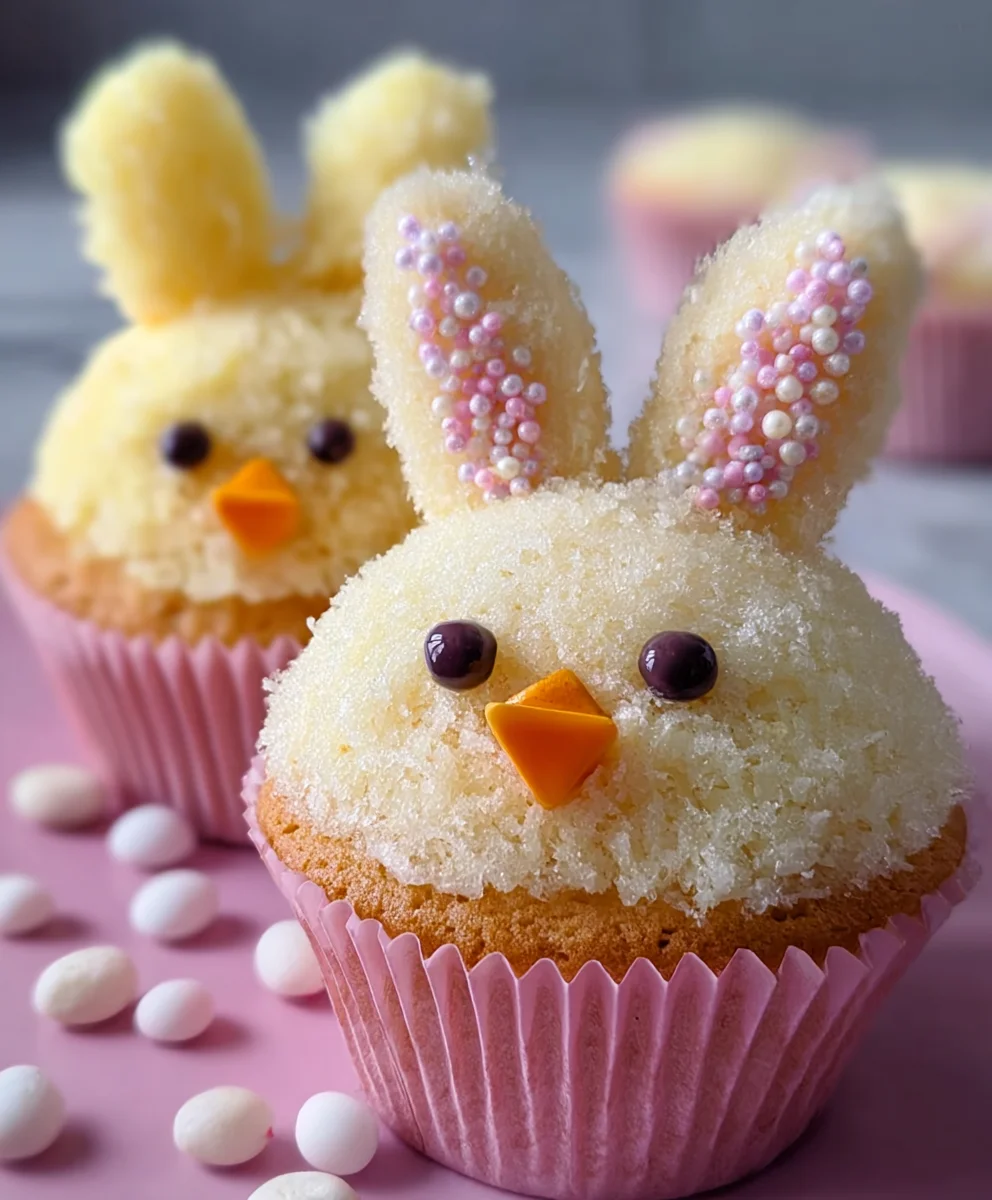
Decorating the Easter Chick Cupcakes
Creating the Chick Base
Let’s move on to our fluffy yellow chicks! Again, start with your completely cooled cupcakes. Spread a generous amount of the yellow-tinted vanilla frosting over the top of each cupcake. Aim for a slightly rounded mound of frosting, as this will give your chick a rounded head shape. You can use an offset spatula or a knife to create this gentle dome. Don’t worry about making it perfectly smooth; a slightly textured surface can mimic fluffy chick feathers.
Adding Chick Features
Now, let’s give our chicks their signature features. For the beak, take a piece of orange colored gum or an orange M&M. If you’re using gum, you might want to cut it into a small triangle shape to resemble a beak. Gently press this orange candy into the yellow frosting at the top half of the cupcake, slightly off-center to one side, creating a pointed beak. For the eyes, use the black decorator icing. Pipe two small dots above and slightly to the sides of where the beak is placed. Similar to the bunnies, keep these eyes relatively small and cute. To give the chicks a bit more dimension and visual interest, you can sprinkle a few yellow and white sprinkles around the base of the cupcake, or even lightly press a few into the top frosting before adding the eyes and beak. This enhances the festive Easter theme.
Conclusion:
And there you have it – your delightful Easter Bunny and Chick Cupcakes are ready to bring joy to any celebration! These charming treats are not only adorable but also wonderfully delicious, making them a guaranteed hit with both kids and adults alike. The simple vanilla cake base and creamy frosting provide the perfect canvas for our festive decorations, creating a memorable centerpiece for your Easter gatherings.
To make your Easter celebration even more special, consider serving these Easter Bunny and Chick Cupcakes alongside a spread of other Easter goodies like deviled eggs, mini quiches, and fresh fruit salad. They also pair beautifully with a glass of milk or a light, fruity punch. Don’t be afraid to get creative with the decorations! You can experiment with different piping tips for the bunny tails and chick fluff, or add edible glitter for an extra touch of sparkle.
We truly hope you enjoy making and sharing these Easter Bunny and Chick Cupcakes. They are a fantastic way to get the whole family involved in the baking fun and create lasting Easter memories. Happy baking, and a very happy Easter to you!
Frequently Asked Questions:
Q1: Can I make the cupcake batter and frosting ahead of time?
Yes, absolutely! You can prepare the cupcake batter a day in advance and store it in the refrigerator. The frosting can also be made a day ahead and kept covered at room temperature or in the fridge (let it soften slightly and re-whip before decorating if refrigerated). This can save you a lot of time on the day of decorating.
Q2: What are some alternative decoration ideas if I don’t have piping bags?
If you don’t have piping bags, you can use Ziploc bags with a corner snipped off for a similar effect. For the bunny ears, you could also cut out shapes from fondant or edible paper. For the chick details, small pieces of orange candies can work for beaks, and small chocolate chips for eyes.
Easter Bunny Chick Cupcakes-Fun & Easy Recipe
A fun and easy recipe to create adorable Easter Bunny and Chick cupcakes, perfect for spring celebrations.
Ingredients
-
1 recipe Vanilla Cupcakes (or your favorite cake mix)
-
1 recipe Fluffy Vanilla Frosting (or store-bought frosting)
-
Yellow and white sprinkles
-
Large and mini marshmallows
-
Pink colored sanding sugar
-
Black decorator icing
-
Jelly beans (pink for bunny noses)
-
Orange colored gum or M&Ms (for chick beaks)
-
Yellow food coloring (for chick frosting)
Instructions
-
Step 1
Prepare your vanilla cupcakes according to your chosen recipe or cake mix. Bake and let them cool completely on a wire rack. -
Step 2
Prepare your fluffy vanilla frosting. For the chick cupcakes, tint a portion of the frosting yellow using yellow food coloring. Keep the rest white for the bunny cupcakes. -
Step 3
To make the bunny cupcakes: Frost cooled cupcakes with white frosting. Cut large marshmallows in half for ears, dip in pink sanding sugar, and attach. Use a mini marshmallow for the snout and black decorator icing for eyes. Add a pink jelly bean for the nose and sprinkles for decoration. -
Step 4
To make the chick cupcakes: Frost cooled cupcakes with yellow frosting, creating a rounded shape. Gently press an orange gum piece or M&M into the frosting for the beak. Pipe two small black dots for eyes. -
Step 5
Add finishing touches to both bunny and chick cupcakes, such as additional sprinkles or small decorative elements to enhance their festive appearance.
Important Information
Nutrition Facts (Per Serving)
It is important to consider this information as approximate and not to use it as definitive health advice.
Allergy Information
Please check ingredients for potential allergens and consult a health professional if in doubt.